
This is the sixth coop featured in my cool coop design series. I love the idea of upcycling what might have been destined for the landfill and using salvaged materials. Playhouses are ubiquitous and versatile so make for great coops. If you like this one, stay tuned as I’ll be presenting several other conversions over the coming months.
This is my first time with chickens. I have done a lot of research, joined every Facebook group I can and I have a large group of friends with chickens to help me. We live within the city limits, but I spoke with my local law enforcement agency and there are no ordinances about having chickens or how many chickens we can have. They just said a rooster could violate a noise ordinance, but I don’t plan on having roosters.
My husband, Bobby, and I worked on the coop together. The playhouse conversion was an idea I had and the rest just kind of fell into place. We’ve really just been coming up with ways to make it better as we go.

We paid $195 for the playhouse, which we found on Facebook Marketplace. I searched for a wooden one because the plastic playhouses would be hot and hard to screw things into. Wood was the way to go. It was a little more expensive but worth it.


Features:
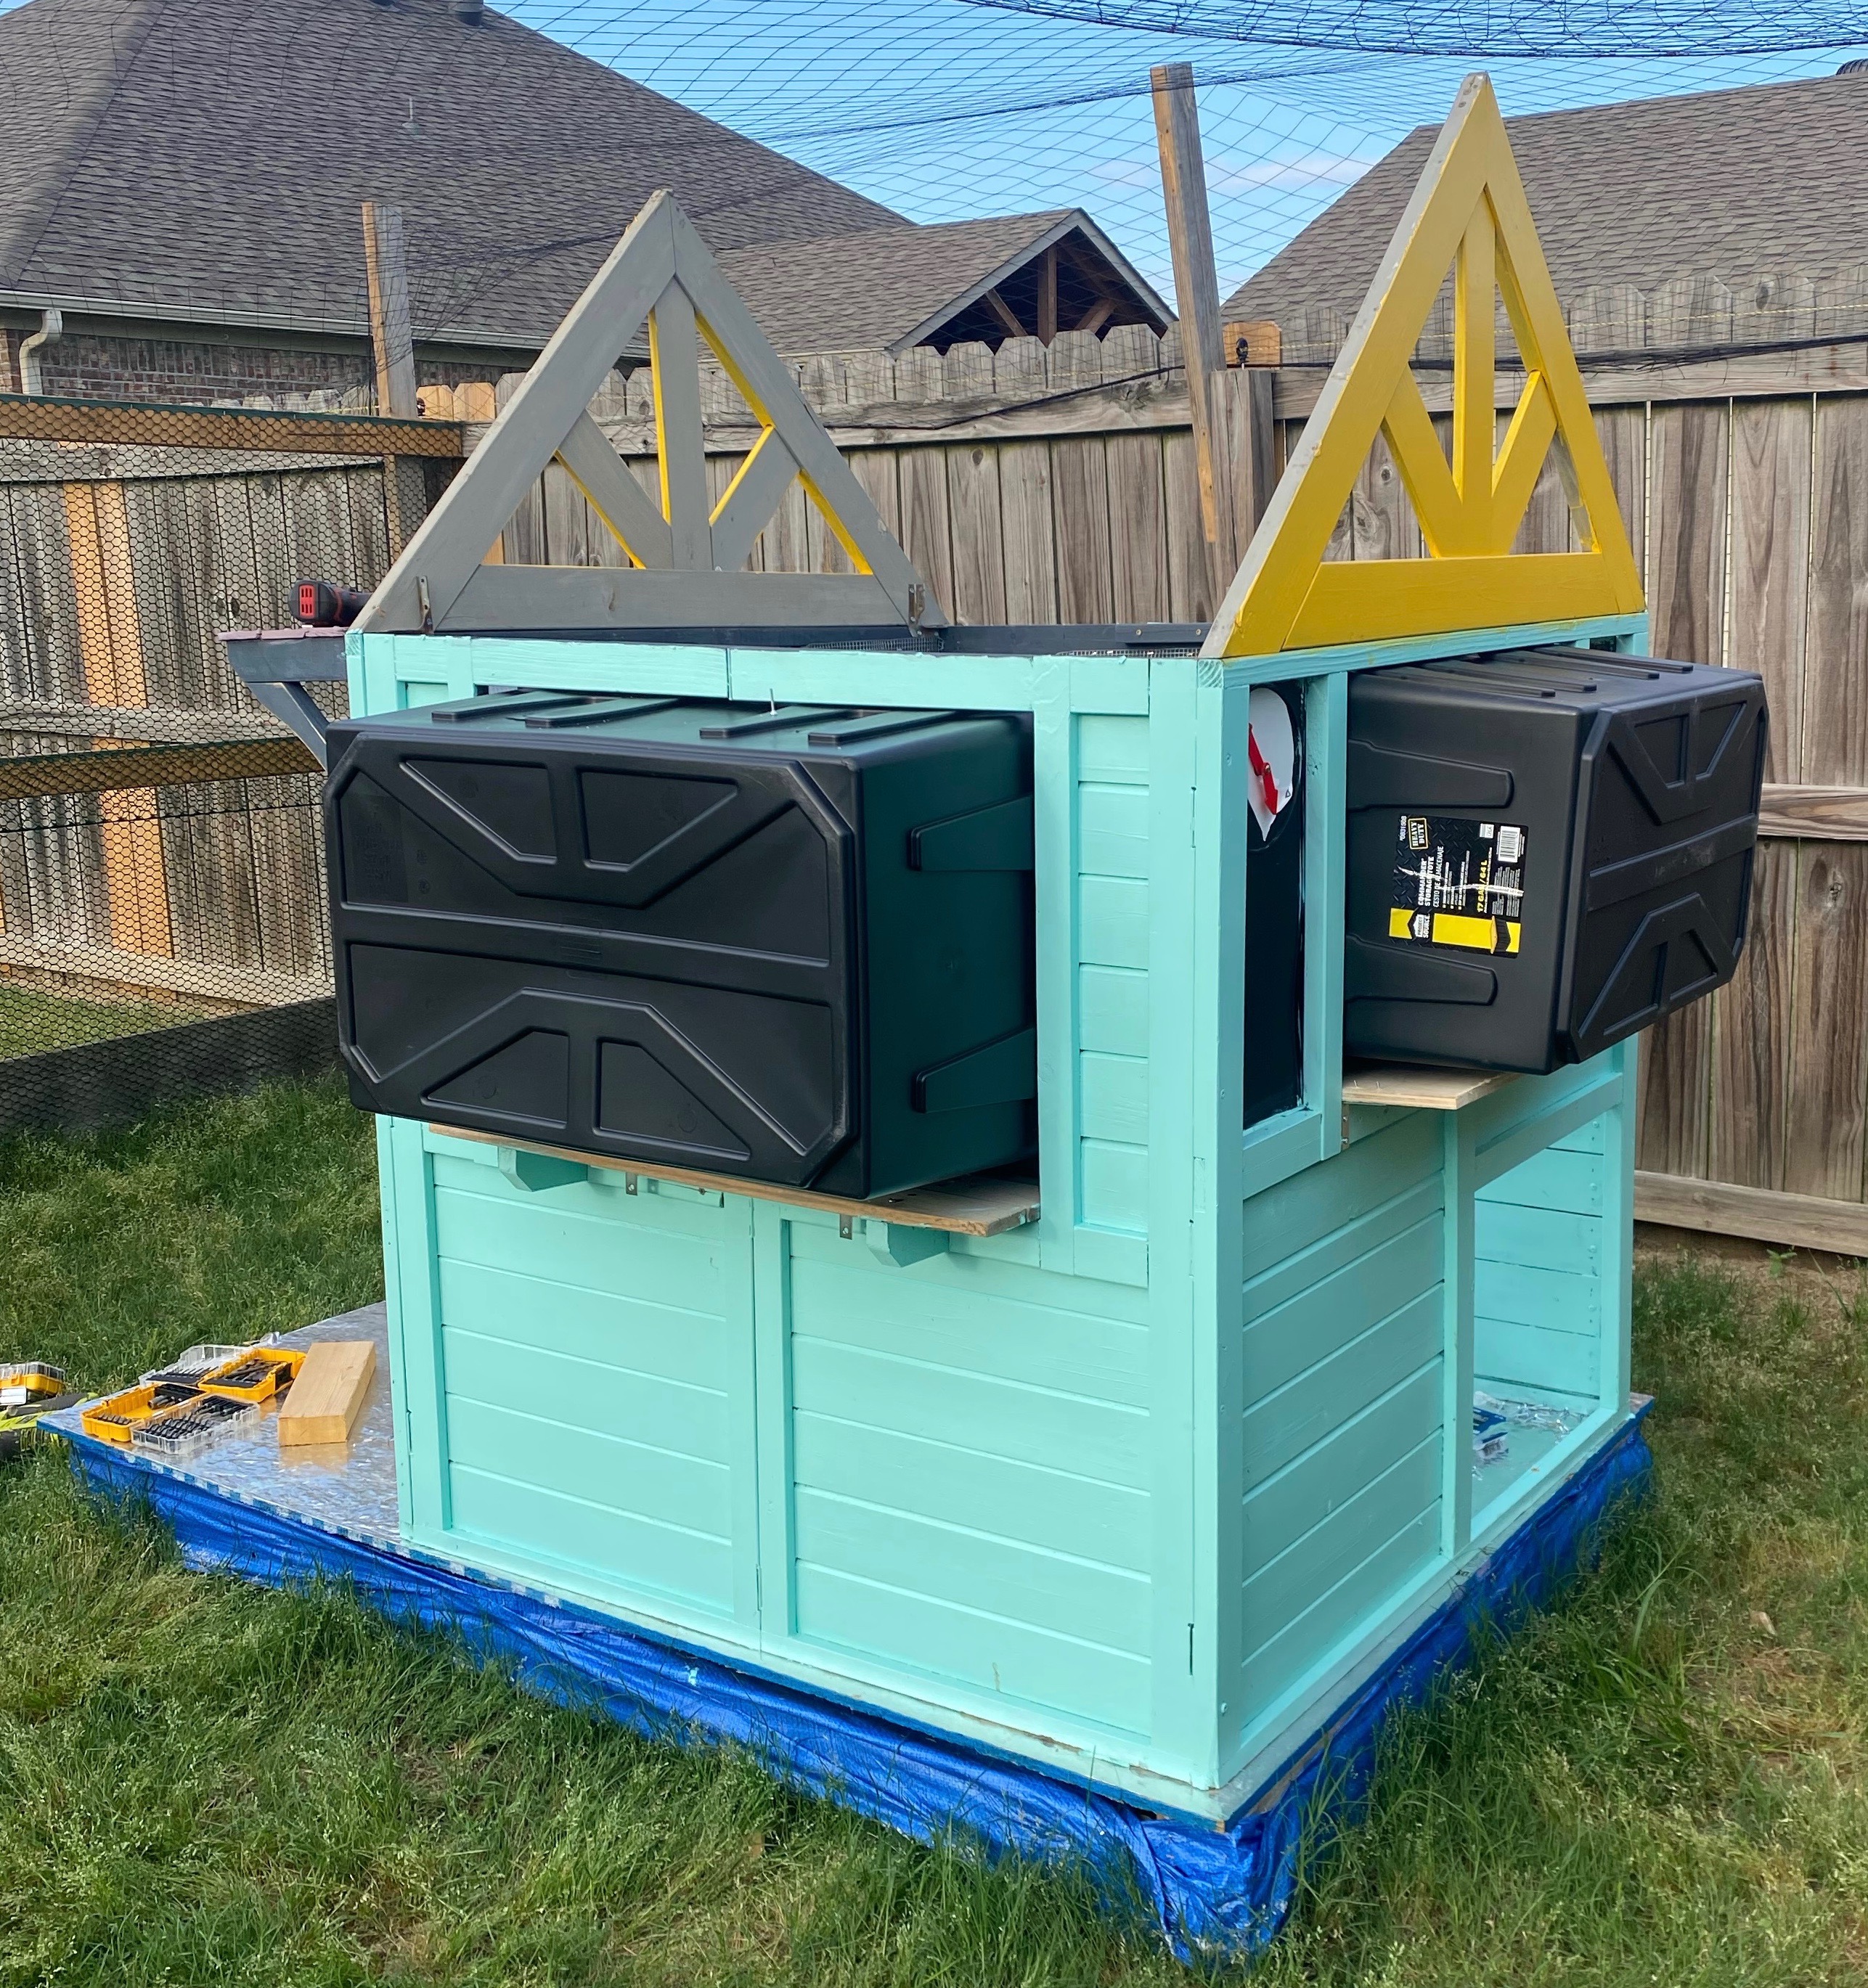
- The run is 16’ x 16’ and the coop is 4’ x 4’
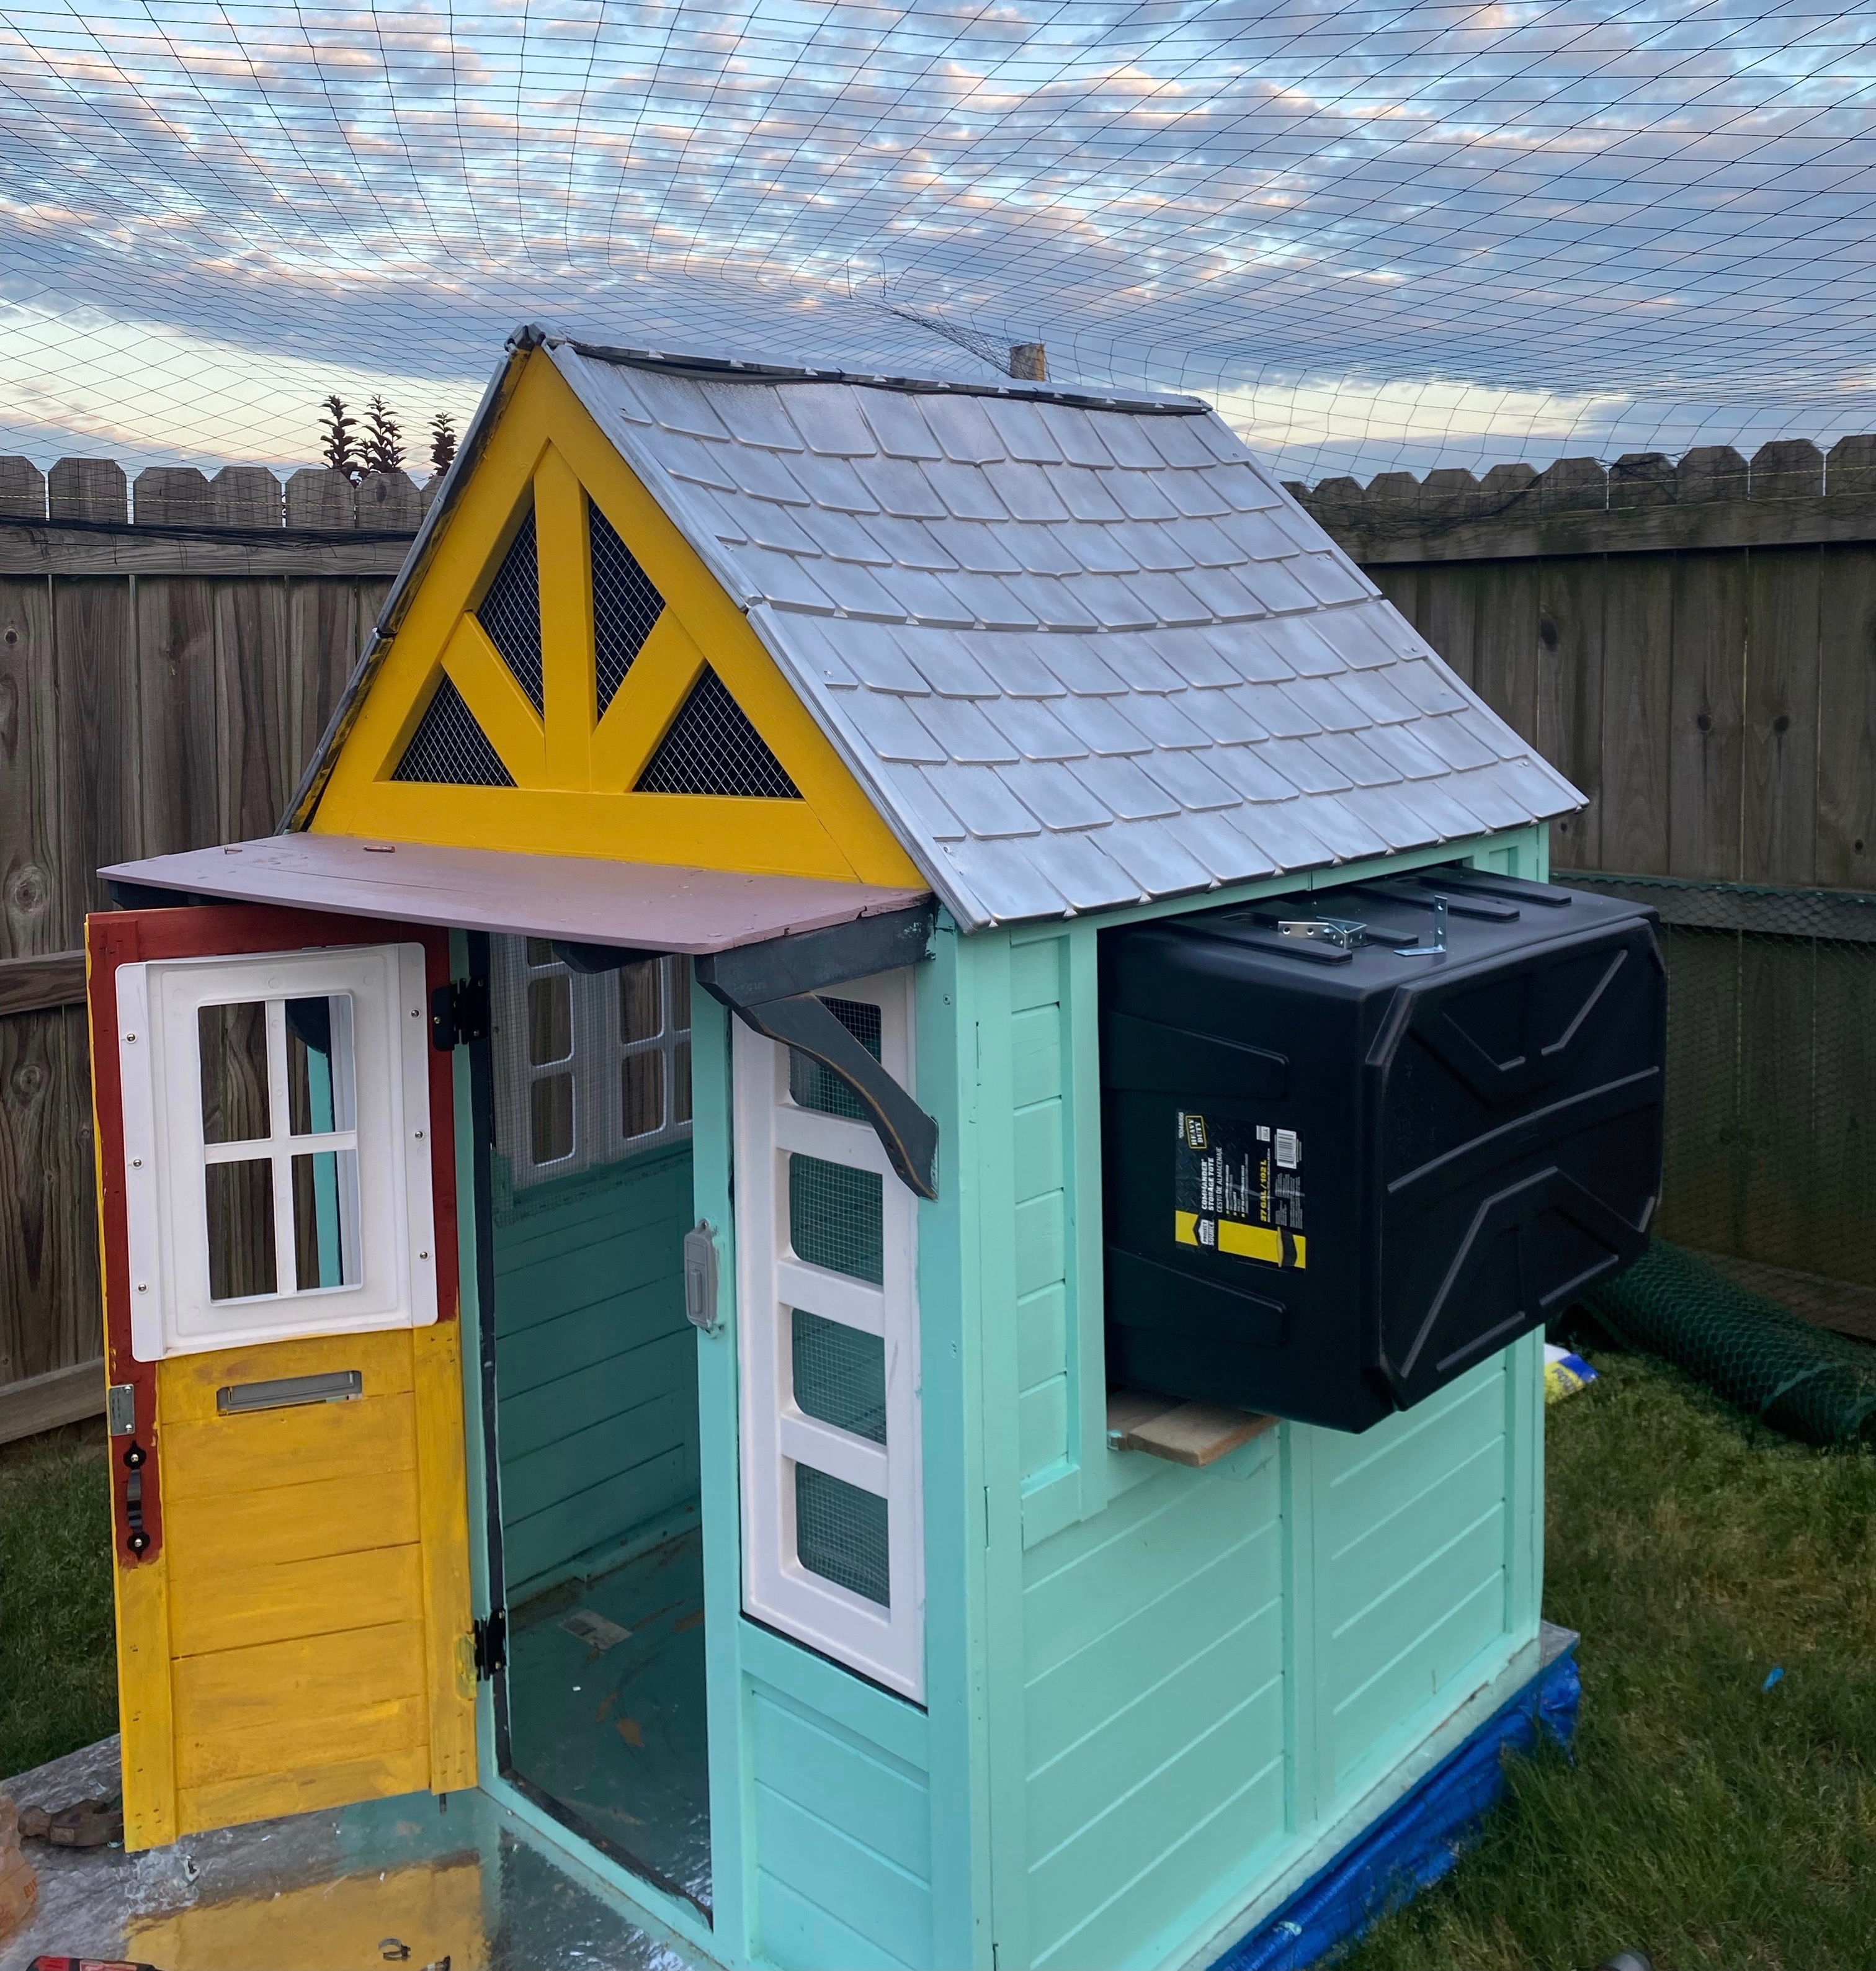
- The roof was taken off, reinforced and painted silver to reflect heat in summer
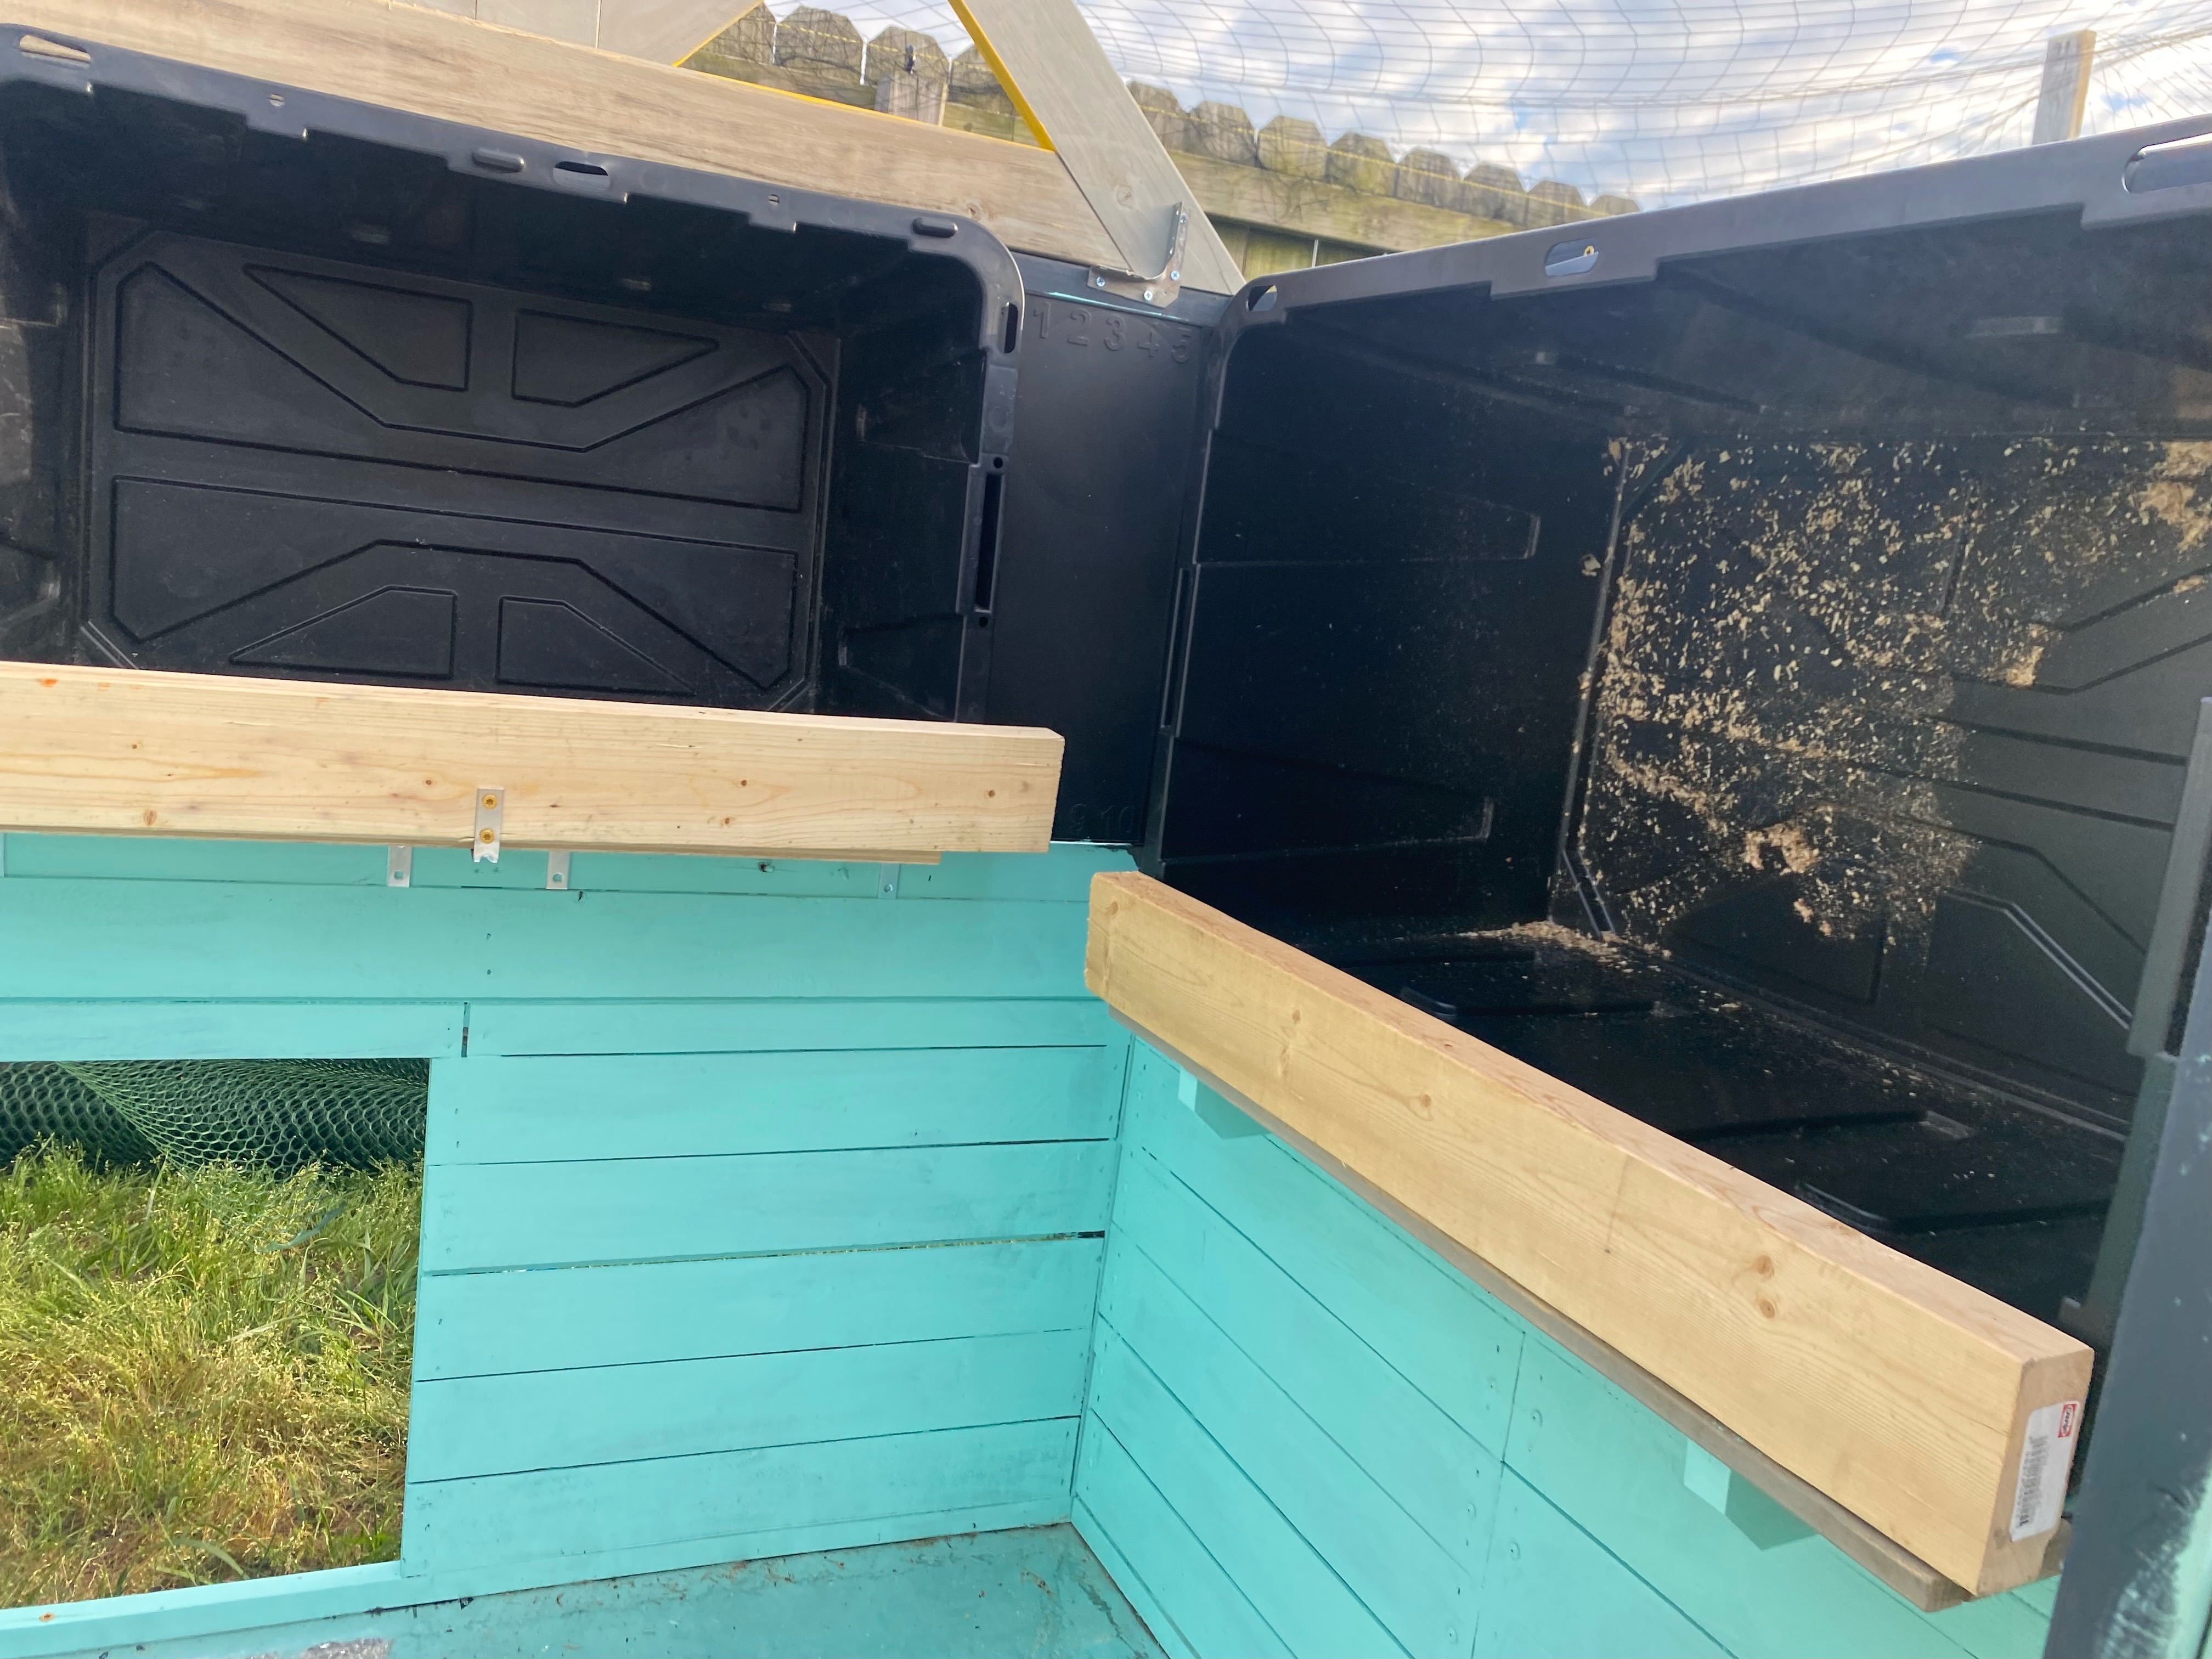
- A nest box with two compartments made from plastic totes was installed on either side of the coop
- 4 roost bars
- The floor is covered with laminate and hemp bedding
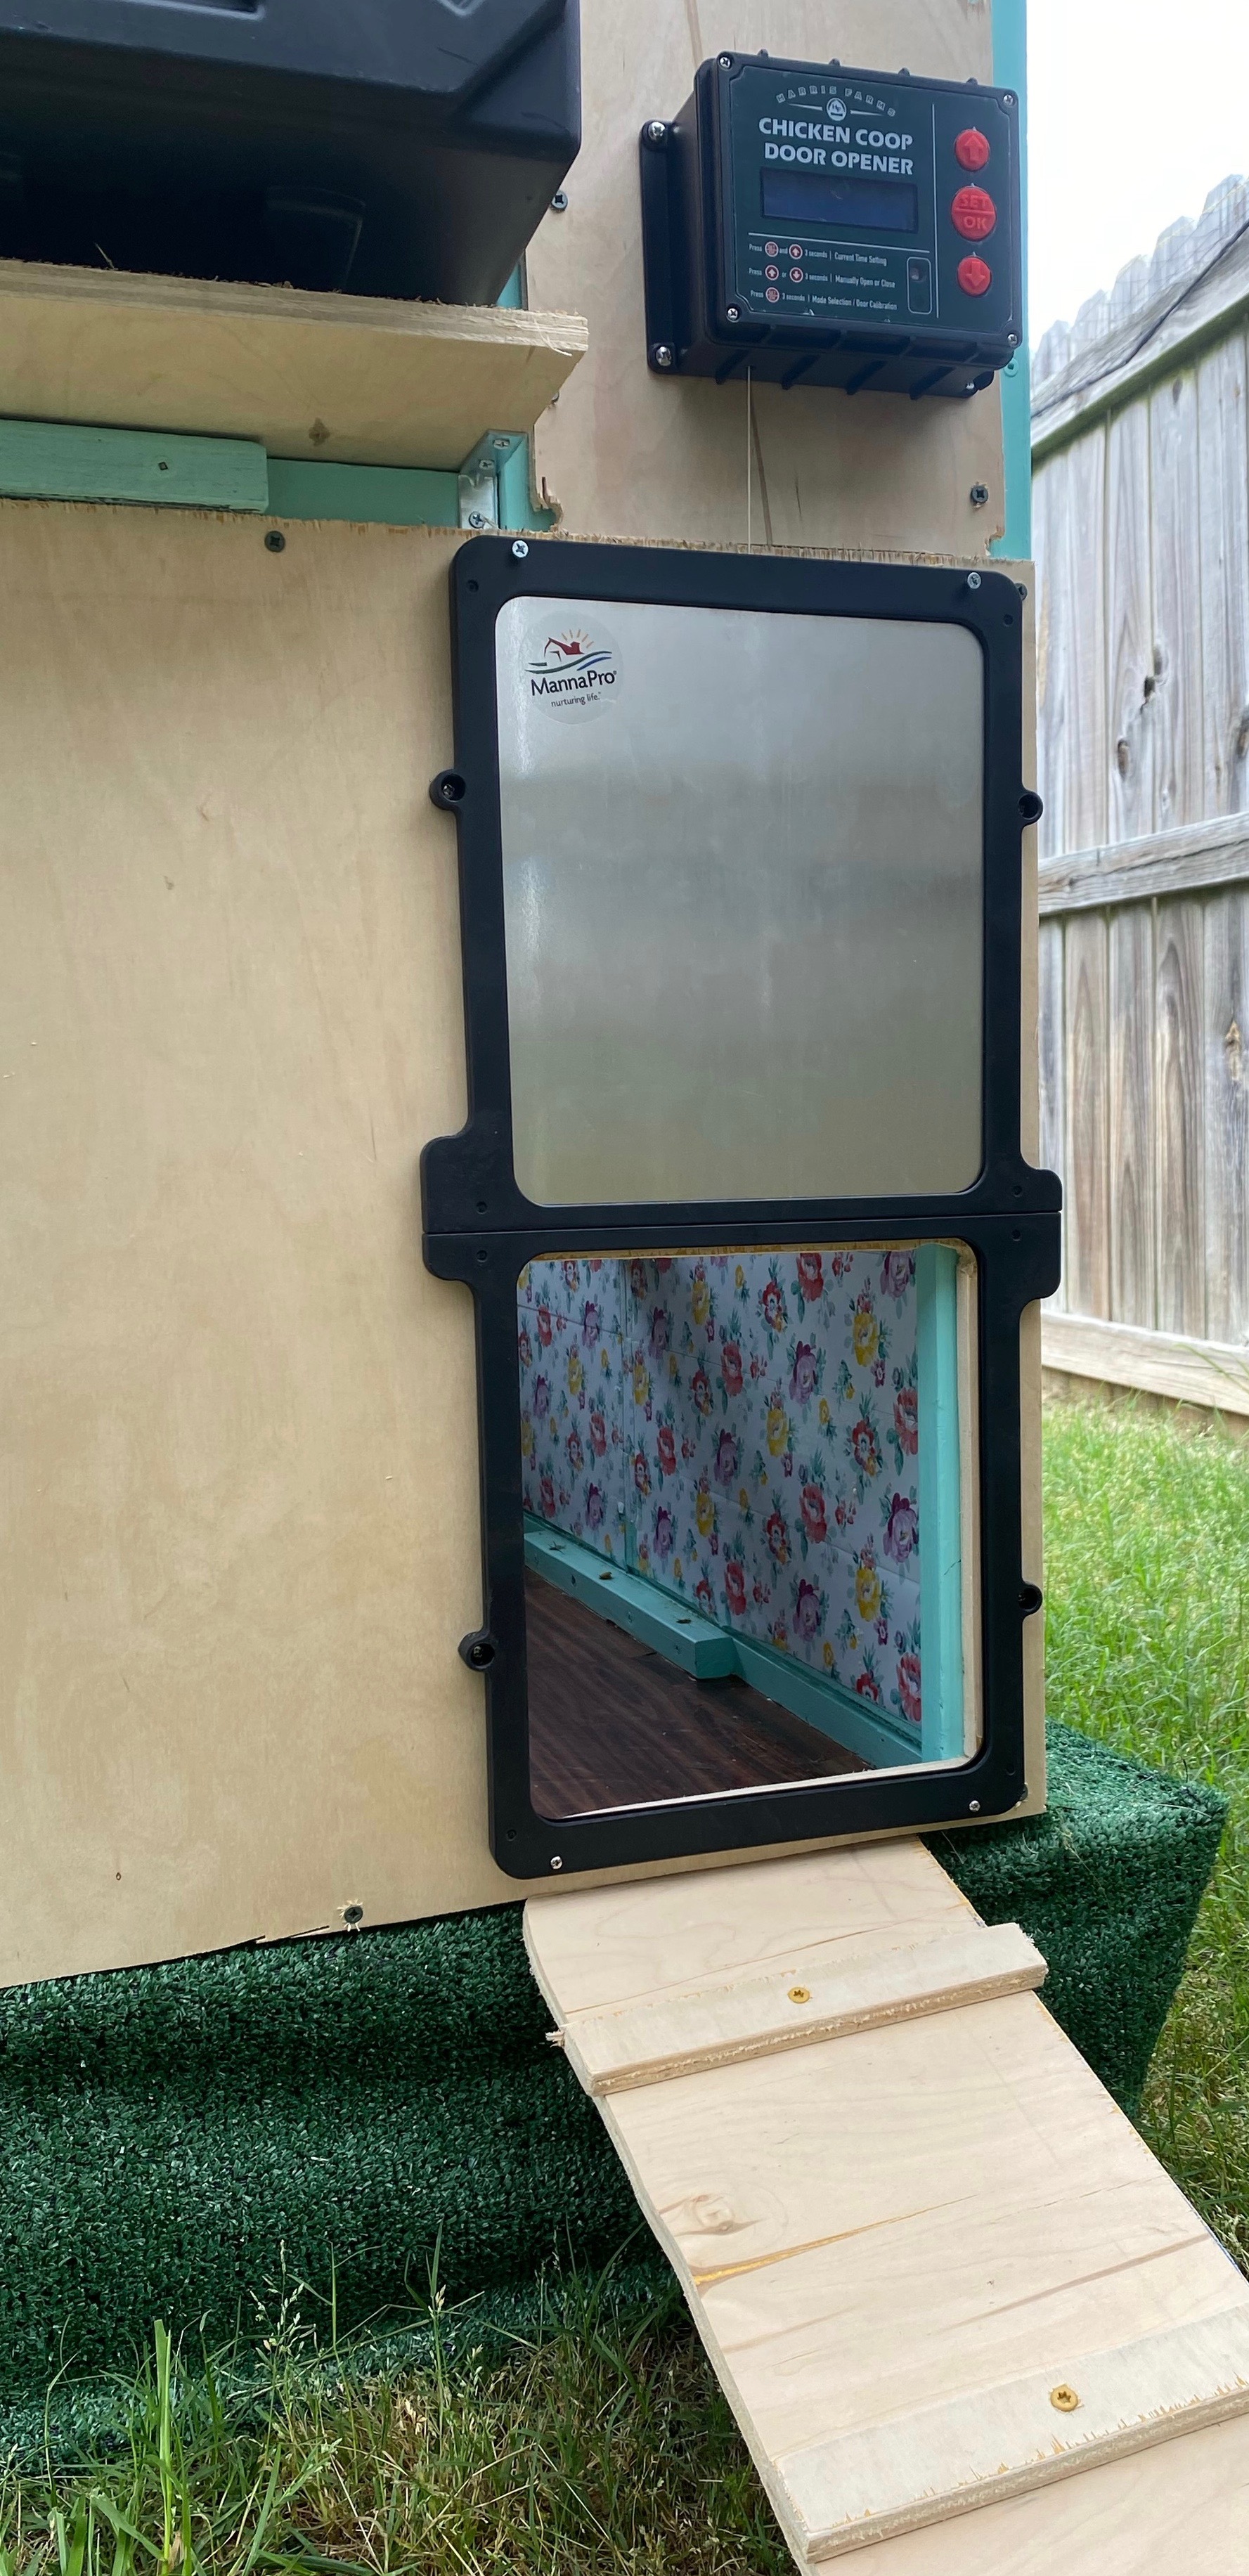
- Peel and stick wallpaper on the walls
- Turf was installed around the base and on the porch
- Automatic door in the back, WIFI camera and a thermometer/hydrometer sensor
- Sun screen fabric was stretched above the coop for shade
- Solar fan to keep the interior cool
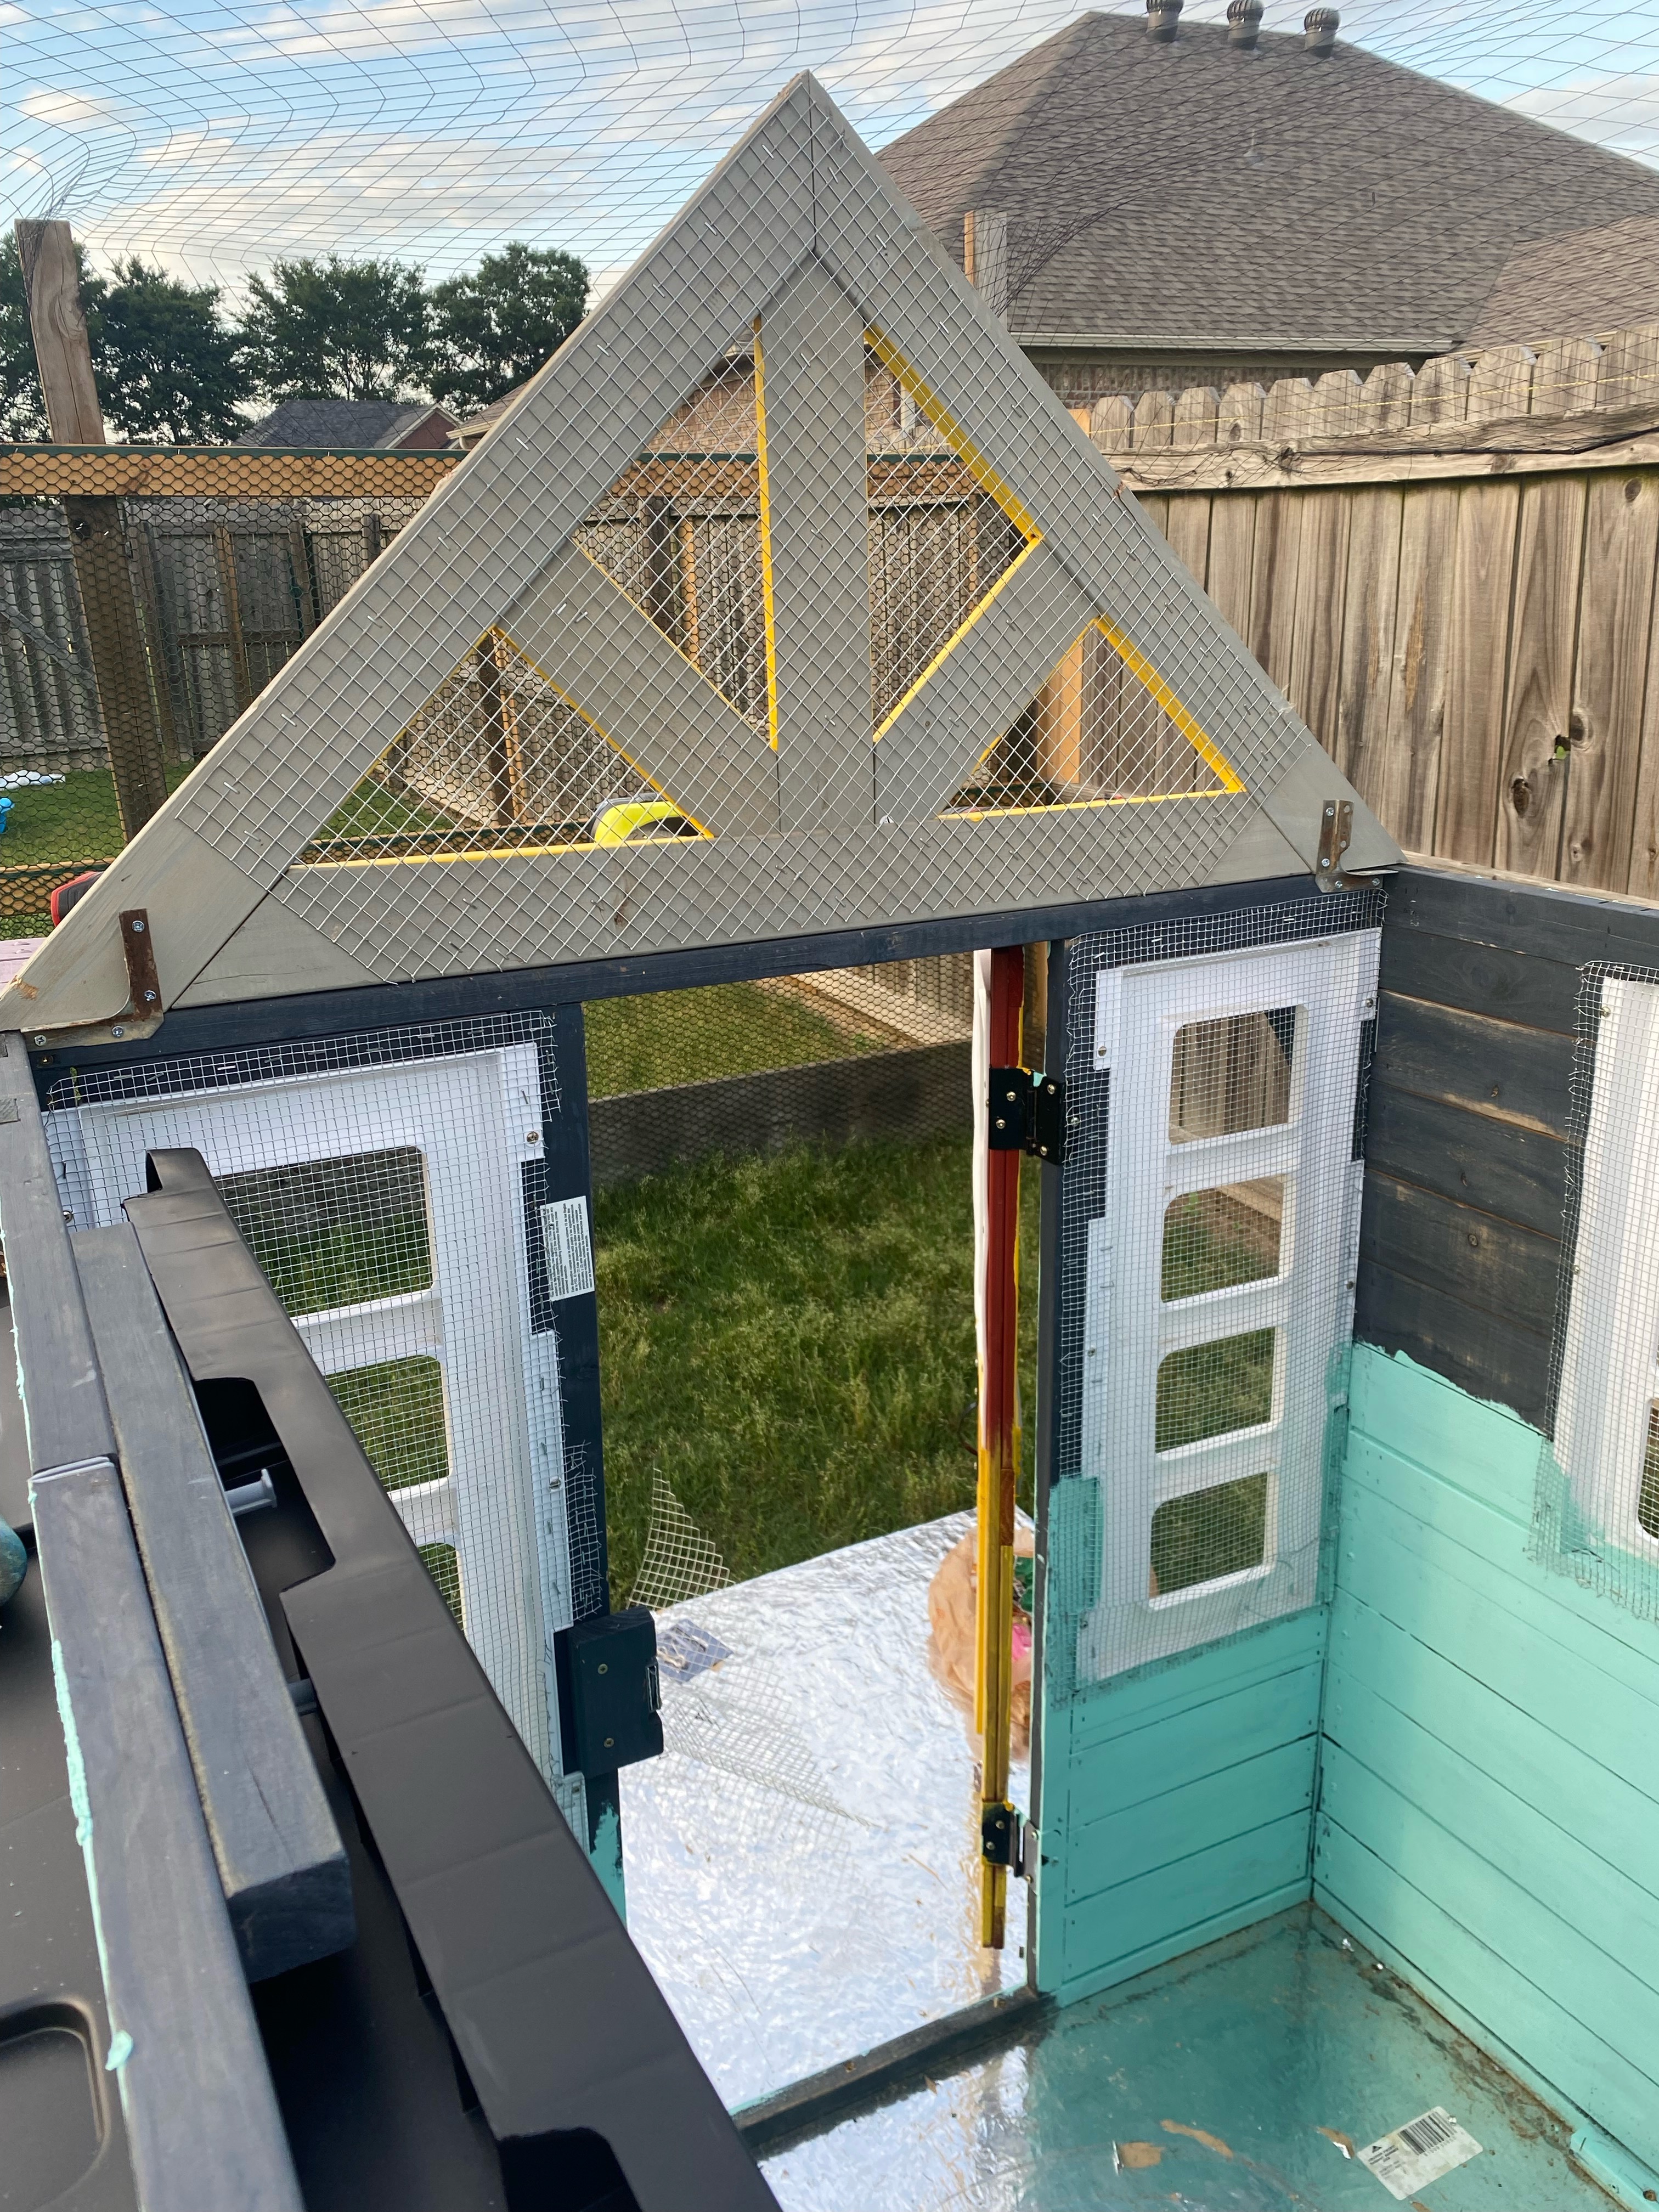
- Hardware cloth covers all the windows and door.
- We live in central Arkansas so our winters aren’t too harsh. I plan to winterize the coop by covering the windows and sealing the gaps when it gets cold.
- The electric fence was pre-existing we just extended it to include the coop. We put two lines of electric fence on the outside of the coop and ran wire around the top of the fence for any critter that walks the fence.


We didn’t have a set budget. A lot of the wood for the run was salvaged from our neighbours. Final cost was around $1,000.
I didn’t think I’d fall victim to chicken math, but I failed. I hatched five in my first incubator attempt but one passed overnight, leaving me with four. My second round of incubator chicks didn’t work out because I had a lot of problems the last week with temperature and humidity control and only one hatched. That one is in the brooder doing very well. Then I bought six from Tractor Supply and am on the waitlist for three Silkies/Frizzles. In total I will have 14. If I end up with any roosters I have friends that want them.
To expand the coop we plan to build a box next to it set up on a pallet. We are going to cut a hole in the existing coop so they can just walk through into the new extension. It will have a pitched roof on hinges so I can lift it for cleaning.
Future plans include extending the run and adding another playhouse coop. I also plan on building an additional run for quail. I’ll eventually add a walkway to the coop and line the run with chicken friendly plants.
Many thanks to Taylor for sharing the story and photos of her coop conversion, used with permission.

I purchased the same place house.. curious how you installed 4 roost bars as I’m trying to think how to install for my 6 hens. Thank you!
LikeLiked by 1 person