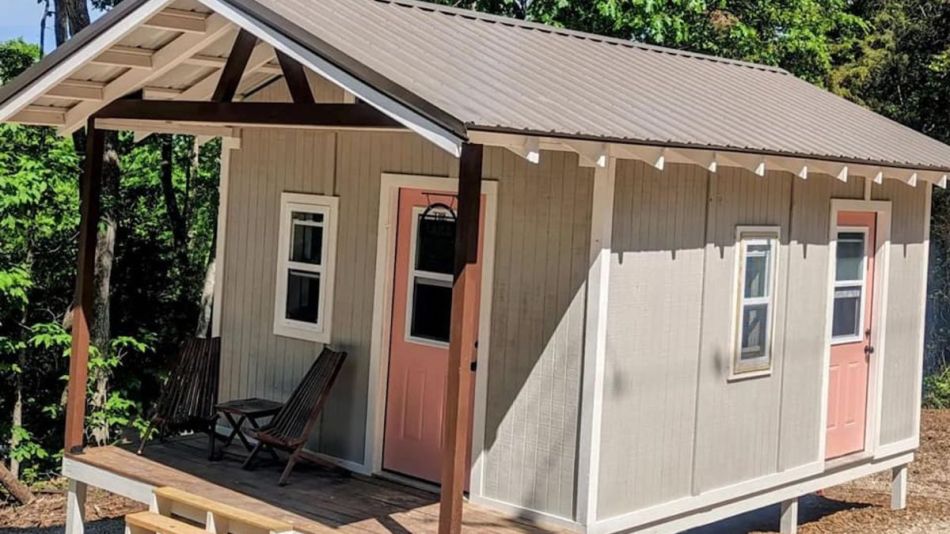
In today’s tight housing market I’m sure there are folks who’d love the opportunity to rent a cabin as cute as this coop, which would rival many tiny homes and urban micro condos. Not everyone has the know-how, time and skill to take on a project of this magnitude, but I appreciate when chicken keepers are able to provide safe, spacious and beautiful homes for their flock. I think there are benefits for both the owners, who gain lasting enjoyment from their hard work, as well as their chickens who are provided with a secure and stress-free environment. If you’re looking for some inspiration take a look at this fourth post in my coop design series.
My wife, Julie, and I purchased a couple hundred acres in Kingston, Arkansas two years ago and we have been building on it since. We are now full-time residents as we have completed building our house.
This is my first chicken coop so I did some research online and asked a few people at the farm store what were some of the issues they ran into and what they would have changed, if they were to do it over again. Surprisingly, most said chickens are very easy to keep.
We decided one of the most important things to remember was cleaning the coop. We wanted to make it inviting not only for chickens, but also for people. Every coop has to be cleaned so why not build something that is pleasing and easy to clean while enjoying the surroundings?
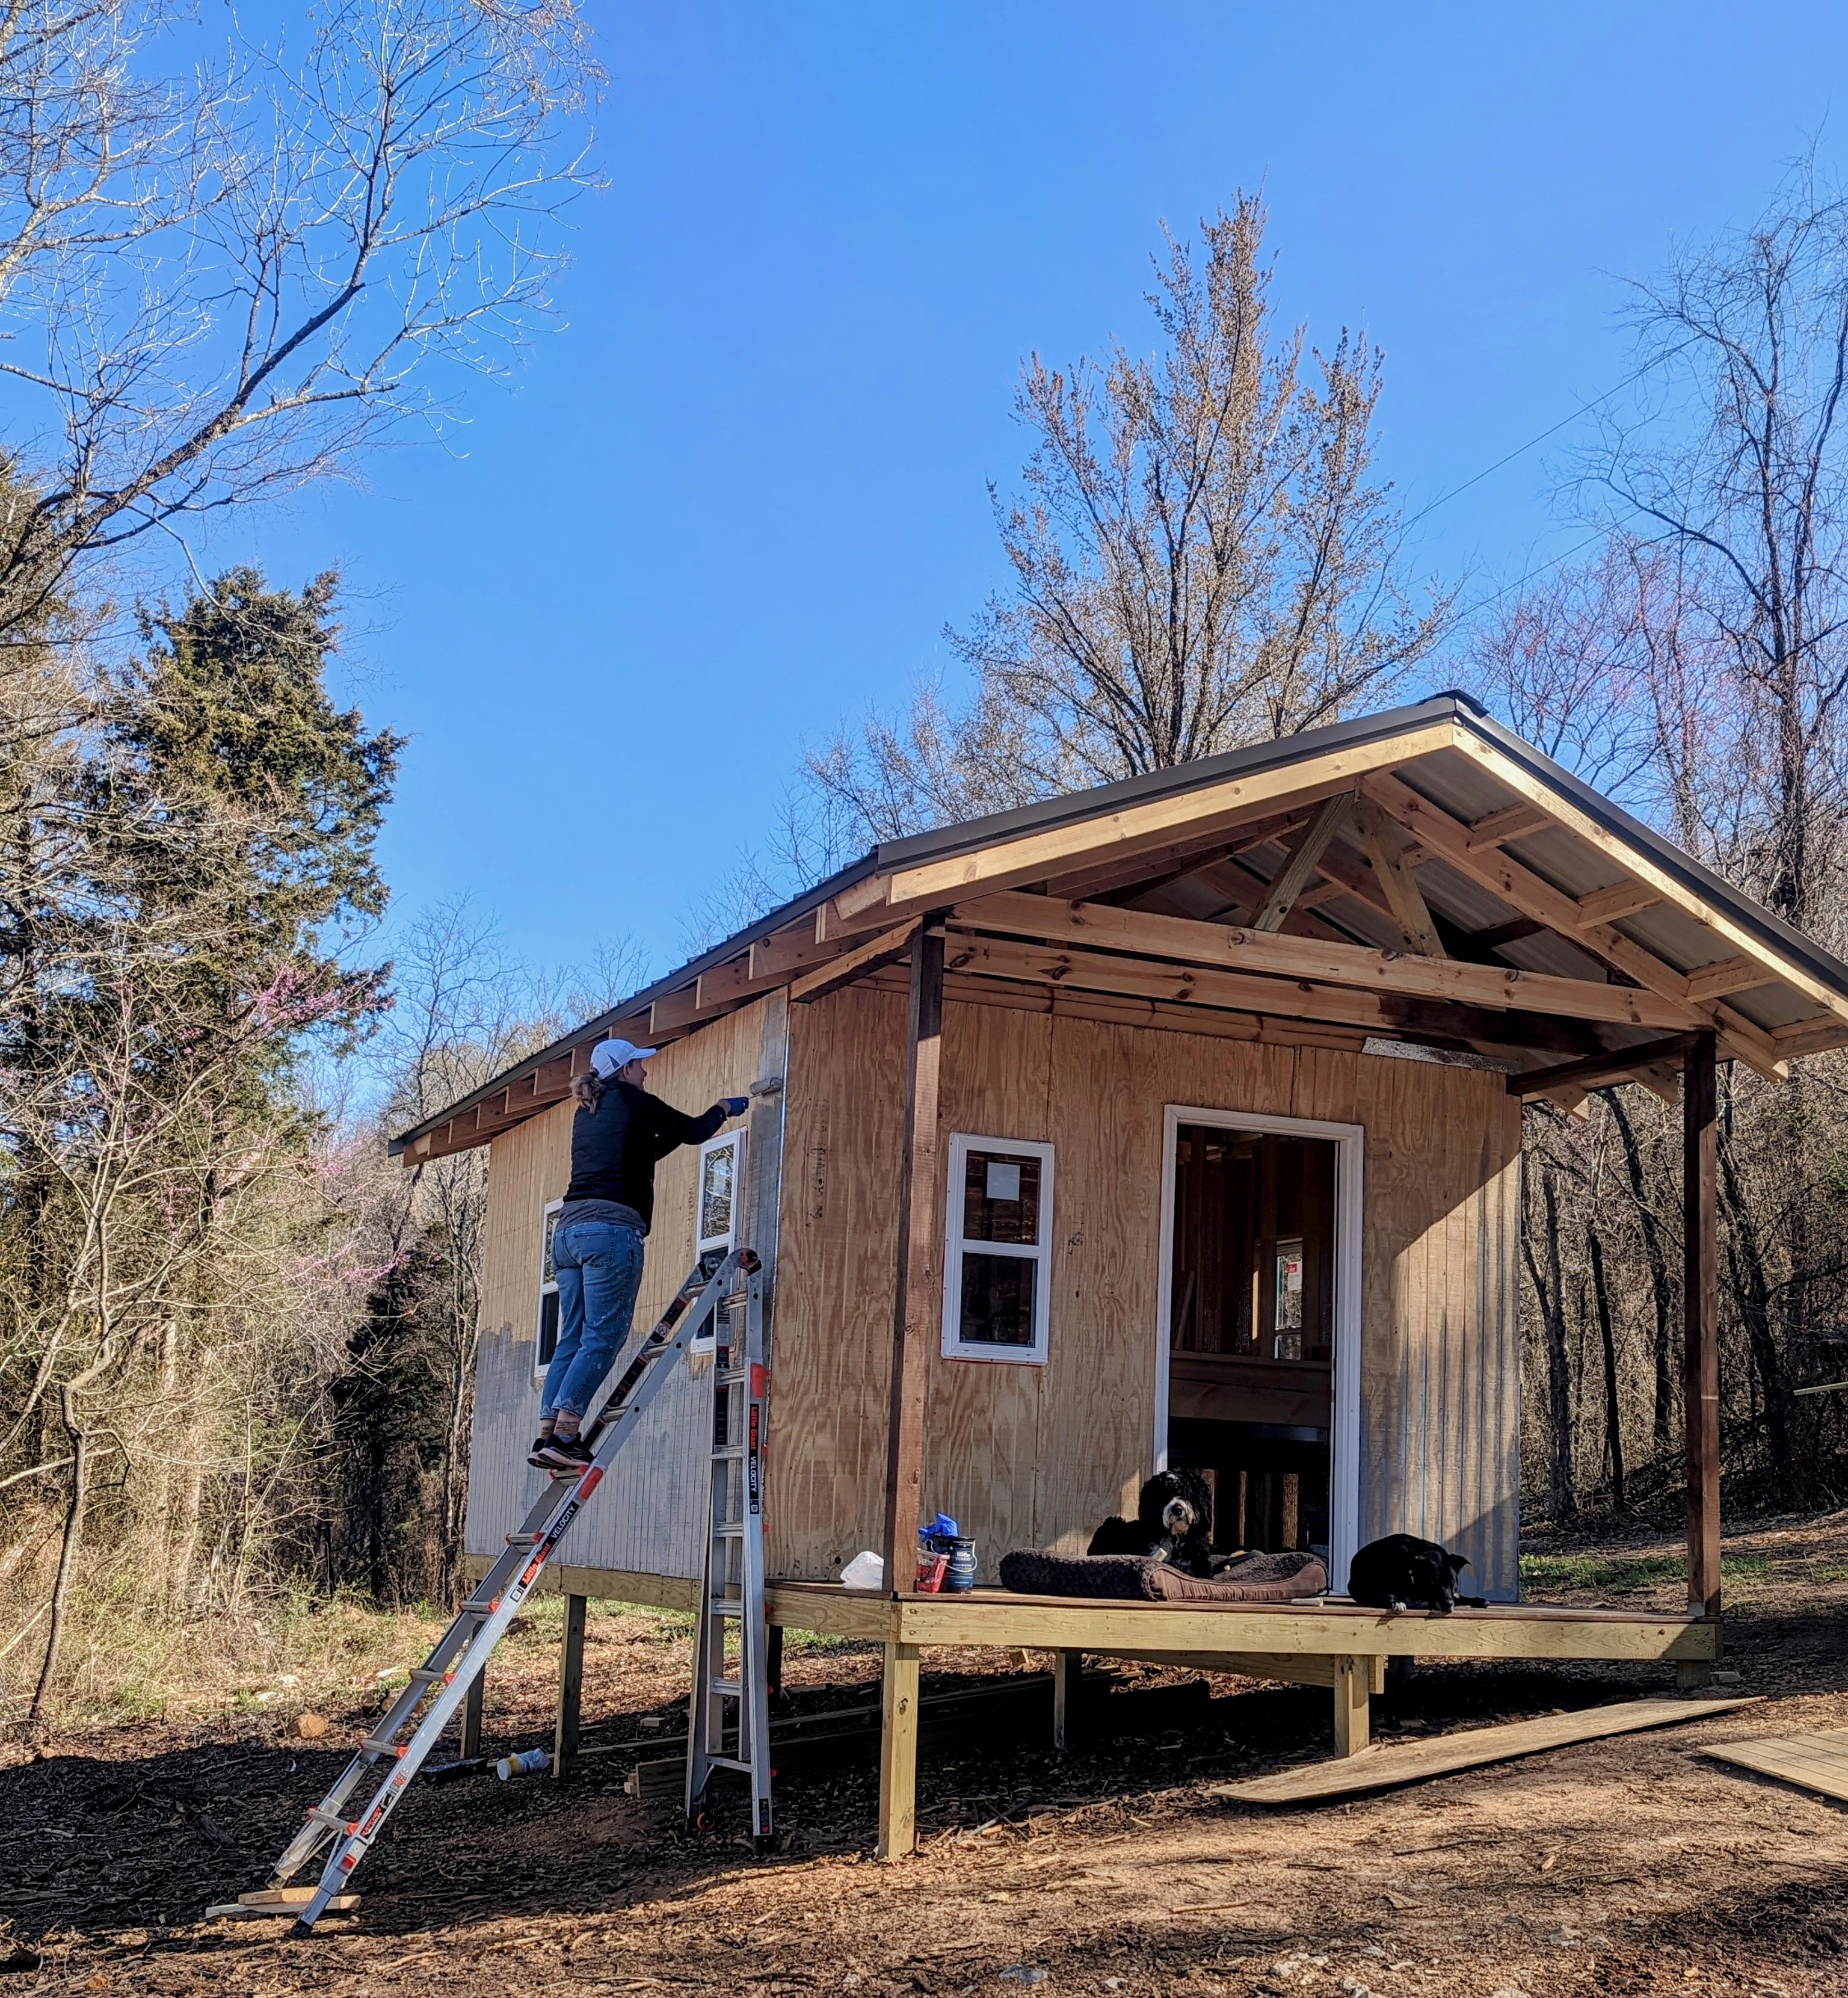
I had no plans just an idea in my mind. I wanted to use as much as I could of the leftover materials from building my home including reusing doors that were over 20 years old. My wife often tells me I see things and how they would work in my mind and when I tell her she doesn’t understand, but goes with it. If something doesn’t quite fit I just make the change on the fly and keep moving forward, always forward.
Julie did all the painting, wallpaper and staining. I did the building design and constructed the detail work (shelves, swings, windows, doors, floors etc). I also had some hourly help from a neighbour that wants to learn, practice and build some projects when he is not working at his other job. It’s always nice to have some help especially when putting up some large walls. Having help allowed me to build other projects on the ranch while still moving forward on the coop (the best of both worlds).

Budget
It wouldn’t be accurate as I used and repurposed items from other building projects. That being said, I spent about $2,000, mostly for chicken supplies, paint, screws, cement, electrical and some steel.
The Coop
- Exterior dimensions of the building: 12’ x 20’
- Coop: 12’x12’
- Storage and egg retrieval: 4’x12’
- Front porch for aesthetics: 4’x12’
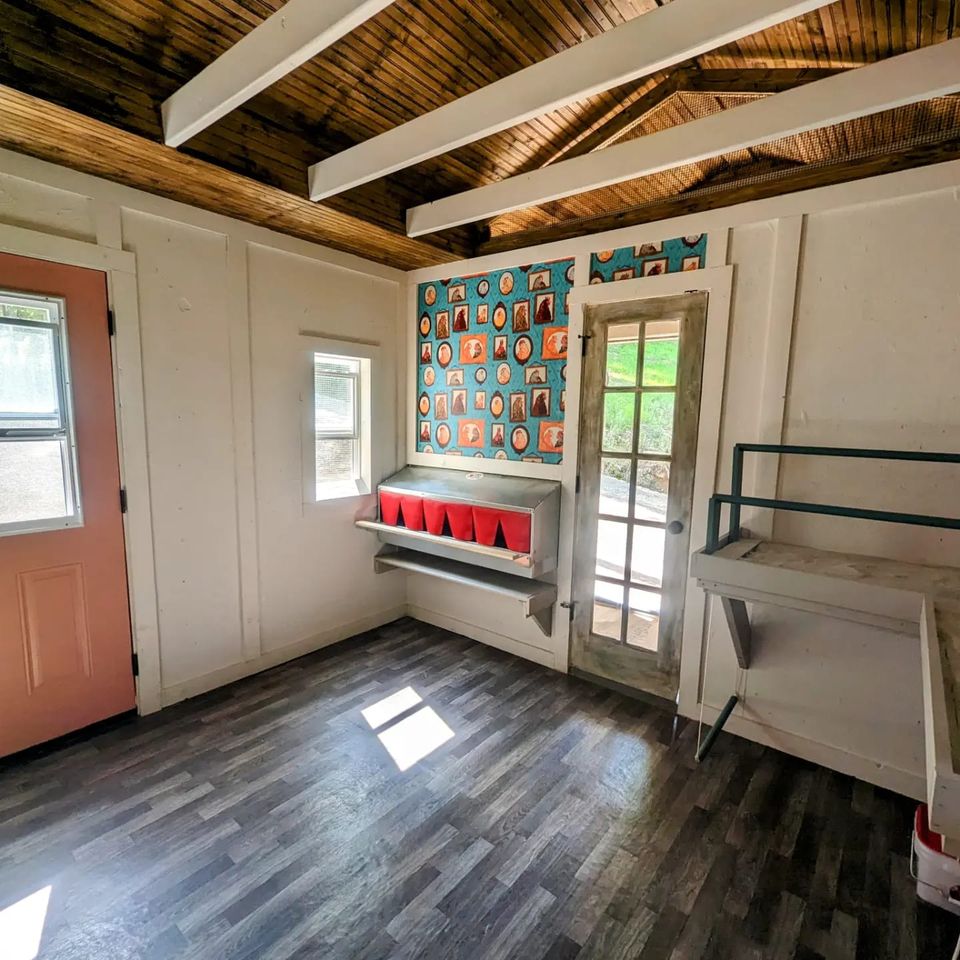
- Interior sidewalls are 8’ high with vaulted ceilings
- The run is connected to the rear of the coop and goes for 100’ and as wide as 50’.
- It has 8’ sidewalls made out of 19 gauge galvanized ½” hardware cloth and 4”x4”x8’ posts.
- To keep eagles and hawks from feasting on the chickens from the air there is aviary netting over the entire run.
- Inside the run there is a 4’x4’ covered dust bath

Features
- In the coop we are using RentACoop feeders and waters along with a low-pressure waterline using Harris Farms Poultry Water Nipples.
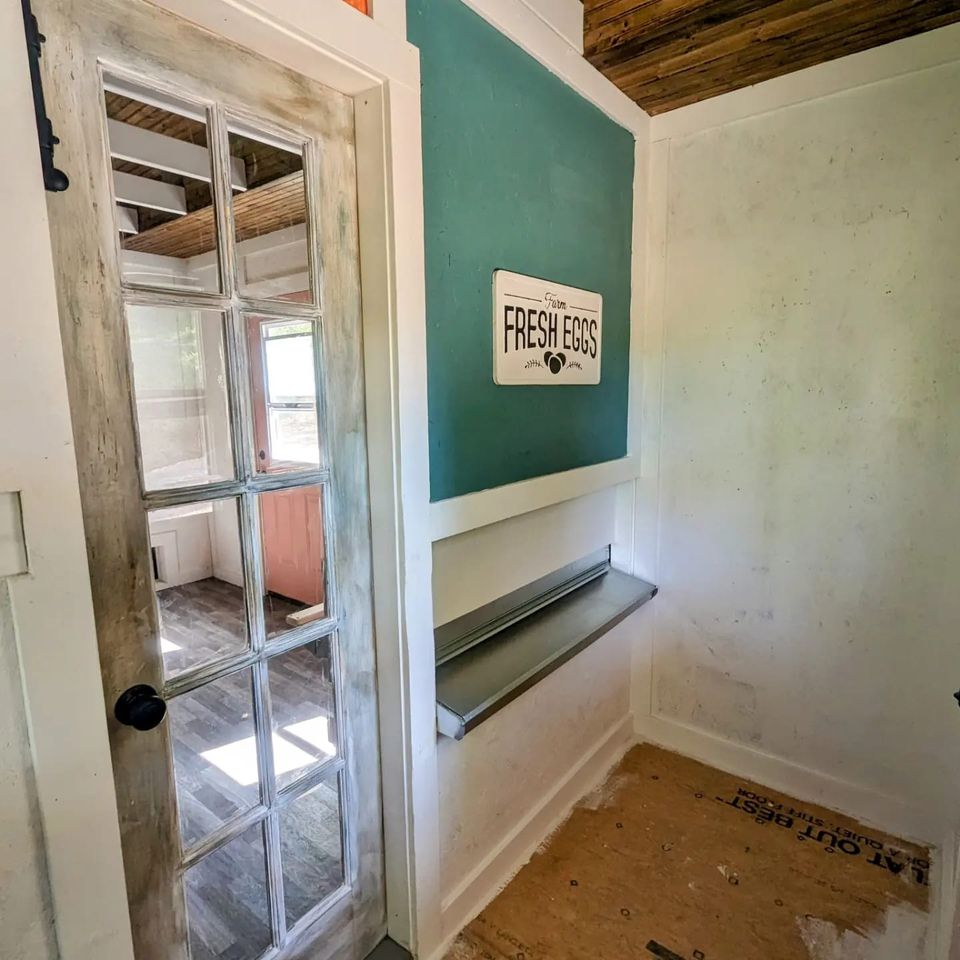
- For the nest box we decided to go all out and use Best Nest Box by Yuneek with rollout egg retrieval with their mats. This product allows us to retrieve eggs without disturbing any hens in the coop and will aid in keeping the eggs much cleaner than in a traditional nesting box.
- We also installed a Farmlite automatic chicken coop door with remote and sensors. These brands gave me exactly what I wanted for quality, options and ease of use at a fair price.
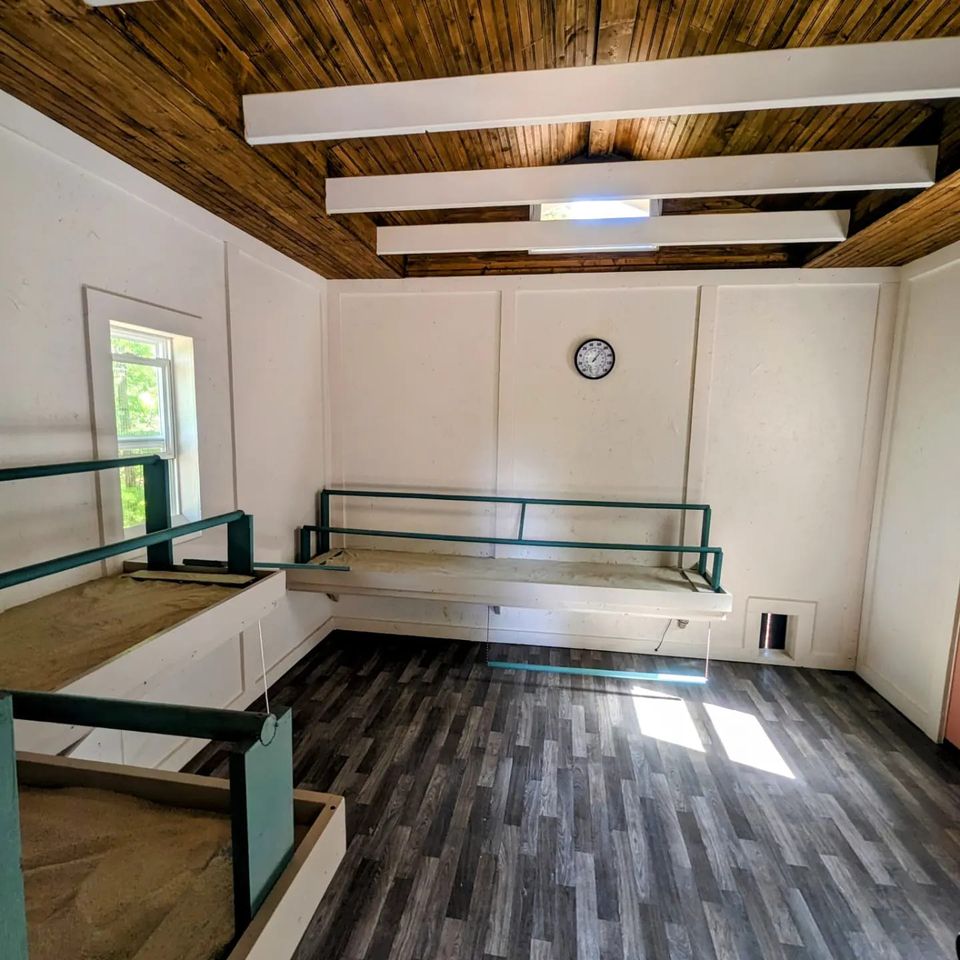
- There are three swings that are setup under the nesting bar tables (poop shelves) that during the day the chickens swing on, there are also a couple mirrors so the birds can admire themselves (sometimes for hours).
- One of the features I was thinking about during construction was how to keep the birds cool in the summer and warm in the winter. I came up with the idea to use radiant insulation barriers so when the sun is beating down on the steel roof it does not amplify the temperature inside the coop.
- I also added a window high up on each gable end to allow any trapped heat in the coop to escape. There are seven windows allowing for cross ventilation in all directions, if desired.
- The entire building is insulated, including the floor, so in the winter I can simply close some or all the windows to retain the heat.
- I do have enough power (amperage) to add an external heat or air conditioner, if need be. The thought was if we decide to raise chicks inside the coop we will want to maintain a specific and constant temperature for their first eight weeks.
We ordered 24 birds from Cackle Hatchery and picked them up at the post office. To our surprise there were 26 chicks in the box and all of them are doing great and very healthy. My wife holds and checks each one every day. We used Powell brand medicated chick starter crumbles for the first six weeks.
The chicken breeds we have are: White Polish, Tolbunt Polish, Lavender Orpington, Dark and Light Easter Eggers, and Columbian Wyandotte Bantams. It’s so fun to watch the interaction of the chickens with my wife as one the Easter Eggers (she calls her “Little Miss Independent”) has to sit on her shoulder while she checks the other chickens.
This is our first time having chickens and now that we have them we understand why some owners talk about them as pets not just a farm animal that they seldom see. Each chicken has its own personality.
We don’t plan on adding more chickens in the near future, but we have started raising Guinea hens that, when old enough, will have free range on the ranch. My next project is adding a tree house.
Many thanks to Trent and Julie for sharing their coop story and photos, used with permission.

Really nice woodwork. Awesome coop! But don’t worry about heating the coop, the girls wear thick down jackets! Keep it airy and dry.
LikeLiked by 1 person
I wouldn’t mind being one of your chicks 🐥
LikeLiked by 1 person
The exterior of this coop is almost exactly like the one we’re currently building! We even built a little porch with stairs – how funny.
They really went all out on the interior! I’m loving these coop tours.
LikeLiked by 1 person
I’m hoping folks get inspired and incorporate bits and pieces from various coops into their own.
LikeLike
How could they not be inspired ? You have featured so many wonderful coops here! From the repurposed to the whimsical. There’s something for everyone
LikeLiked by 1 person