
As a kid I kept all kinds of pets: cats, a dog, small rodents, turtles, snakes and salamanders. At one point I raised my own mealworms for some of them. In my teens, and for many years after, I collected animal skulls and used a variety of methods to deflesh them. The local university gave me some Dermestid Beetles to start my own colony, which happily cleaned the bones for me.
Mealworms of course aren’t worms, but the larvae of Mealworm Beetles a species of Darkling Beetles (Tenebrio molitor). I didn’t know that until I started working on this post. That fact surprised me a bit since another type of Darkling Beetles (Alphitobius diaperinus) is considered a farmyard pest and a vector of disease in chicken flocks.
Those innocuous looking insects are known to carry at least 60 diseases that affect poultry: Aspergillus, Avian Influenza, Infectious Bursal Disease, Marek’s Disease, Newcastle disease, Salmonella spp., 26 pathogenic types of E. coli, and parasites like coccidia, roundworm and tapeworm. Both adult and larval darkling beetles can harbour disease, carrying pathogens in their gut and on their bodies. They can remain positive for E. coli for up to 12 days, and Salmonella for up to 28 days. Birds can become infected with Salmonella after consuming a single contaminated beetle.
Necropsy Photo: Chick Crop Full of Darkling Beetles (Ontario Ministry Of Agriculture)
In some EU countries it’s actually illegal to feed mealworms to poultry. In the 1990s there was a variant of Creutzfeldt-Jakob Disease (Mad Cow Disease) that spread from cattle to people. Following that, when there was an outbreak of Foot and Mouth Disease (both were caused by feeding animal proteins to livestock) the U.K’s Department of Environment Food & Rural Affairs (DEFRA) mandated that products containing animal proteins shouldn’t be fed to chickens.
“Insects that are dried and used in proteins are often raised on waste and animal protein. This could end up being a channel for diseases to enter what is one of the most tightly regulated industries in the modern farming world.” – DEFRA
If you purchase dried meal worms check the package to see where they were grown. Chances are they have been imported from a country without regulations that might protect consumers. They may have been raised on an industrial scale with exposure to human waste and animal protein. That alone, might motivate you to become a mealworm farmer. Just be careful about inadvertently releasing them into the environment.
I’ve never given my birds mealworms – they have access to plenty of treats without my having to purchase more – but they are a good source of protein, fat, fibre, calcium, phosphorous and magnesium.
It’s been many years since I raised my own mealworms so I consulted with other chicken keepers with experience as bug farmers. They all had different methods of doing things, some of which I will report here.
Raising Mealworms
Supplies
- Dry oatmeal, cornmeal, cheerios, wheat bran or chick starter.
- An organic source of moisture that is not likely to mold quickly. Carrots work best for this, but you can also use other fruits and vegetables such as sliced potatoes or apples.
- There are a number of options to house your farm. You can buy ready-made bins or make your own from an aquarium, three plastic totes with air-holes drilled in the tops/side or a 3-tiered trolley with plastic drawers. Whichever container you choose make sure it is approximately: 12 inches x 24 inches.
- Small pieces of cardboard (cut from egg cartons or toilet paper rolls)
- Live mealworms: anywhere from 500 to 1000.
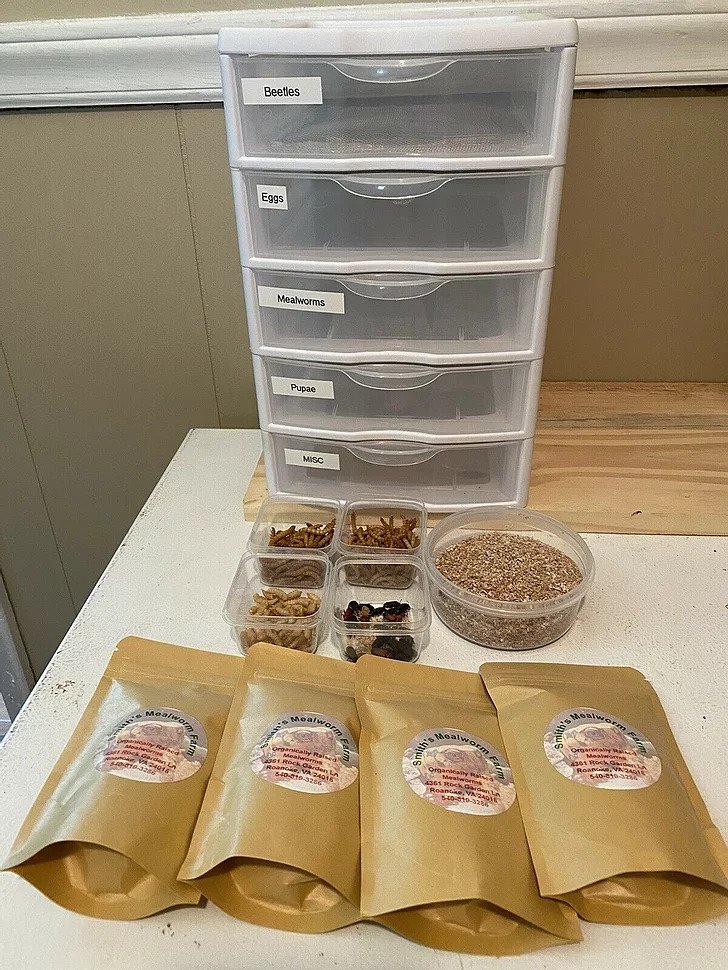
(Smith’s Mealworm Farm) 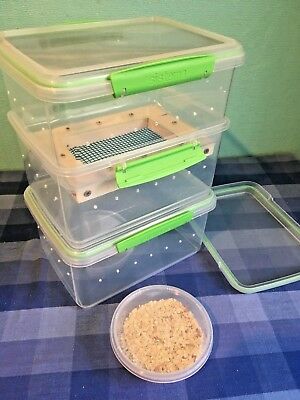
(Pic Click UK)
Prep
- An aquarium is the easiest to set up, but the self-sorting multiple containers are easier to maintain once your beetles start reproducing. If you use the latter: house the pupae on top, adults in the middle, worms on the bottom. The middle of the top two drawer bottoms should be cut out and replaced with fine mesh netting so eggs can fall through.
- The adult enclosure will also need a lid or screen mesh to put over the top to provide air circulation and to keep them contained to prevent them from escaping.
- Pour up to 5 cms/2” layer of oats into the bottom of the container which serves as both bedding and food for their various stages of development.
- One ‘farmer’ recommended using chick starter instead of oats as it is easier to sift through. Others use breakfast cereal, wheat bran or corn meal.
- Place some vegetable slices (e.g. celery, lettuce, potatoes or apples) ‘wet’ side down into each bin as their source of water. Carrots are ideal as they don’t get moldy as quickly as other fruits or vegetables. Replace every few days and don’t allow them to get moldy.
- Pour the live mealworms into one of the containers. You can add sliced bread, some ground up cereal, or dry dog food to the mix.
- Place a few pieces of cardboard to provide shelter.
- Keep in a warm place. Beetles can survive at temperatures between 18-38c/65-100f, but ideally should be kept at the sweet spot of 25-27c/77-81f.
Here is a great, simple video on how to set up a self-sorting farm.
(Ontario Ministry of Agriculture)

(Heritage Acres Market) 
(AJC1)
Maintenance
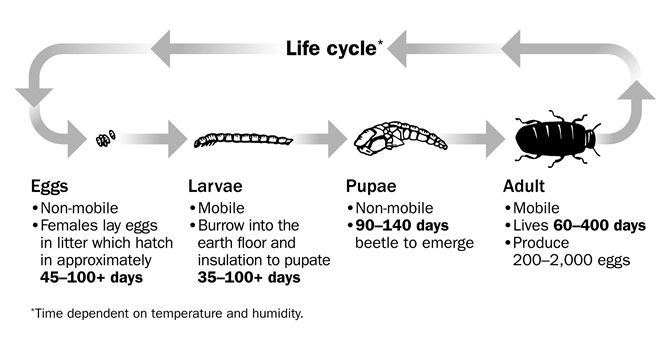
- They go through four life stages: egg, larva, pupa, and adult. Larvae @ 2.5 cm/1” long and adults are generally between 1.25cm and 1.8 cm in length.
- Monitor progress several times a week.
- Remove any rotted fruit or vegetables, dead insects, or clumps of mold from the oatmeal substrate.
- Add more vegetables and oatmeal as needed and move the bedding around to prevent mold.
- Watch for any new pupae which can take from one – eight weeks.
- They start off pale white and molt several times before turning to pupa.
- Separate the pupae by hand or with tweezers and place in a second container. It is important to keep pupae separate from larvae and adults because they are vulnerable to being eaten by adults before they hatch.
- The pupal stage lasts anywhere from one to several weeks depending on the temperature. You’ll know they are getting close to hatching as they begin to darken in color.
- Continue to check all your containers regularly for changes in the life cycle. This becomes more important as your colony grows and you have more insects in the various stages of development.
- Maturity is marked by gradual darkening of color in all stages of the life cycle.
- Move adults and pupae to their respective drawers every few days.
Upkeep
- Remove adult beetles from the pupae container immediately or they may be predated by the adults.
- If you are not using the self-sorting bins, then place the adult beetles into a separate container with the same setup as the mealworms. Add some extra oatmeal so they have more room to nest.
- Check the adult beetle container regularly for eggs. These will become more plentiful the more adults are in there and can usually be found along the bottom of the container.
- It’s not necessary to remove the eggs, but they serve as a signal that you will have more larval mealworms soon.
- Adult females will lay about 500 eggs at a time.
- Eggs will hatch within 4-19 days depending on the temperature.
- If you don’t use the self-sorting set up, then move the mealworms out of the adult beetle habitat and into the mealworm container upon hatching. Since the females lay so many eggs at once, you’ll have some work to do with each generation of hatchlings.
- Continue daily or weekly maintenance of the habitats. This includes replenishing food and moisture sources, keeping the insects separated according to their phases of life, removing dead insects, and moving the bedding around regularly.
- If you notice that you begin to produce more mealworms than you can feed to your flock, offer some to wild birds or freeze them for future use.
- Excess pupae can be fed to the adult beetles.
- Do not release them into the wild.
Tips
- You can add supplements to make your mealworms fatter and healthier before giving them to you chickens. Sprinkle supplements into the bedding or directly on the fruit used in the breeding container: finely ground egg shells, wheat germ, soybean meal, fish flakes, bone meal, whole wheat flour or dried brewer’s yeast.
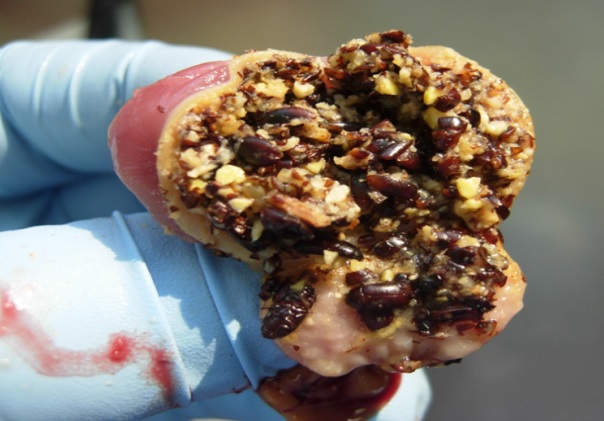
- Mealworms contain between 18% – 70% crude protein depending on whether they are live or dried.
- Chicks need @20% protein, while layers only require @16%. Too much protein can be an issue, so feed small numbers of mealworms as treats twice a week.
- Only feed the larvae and not the adult beetles to your birds.
- Excess mealworms can be frozen or dried in the microwave and stored for future use.
- Change bedding in the bottom shelf every other month unless there are problems.
- I kept my Dermestid Beetle colony at work – a cavernous space that was cold in winter and hot in summer. Needless to say, my inability to maintain them at the right temperature was to their detriment. Keep your farm as close to 25-27c/77-81f as possible.
- Keep on top of things when they get to the stage where they are reproducing quickly.
- Remember these are treats so give them to your flock sparingly. Too much of a good thing can lead to fatty liver disease.
- Mealworms are ideal for putting weight on birds; to promote feather growth after molting; and to entice sick or injured birds to eat.
Credits: Exotic Nutrition; Ontario Ministry of Agriculture; Science Direct; Wiki How.

Do you have any information on soldier fly larvae?
LikeLiked by 1 person
Not much, other than to say that my avian pathologist advised they contain saturated fats and contribute to fatty liver disease in small flock chickens. I know birds love them, but I’d give healthier treats.
LikeLike