In my search for cool coop designs I’ve focused not on the biggest or most well built, but those that express something about the folks that made them to house their flock. Sometimes that has meant using upcycled materials or fumbling along with no previous experience to create something they’re proud of.
As an experienced builder Ruben has put time, energy and thought into protecting his little flock from both the elements and the myriad of predators in Washington state.
You might not be a professional builder but there are a number of features he’s incorporated in his coop that we could all learn from.
I live in Gig Harbor, Washington. We currently have six chickens that are almost a year and a half old: five hens and one rooster. We also have two chicks that are a couple weeks old, plus seven more eggs in the incubator, with three scheduled to hatch in the next few days.
Breeds include Buff Orpington, Golden Laced Wyandotte and Turken. I would like to end up with more variety in the future.
I’ve been a contractor for a little over a decade but have specialized in framing/carpentry and siding for 26 years. I just had a coop design idea in my head and rolled with it, making it up as I went. I’m pretty good at winging it.
I did 90% of the work solo. There were a couple days we were slow at work that I had a couple of my guys come over and give me a hand to keep them busy.


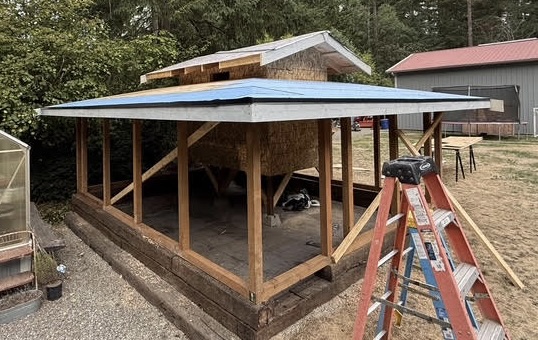
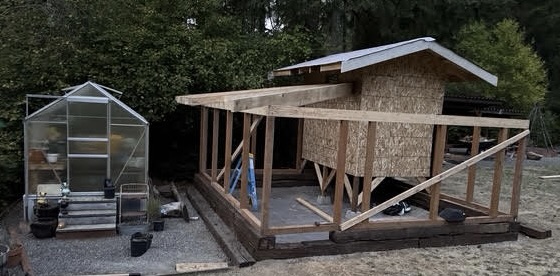
The build took a lot longer than I wanted. I framed it and dried it in back in the fall of 2025. Not much progress was made during the winter. It rains a lot here and I spent the weekends all winter-long up at the mountain snowboarding with my son. Finding time to work on it has been the biggest struggle.
Budget
I didn’t really have a budget in mind. A great deal of the framing and siding materials were surplus I already had. I did have to buy materials totalling $5k-$6k, which included stuff like sand in the run, landscaping around the perimeter as well as all the luxury items.
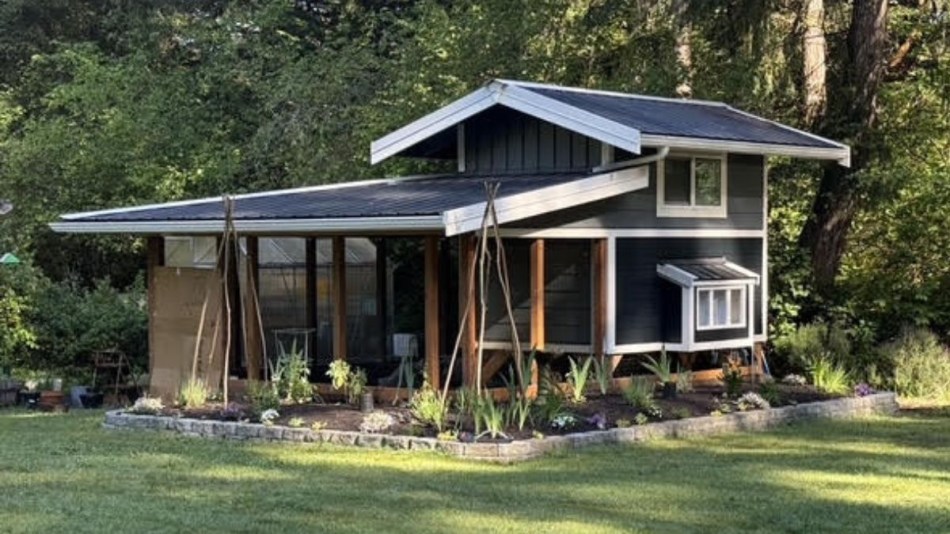
Dimensions
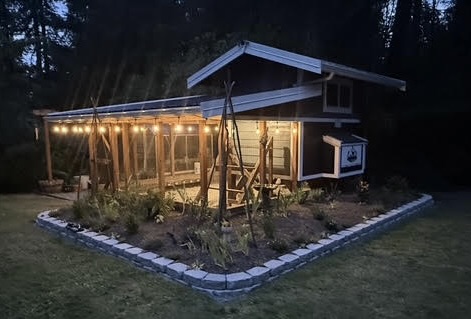
The full footprint is approximately 15’ x 16’. The coop is 6’x10’ and elevated 2’ off the ground to give them an additional 60 square feet of space in the run. It also contributes to keeping predators out and materials away from ground contact to prevent decay.
Features
I wanted to make it as self-contained as possible. We are in a rural area and deal with a lot of predators, from coyotes and raccoon to hawks and eagles. Letting them free-range isn’t a great option. We have lost most of our birds in the past due to predators. I also wanted to make it as convenient as possible for my neighbour who takes care of them when we travel.
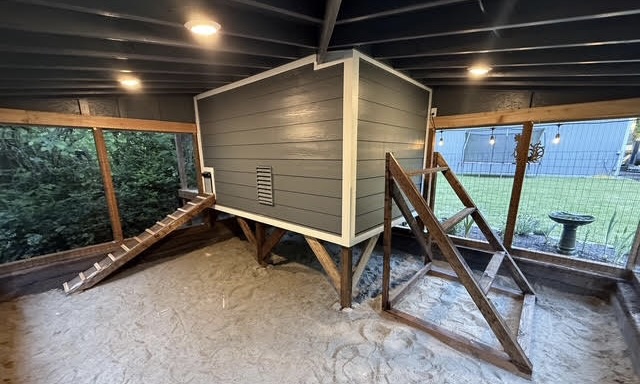
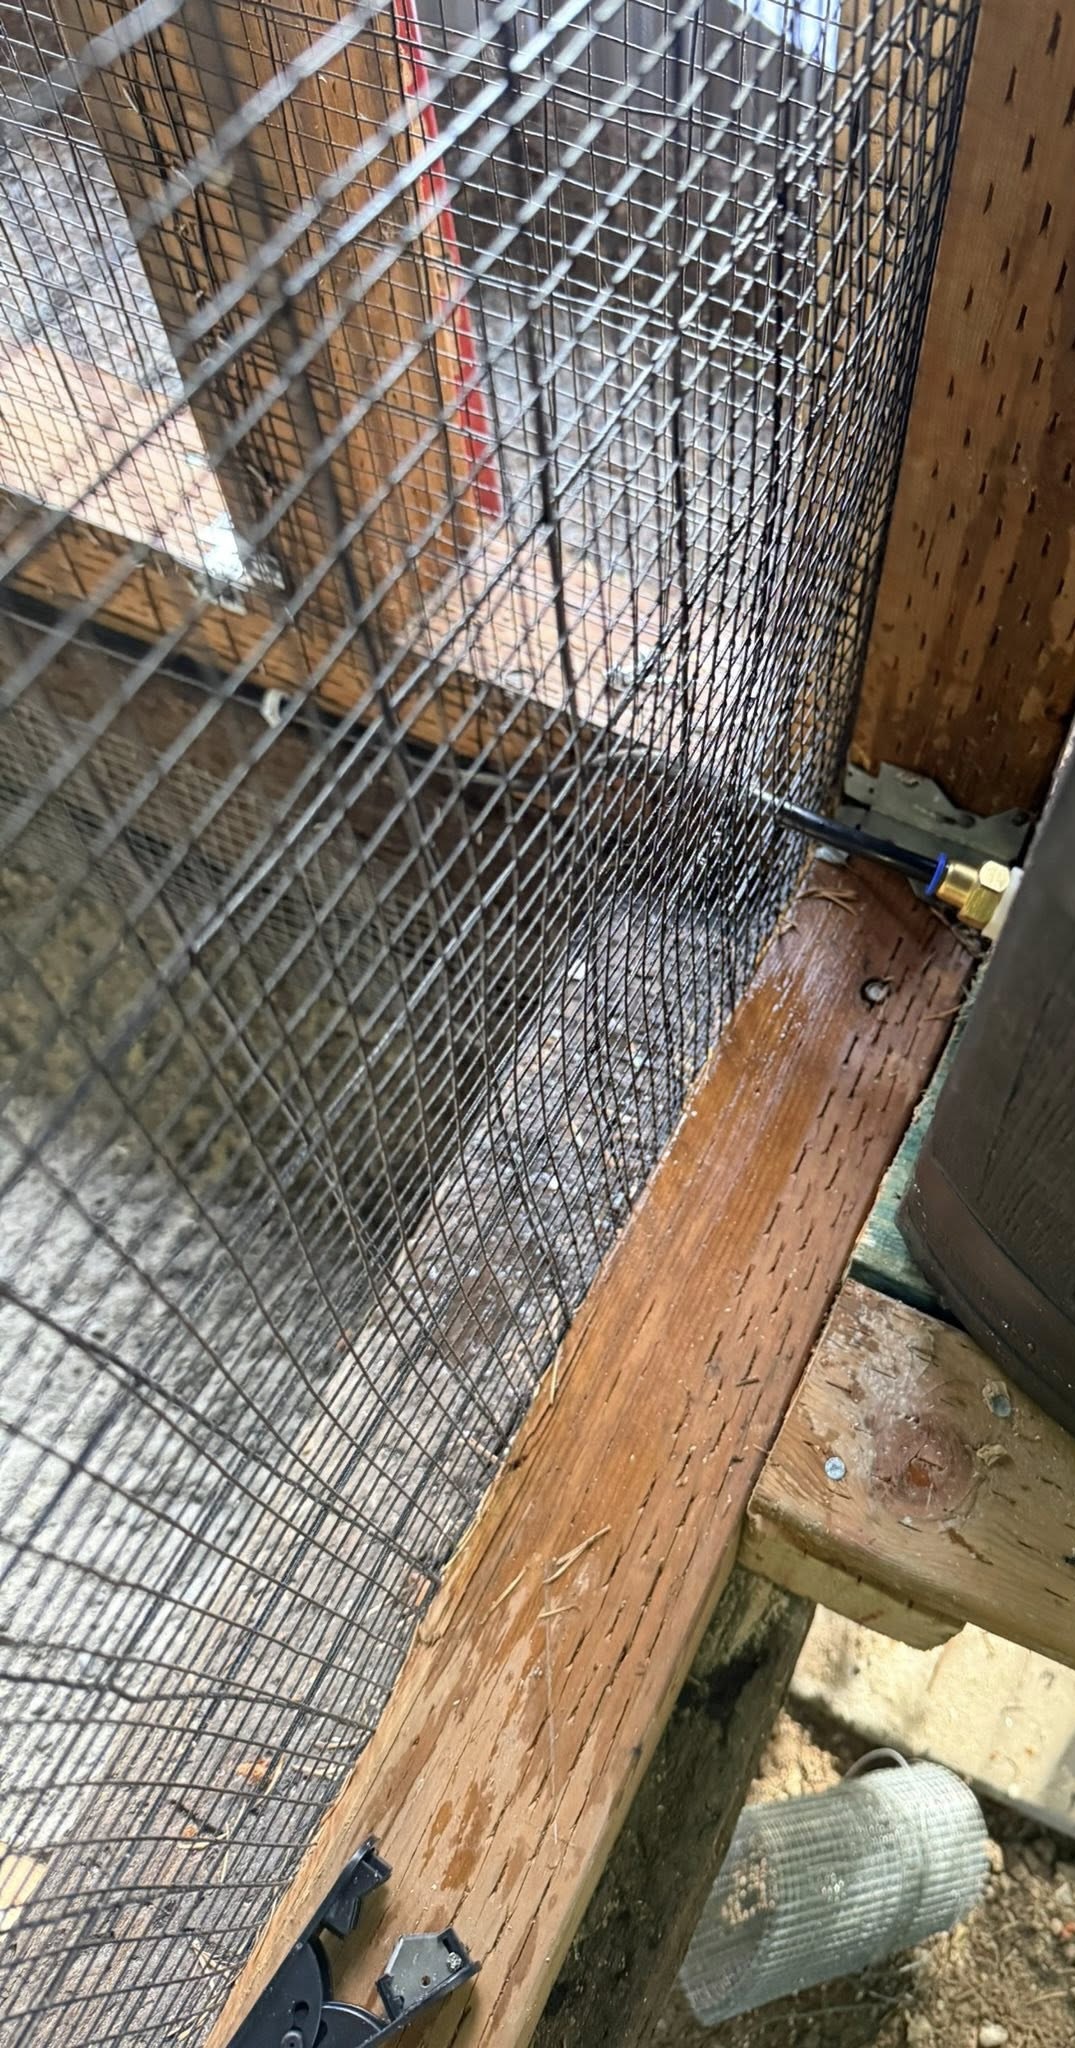
- Floor of the run is completely lined with 1/2” hardware cloth so predators and rodents cannot tunnel into the run
- The walls are also lined with 1/2” hardware cloth then 4’ of 2”x4” fencing. We had chickenwire on the old coop and coyotes ate through it. I used black-coated wire to make it less visible. There isn’t more than a 1/2” penetration anywhere on the entire coop. It’s virtually protected from entry by any predators or rodents.
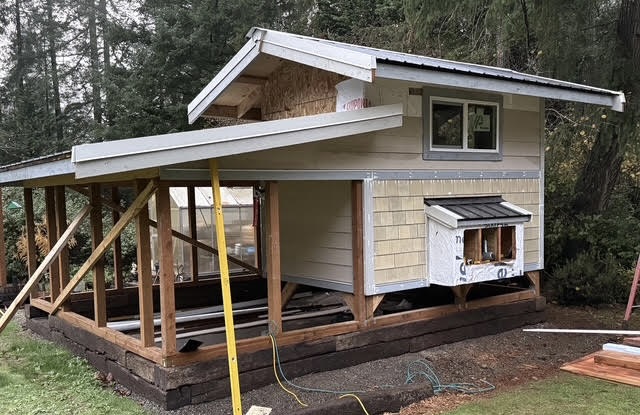
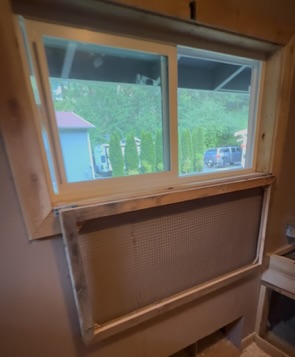
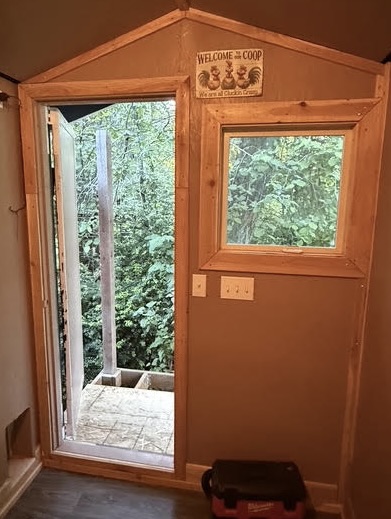
- The coop is fully insulated with lower and upper cross ventilation along with a 2’x2’ fixed window and 4’x2’ opening sliding window. I have a hardware cloth screened frame that secures the window when left open.

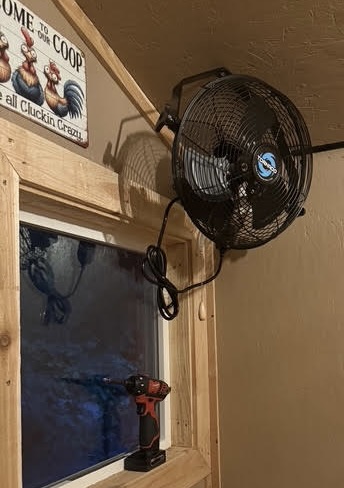
- Ceiling hung fan that will help keep the air moving for those hot summer days
- I ran a dedicated electrical circuit with a couple of outlets on both the inside and outside of the coop. I ran one switched outlet for the cafe lighting that hangs from the roof eaves on the run or for Christmas lights. There are also three overhead lights inside the run. This is nice for me for cleaning the pen after the girls are in for the night.
- Automatic coop door on a timer that is hooked up to WiFi so I can get notifications through an app on my phone. It features a camera as well as an alarm that triggers if it sees movement when the door is shut at night. There is limited sight with the direction it’s facing so I installed an additional camera in the run that is on my home surveillance network set up to see almost the entire area. Camera inside the coop itself.
- Ramp going up to two runs of roosting bars over a poop shelf for easy clean up. Under the poop shelf is a separate area that can be used to isolate chickens or slowly integrate new chickens.
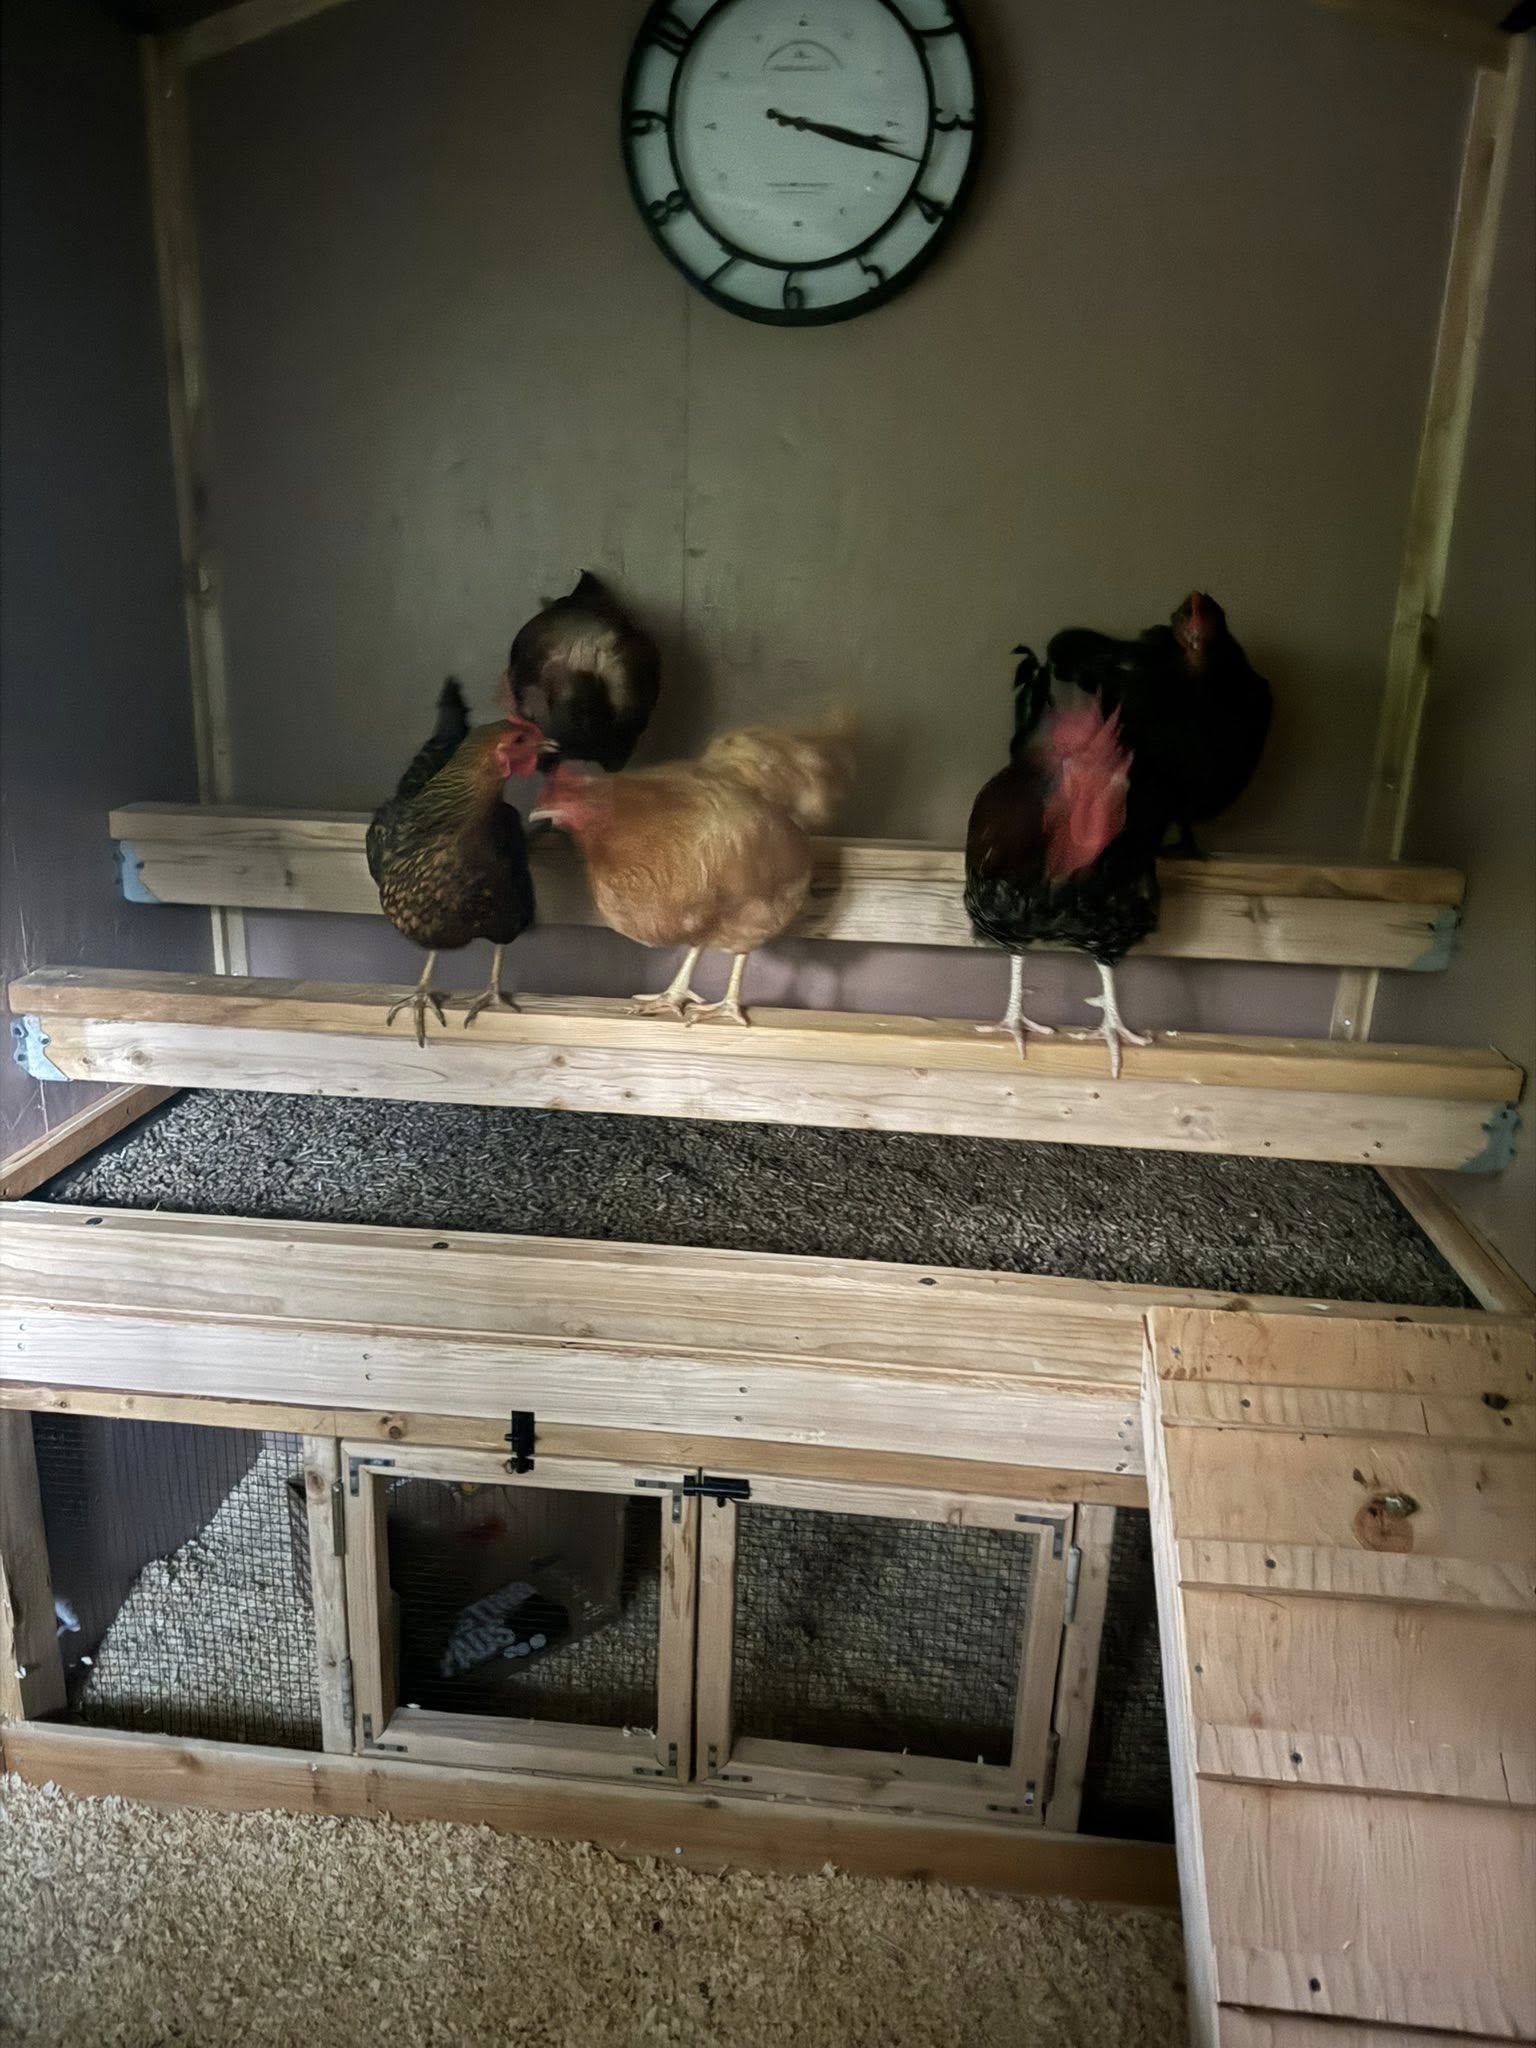

- Floor level nesting boxes are integrated into the exterior wall with an access door from the outside for the ease of collecting eggs and cleaning.
- Floor is covered with linoleum for easy clean up.
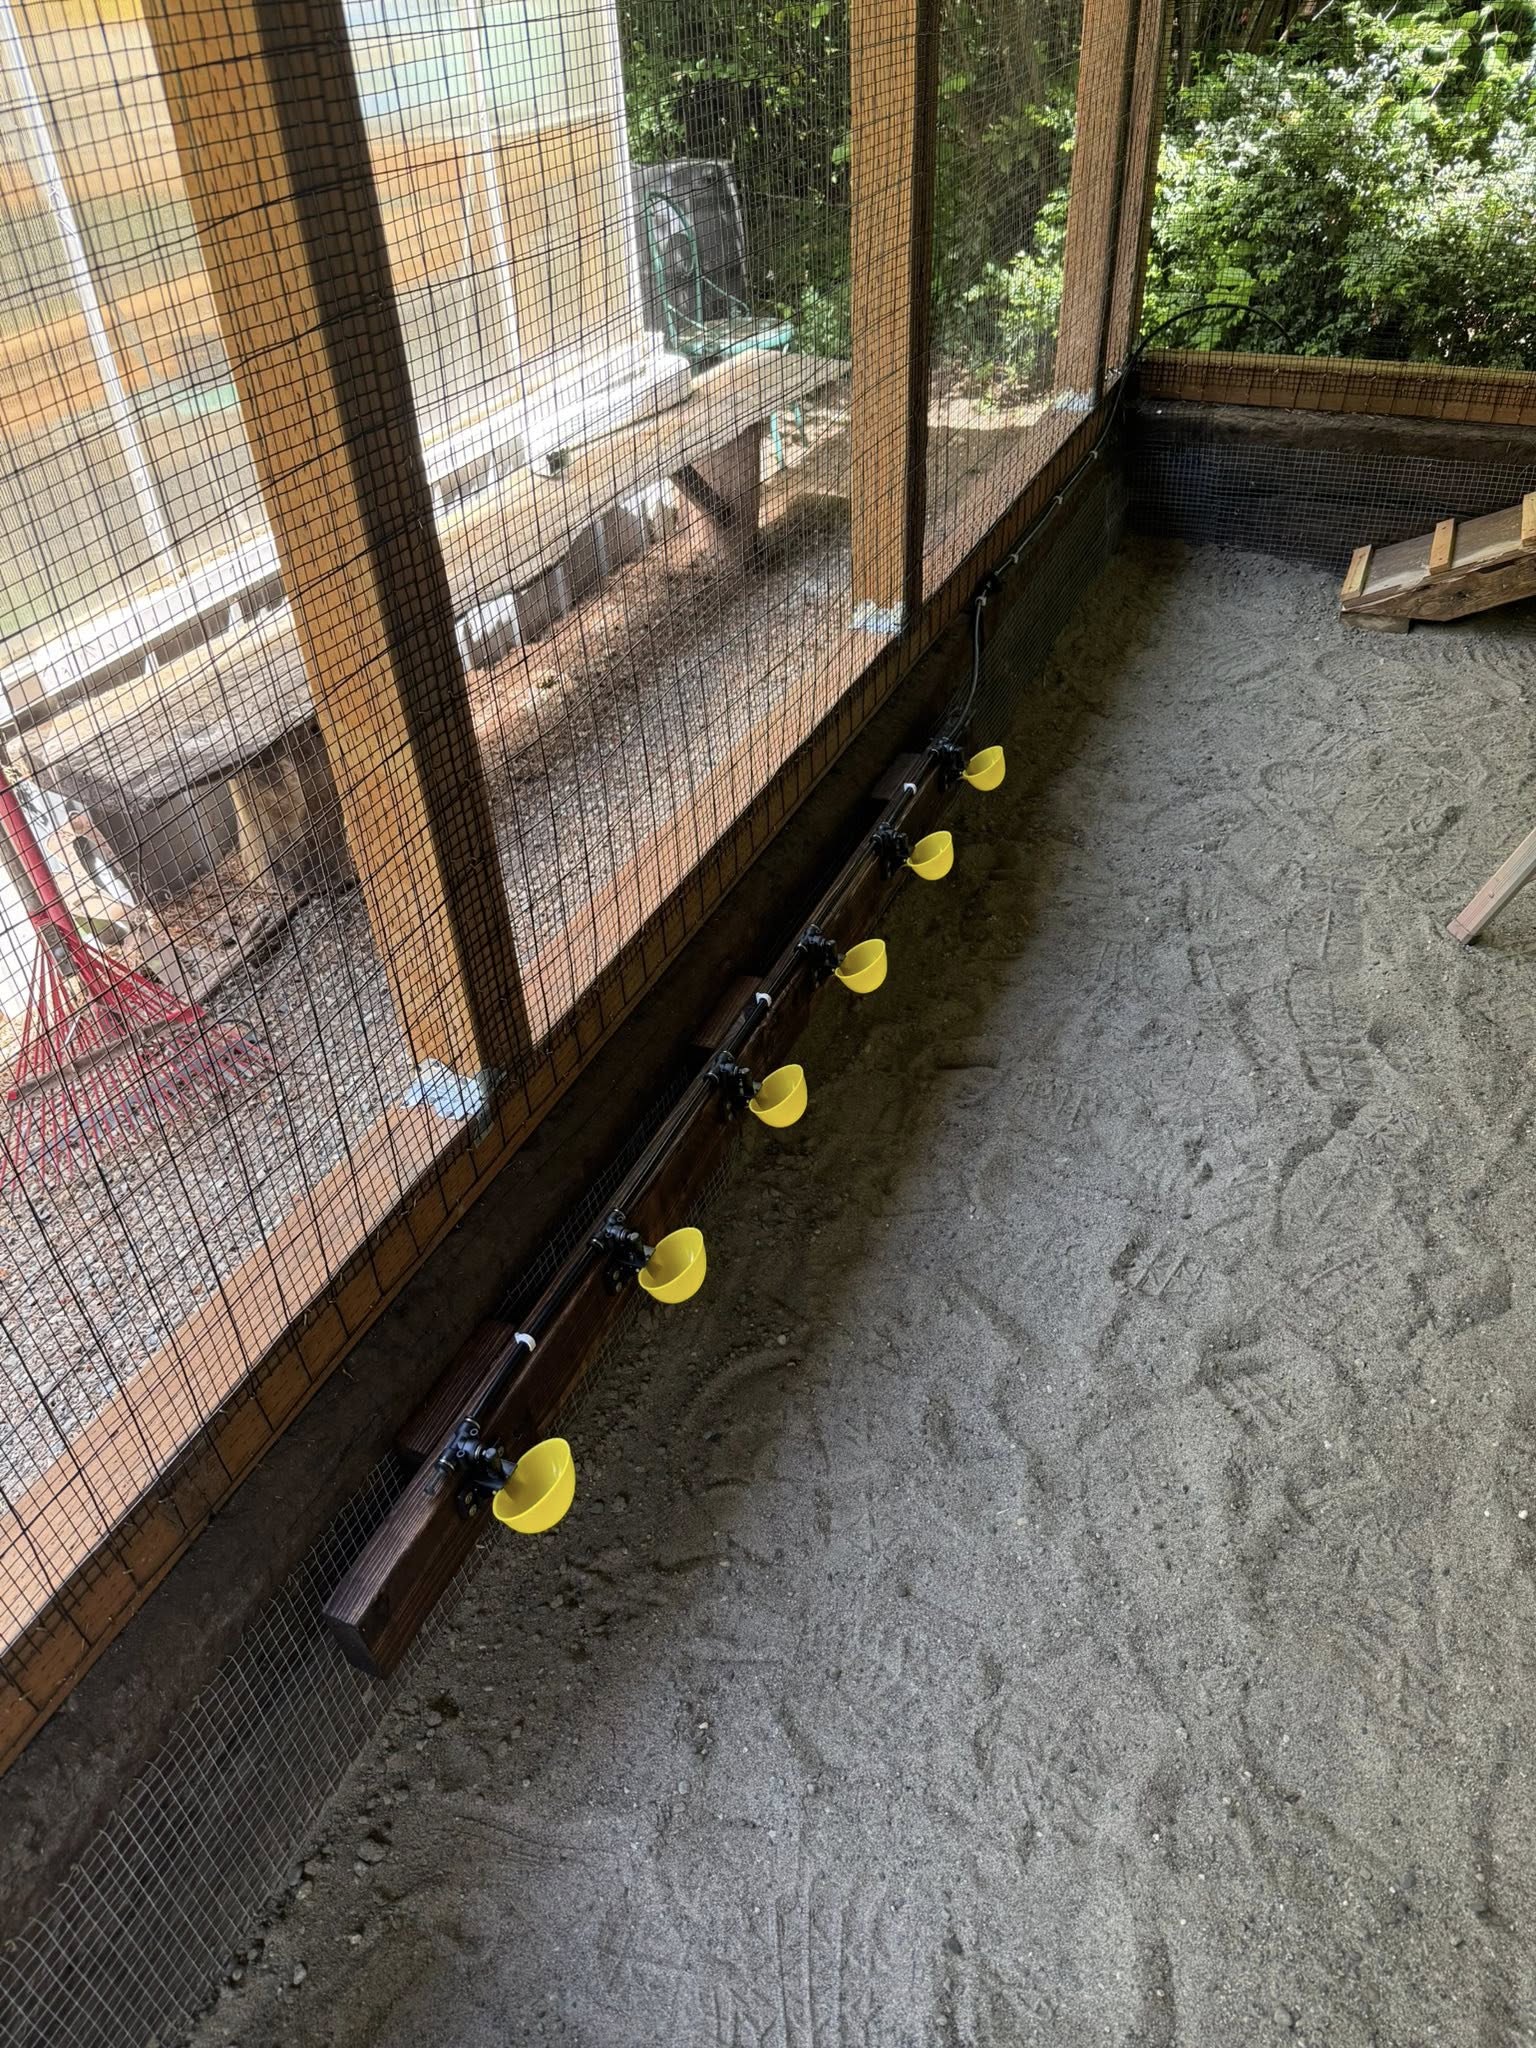
- Watering system consists of six watering cups that are plumbed into a rain barrel. All of the rainwater that runs off the roof is diverted to one downspout feeding the 55 gallon barrel that feeds the cups, which drop down with the weight of the water so they always remain full. As the birds drink from the cups they automatically refill. The barrel can be filled from the hose during the dry months.

- Feeder cup mounted in a 5 gallon bucket suspended off of the ground. I’ve had my best success with this style feeder as they have to stick their head into the cup to access feed which prevents them from dumping so much feed on to the ground. I have used open tray feeders in the past and there was always so much waste.
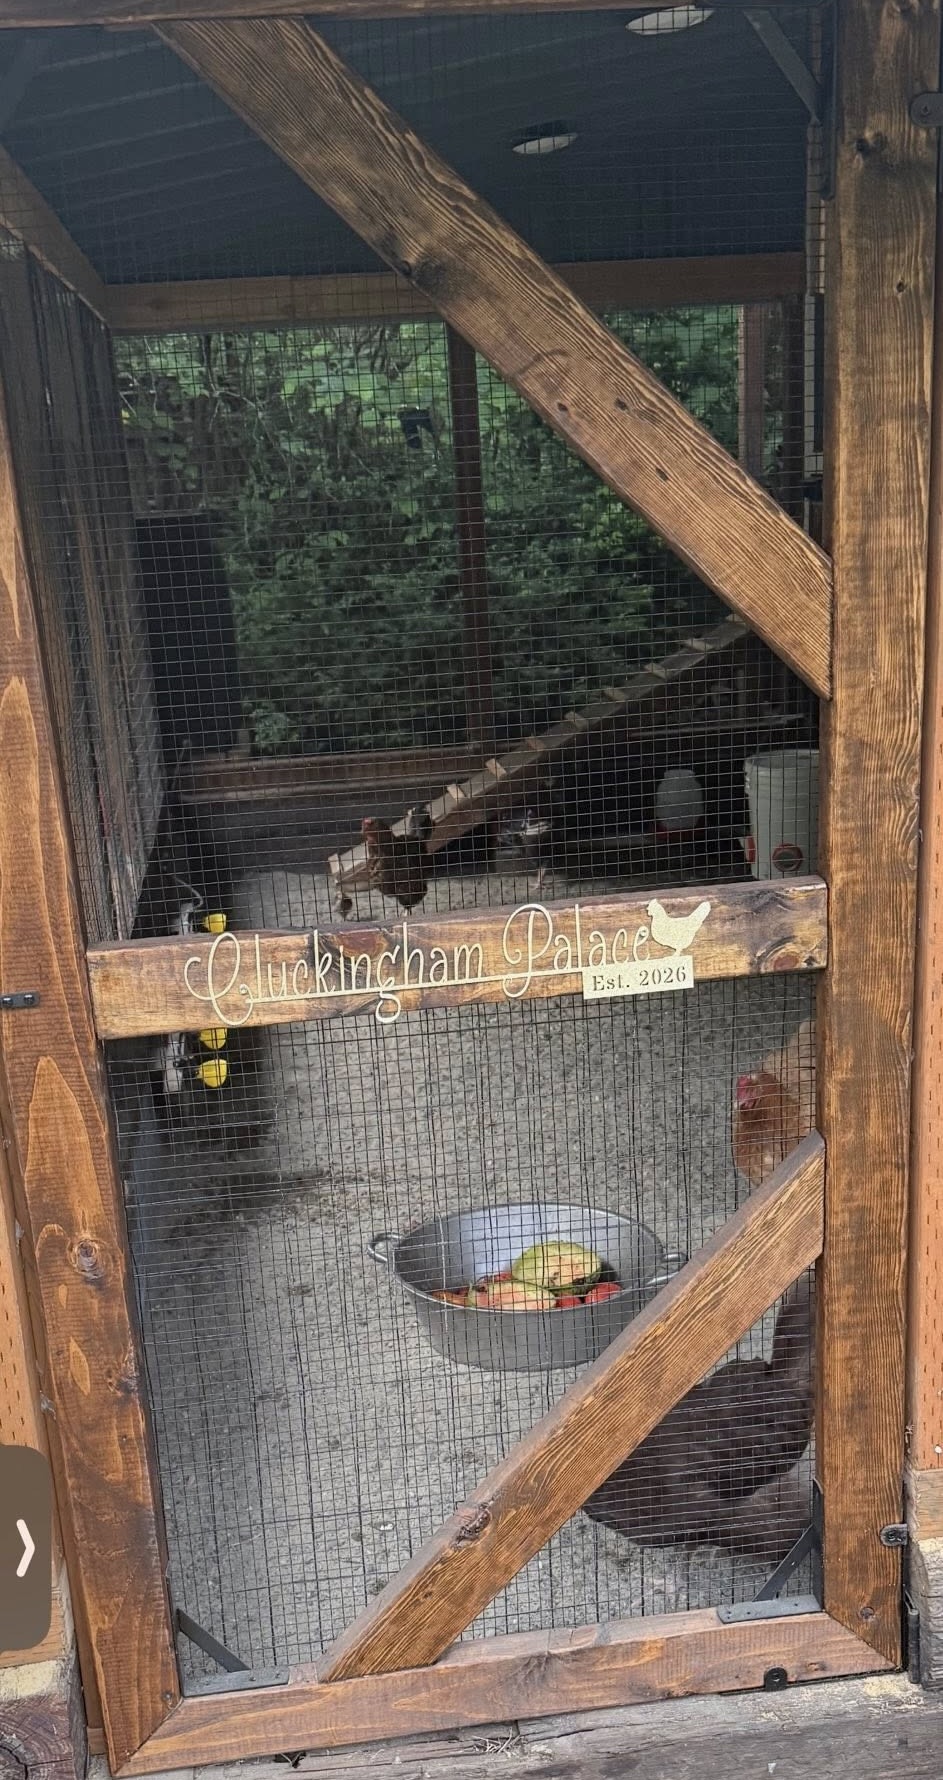
Our neighbour is a crazy chicken person as well. She brought this signage over this evening she had made for me. Nice gesture. She takes care of the birds when we are gone. When building this coop I made sure to set it up as efficient as I could so that they would need minimal attention. My kids were a little jealous that I devoted so much time into a project for some chickens.
Plans for the future
I may add an exhaust fan that works on a thermostat which would pull hot air out of the coop. I’m hoping because it’s insulated with adequate ventilation that won’t be necessary.
Thanks to Ruben for sharing his coop build and photos, used with permission.
“Science-based chicken keeping with a splash of sass”

Wowser!!!!!!!
LikeLike
Nicest coop around for sure!
LikeLike
amazing…. 🤩 Spoiled chickens gotta be loving it 💖
LikeLike