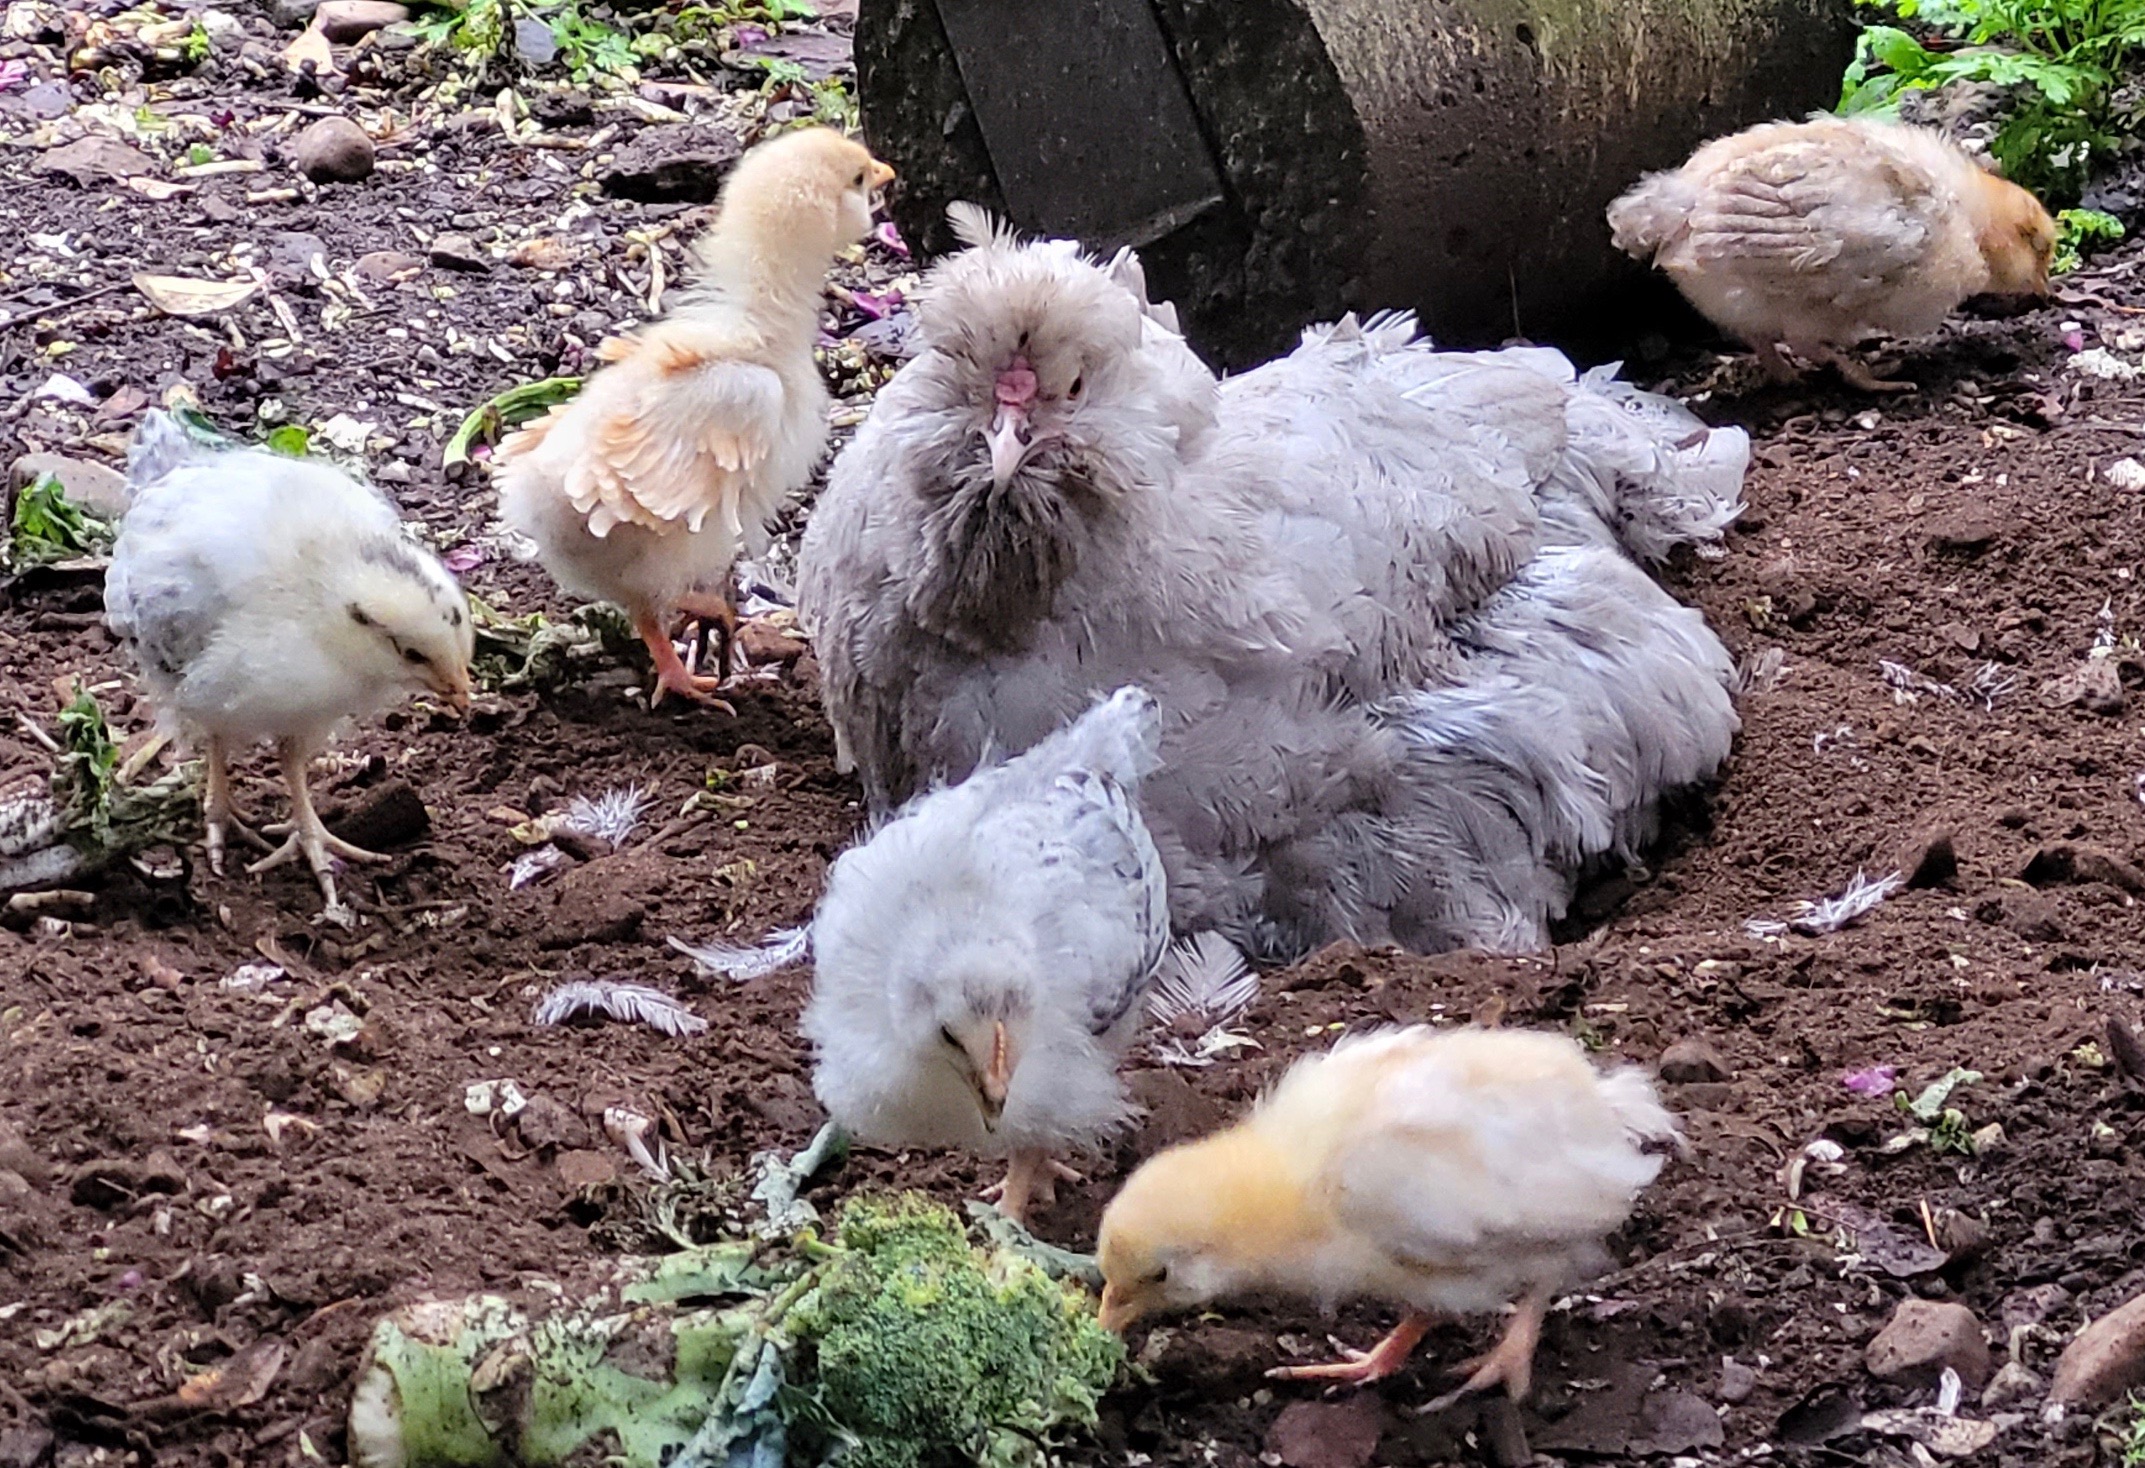
Chicken Math, the desire for more birds than is perhaps practical, is an insidious thing. Last year, two of my hens hatched ten chicks between them and unfortunately eight turned out to be cockerels. Both of the pullets were blue egg layers which was great, but I wanted more frizzles.
I had five hens go broody and hatch chicks earlier this season. One Spot led the charge, and then some three months later appeared to want a second batch of littles. I waffled a bit as I already had a bunch of chicks, but I was crossing my fingers for a frizzled hen and so far only had one frizzled chick hatch (who was unsexed at that point). I let the itch for more babies get the better of me and set about sourcing fertilized eggs.
Lesson #1: Where’s A Rooster When You Need One?
I was roosterless for the first time in years, having just rehomed Hank. As beautiful as he is, Hank was also a bit too big for a few of my hens, especially my frizzles, who had experienced some feather loss as a consequence of mating with him. They seemed frazzled by his attention so he went off to Romela’s where he’d have a flock of his own girls on seven acres.


I contacted a few chicken friends as well as posted on my local community Facebook bulletin board asking for eggs.
My friend Laurie who has a frizzled rooster offered me whatever eggs were laid the next day. The odds were good that if I incubated her hens’ eggs I would end up with at least a frizzled chick or two. It turned out her hens were either broody themselves or not laying so my options were limited. I picked up three eggs, one blue and two cream, and hoped for the best.
Lesson #2: If It Ain’t Broke, Don’t Fix It
I have a particular routine with broody hens that hasn’t let me down. I let them go broody in the coop nest box and after a couple of days move them after dark to a dog crate. I slide the eggs I want to hatch under them and cover the openings in the crate with a towel to keep it darkened for the first 24 hours. I use wood shavings in the bottom of the crate and let the hens make their own nest. I had been given some complementary My Favourite Chicken nest box pads and wanted to try them out.
I slid one into the crate, putting the eggs and hen on top. I don’t know what possessed me but I didn’t put the towel over the opening. The next morning I came out to a hen that had found her way out of the crate (first time I didn’t close it properly) and the three eggs out on the concrete floor of my coop. Damn! I realized that the nest pad was quite firm and she hadn’t made an indention so the eggs rolled out when she escaped.
Lesson #3: When It Rains It Pours
Now I was worried that the three precious frizzled eggs I managed to scrounge might have been damaged. I swung by friends Thomas and Elizabeth’s and picked up five large barnyard mix eggs. My rationale for more eggs: I didn’t want One Spot to sit for three weeks only to end up with a bad hatch.
I waited till dark, put her back in the crate with the eight eggs and covered the crate for the night. By the next day she was sitting and committed.
By then, I wanted to improve my frizzle odds so I dropped by Laurie’s place and picked up the only egg laid that day. I marked it and added it to the bunch. Then, someone who responded to my Facebook post offered me three of hers.
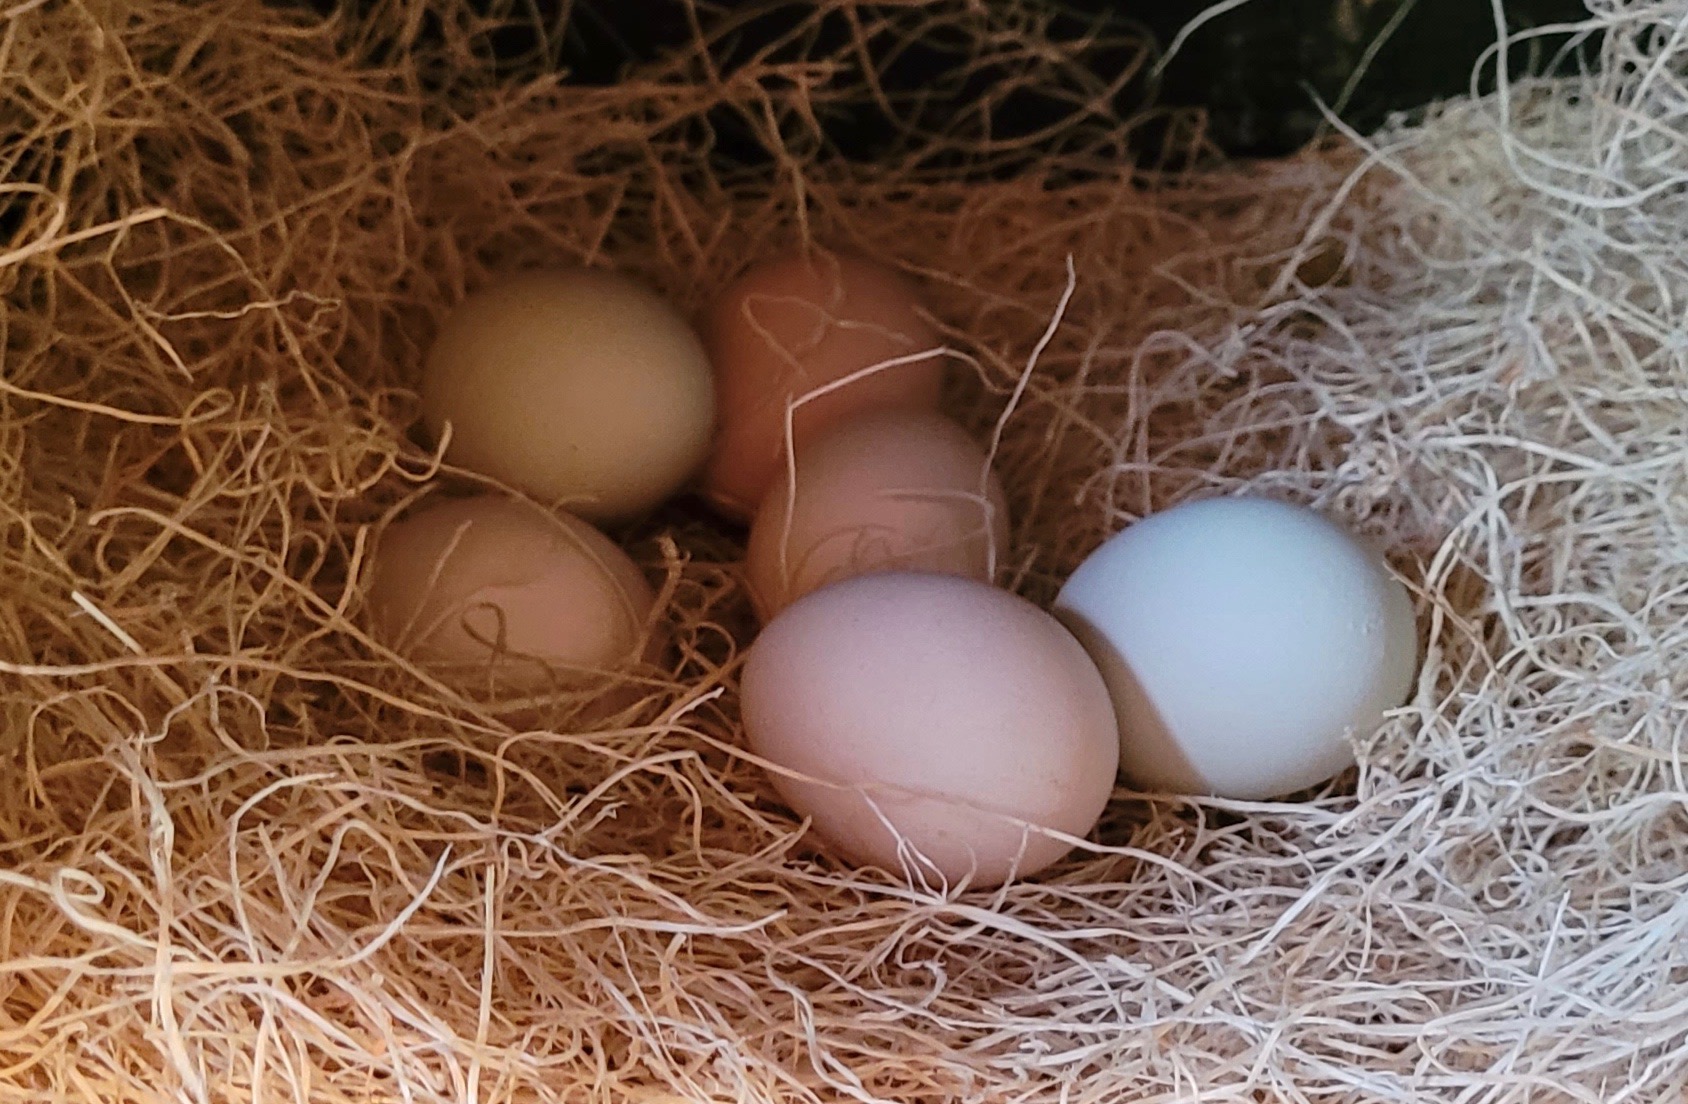
Hens lay the eggs they want to incubate over a period of days and when they have enough – often a dozen – they sit. That way all the eggs will have started, and hopefully hatch, at the same time.
I have often added more eggs the day after starting a hen but this time I really pushed it and in more ways than one. I went by Laurie’s one more time and picked up the single egg hatched that day. I know it sounds crazy, but I ended up with 13 eggs. Laurie’s five were quite small but the rest were large for my slender hen and I worried she wouldn’t be able to consistently cover all of them which could result in premature deaths or late hatches. That decision came back to bite me later.
Lesson #4: Candling Eggs
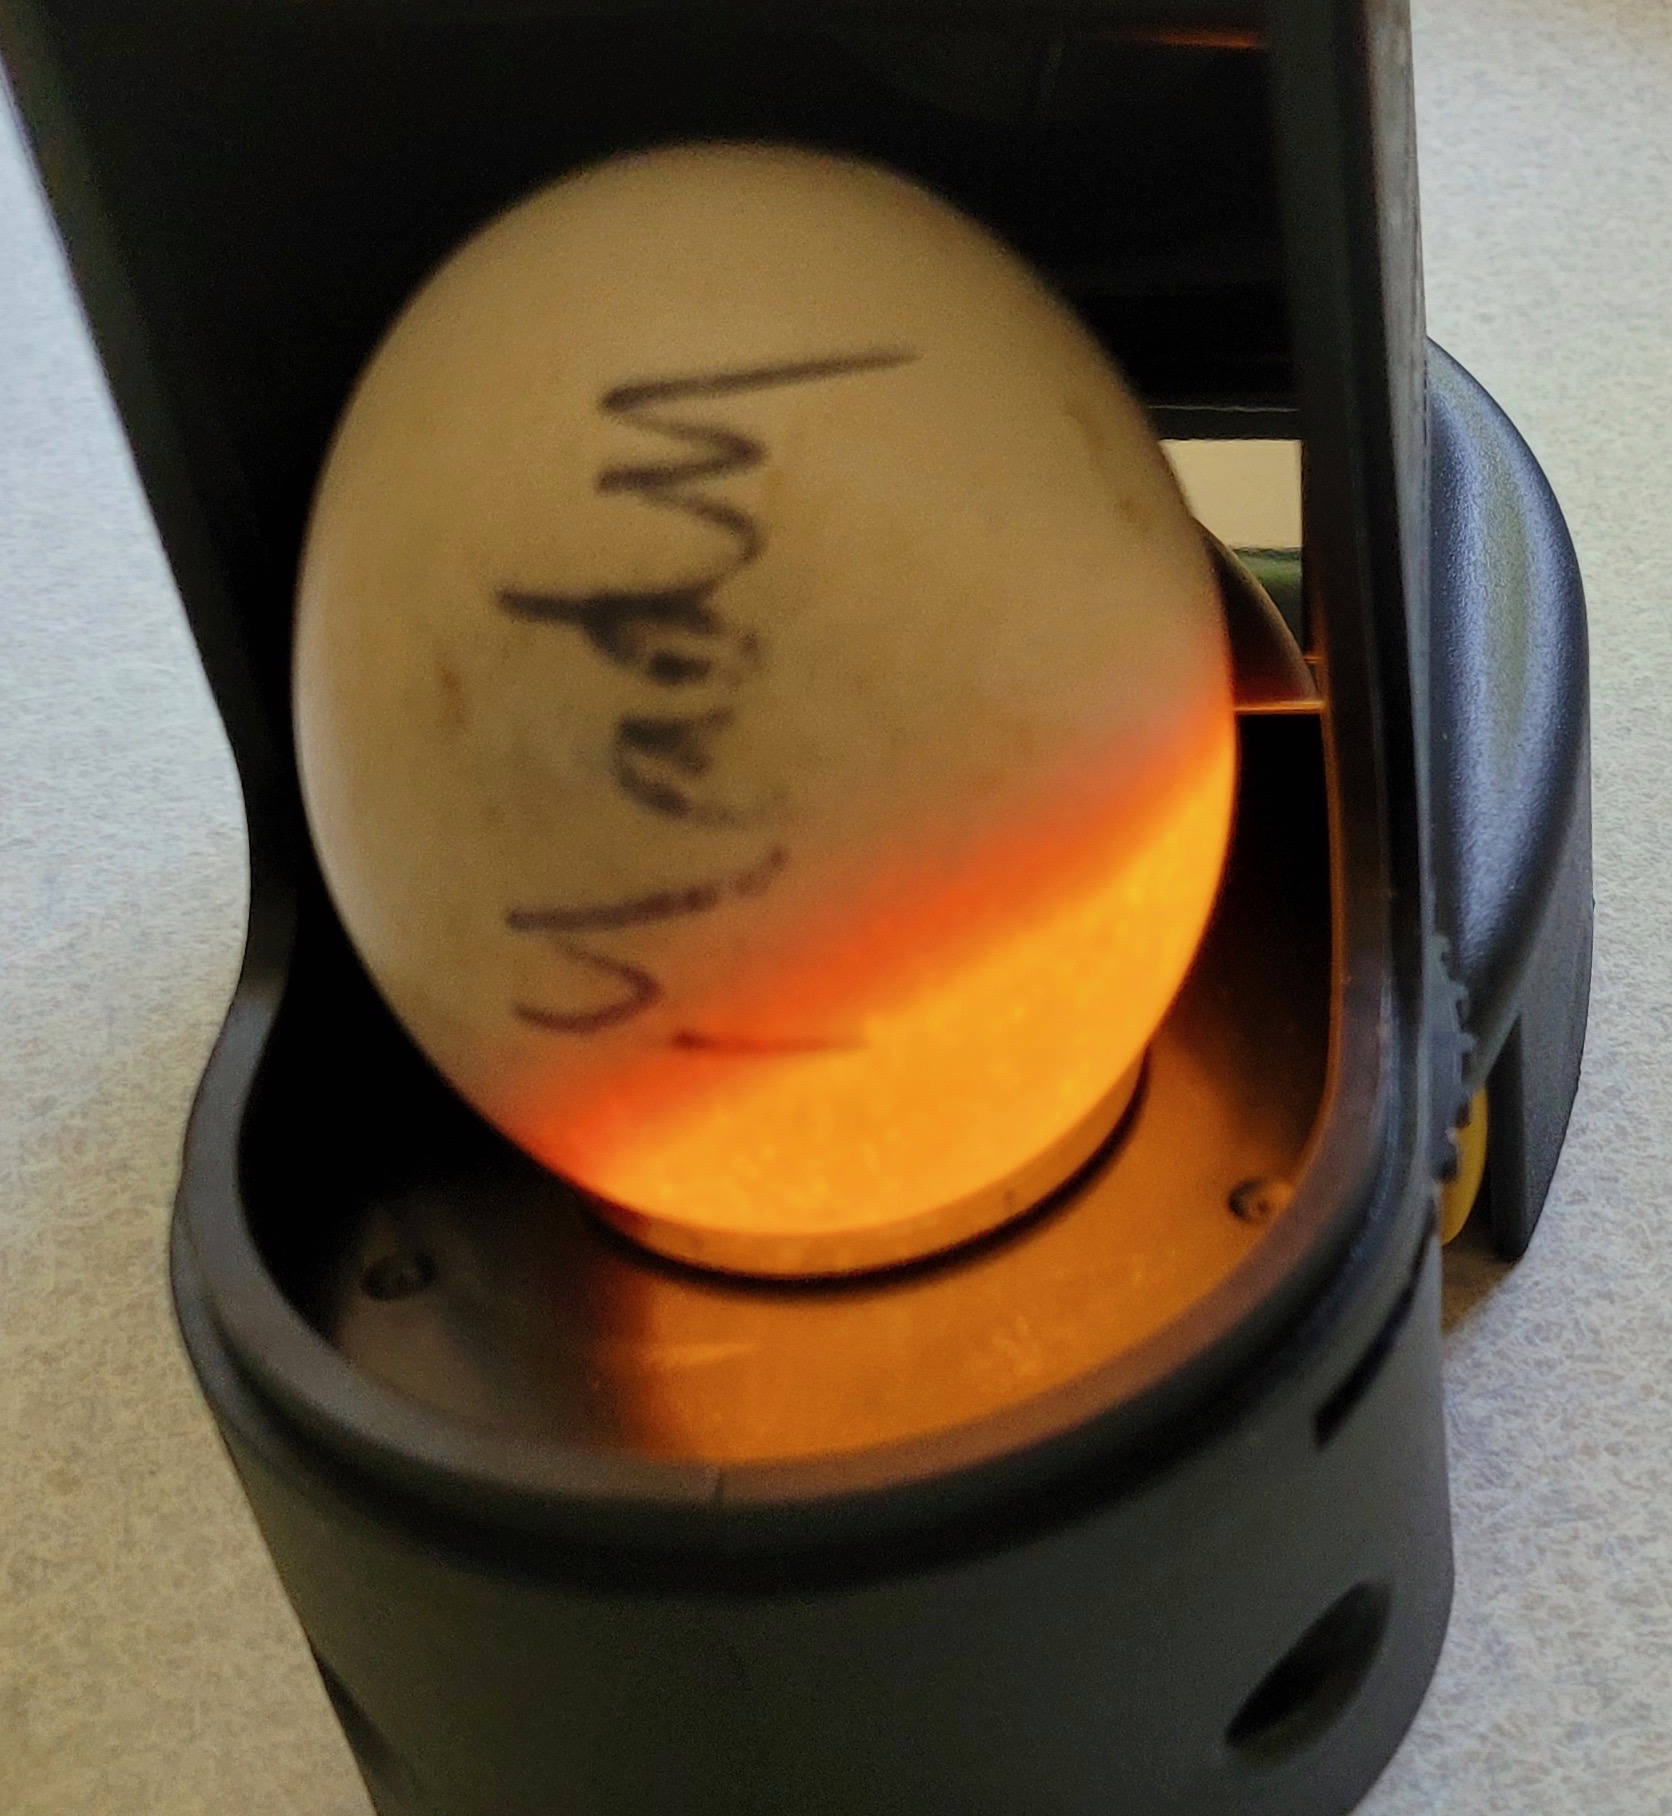
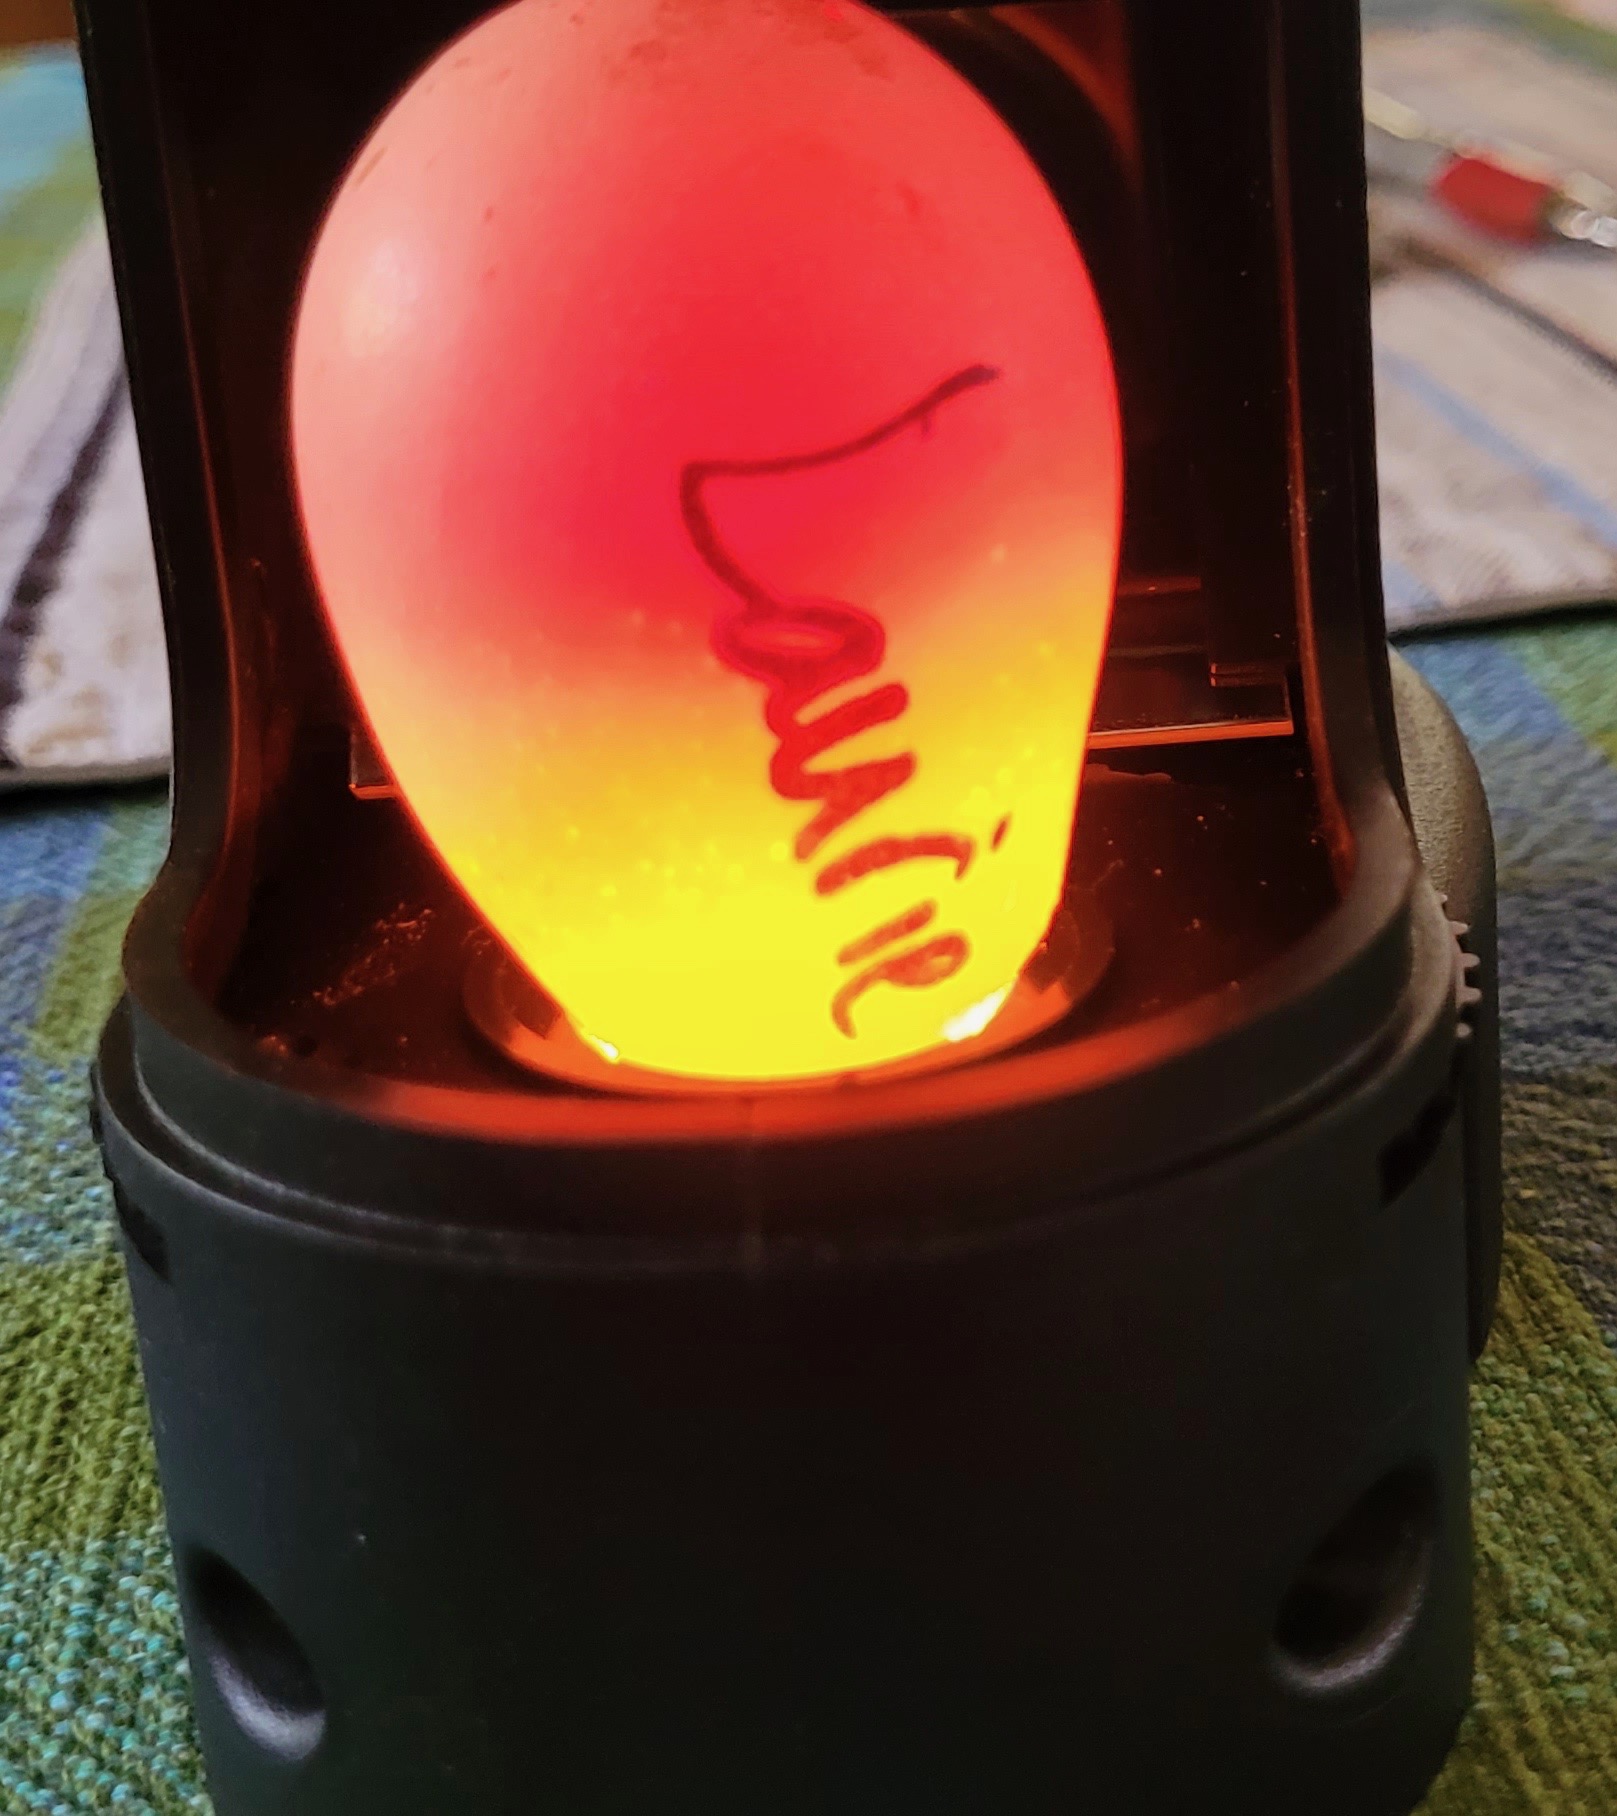
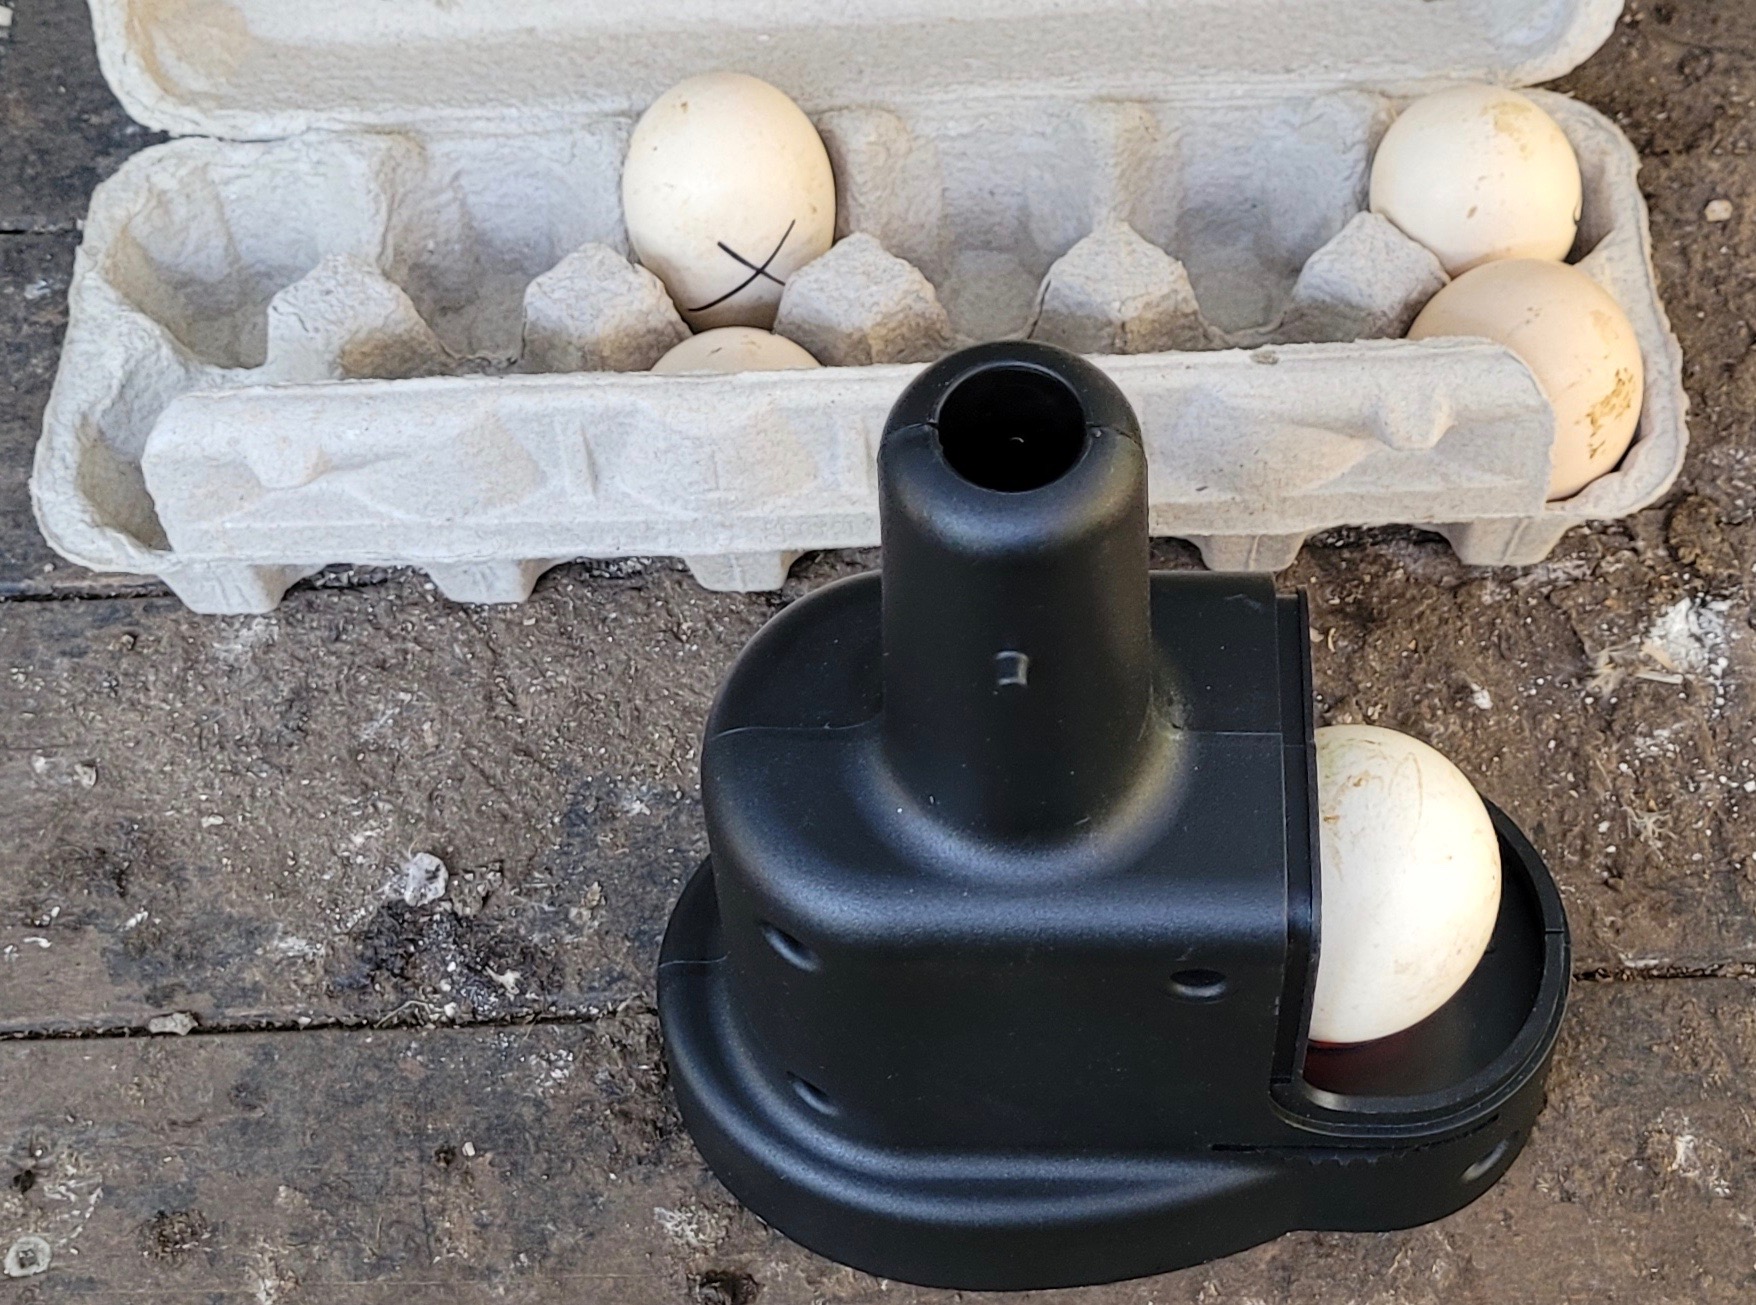
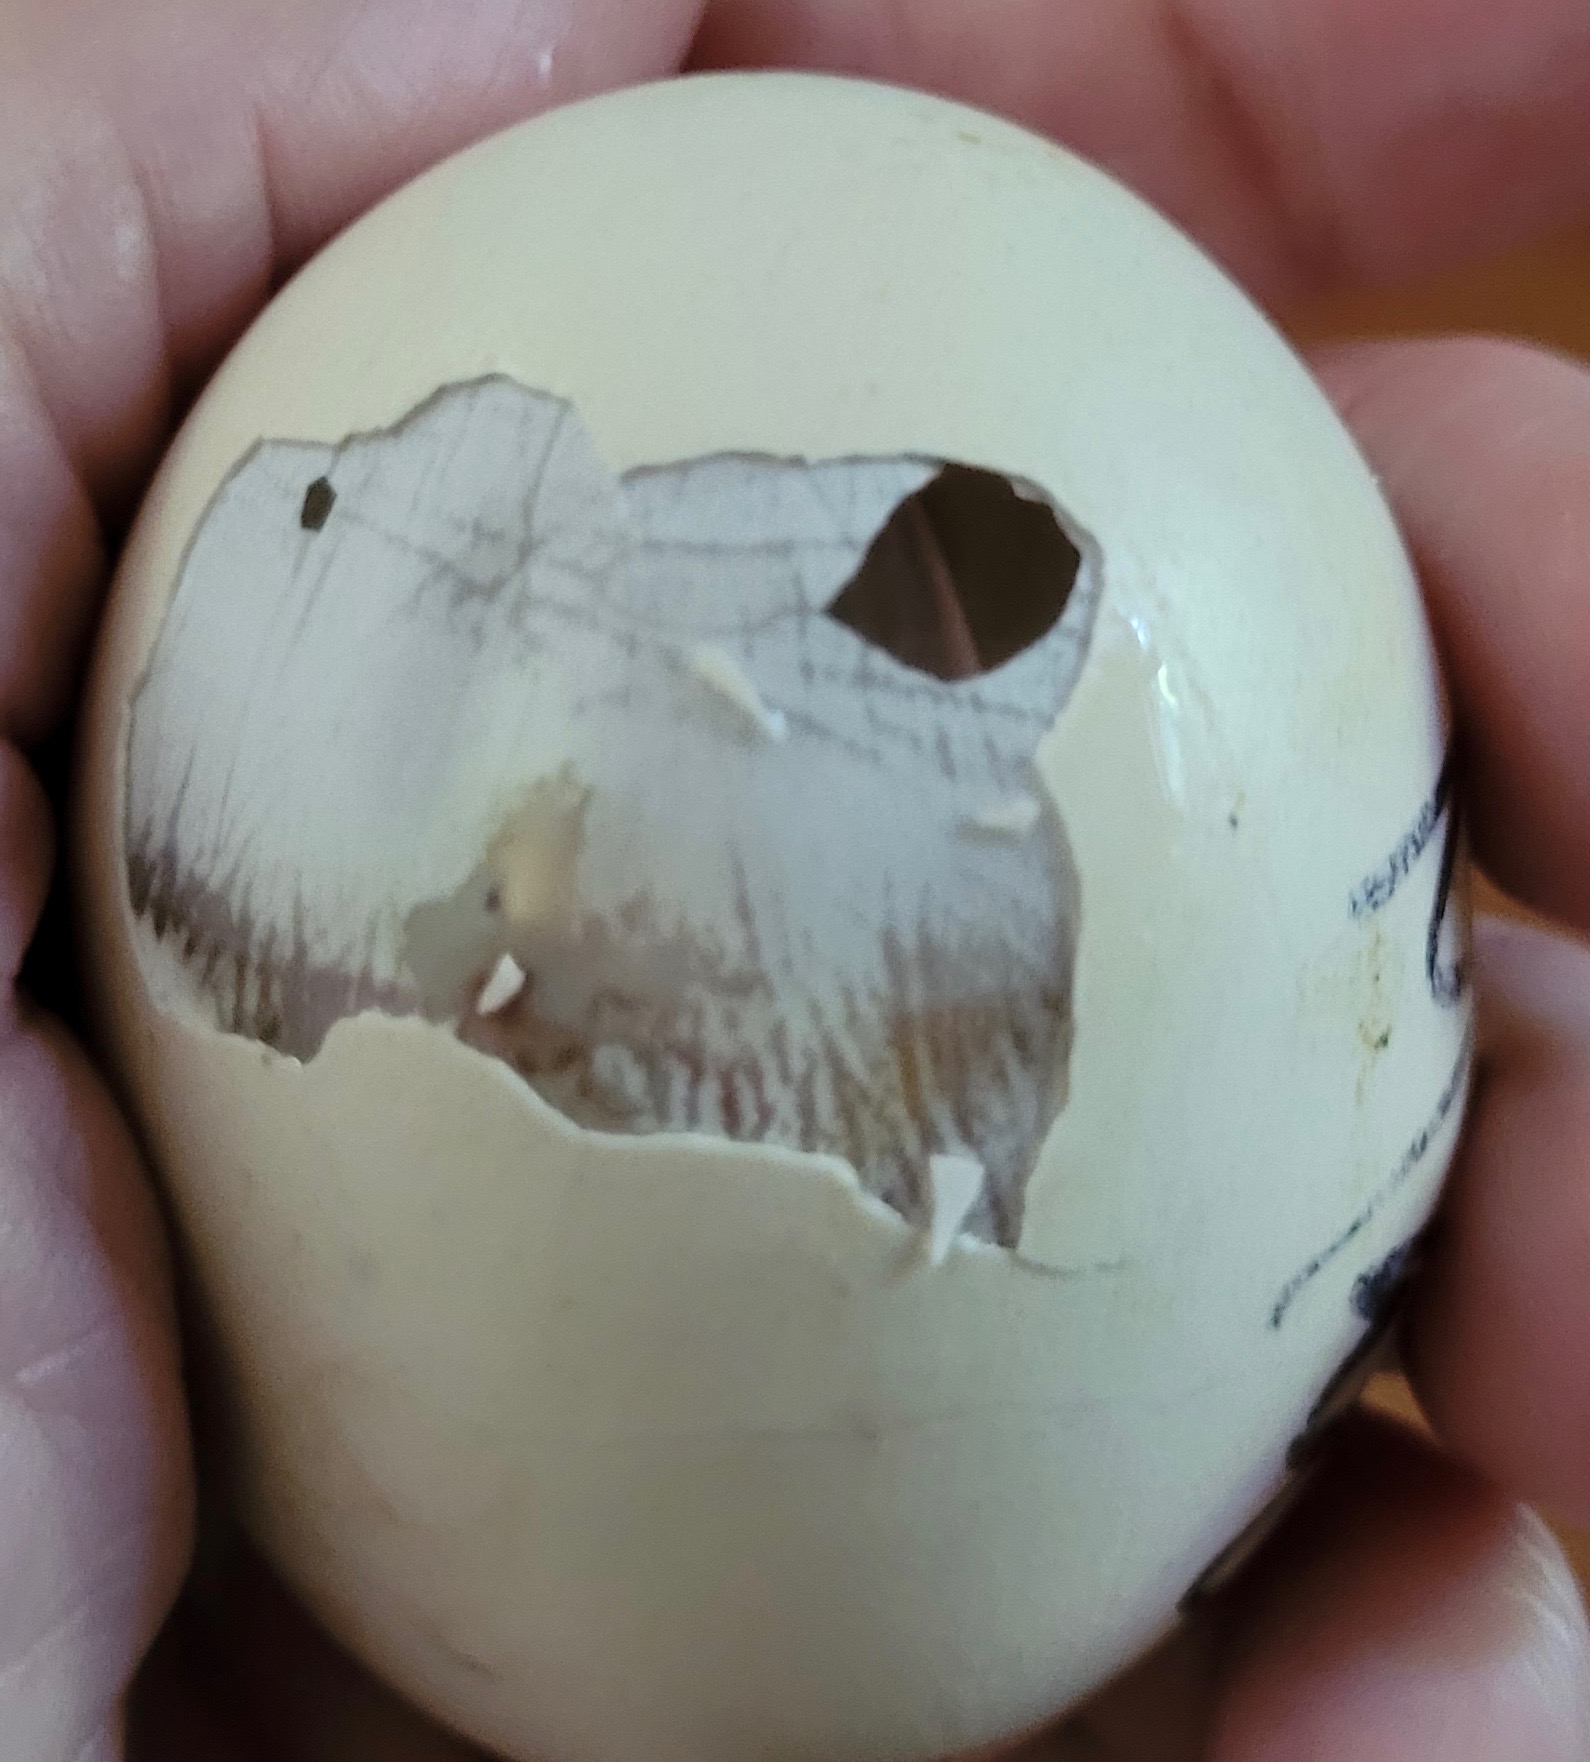
Candling is the practice of shining a bright light into an egg to determine if an embryo is developing or not. It sounds easier than it is (e.g. dark eggshells can be hard to see through). The ideal time to candle incubating eggs is between days 8-17. On day 13, I took my new Brinsea egg candler out to the coop after dark. I’ve read lots of posts in online chicken groups in which someone has inadvertently dropped or damaged an egg while candling. I did so with the utmost care with mixed results. The following day I tried again at midday. Even though this candler has a darkened chamber I found the light reflected off the mirror inside made it difficult to see properly.

Two days later, I tried again. This time I saw some clear eggs (duds) and some that looked like there was a mass inside but nothing was moving (like I’ve seen in videos). I wasn’t confident removing the non-viable eggs, but in hindsight that might have made incubating the last ones easier for One Spot.
On the morning of day 19 I found her perched on the roost bar and restless. I crossed my fingers she wasn’t going to throw in the towel and abandon the eggs so close to hatch day. No worries – she went back to the eggs and stayed there without getting off the nest for the next two days.
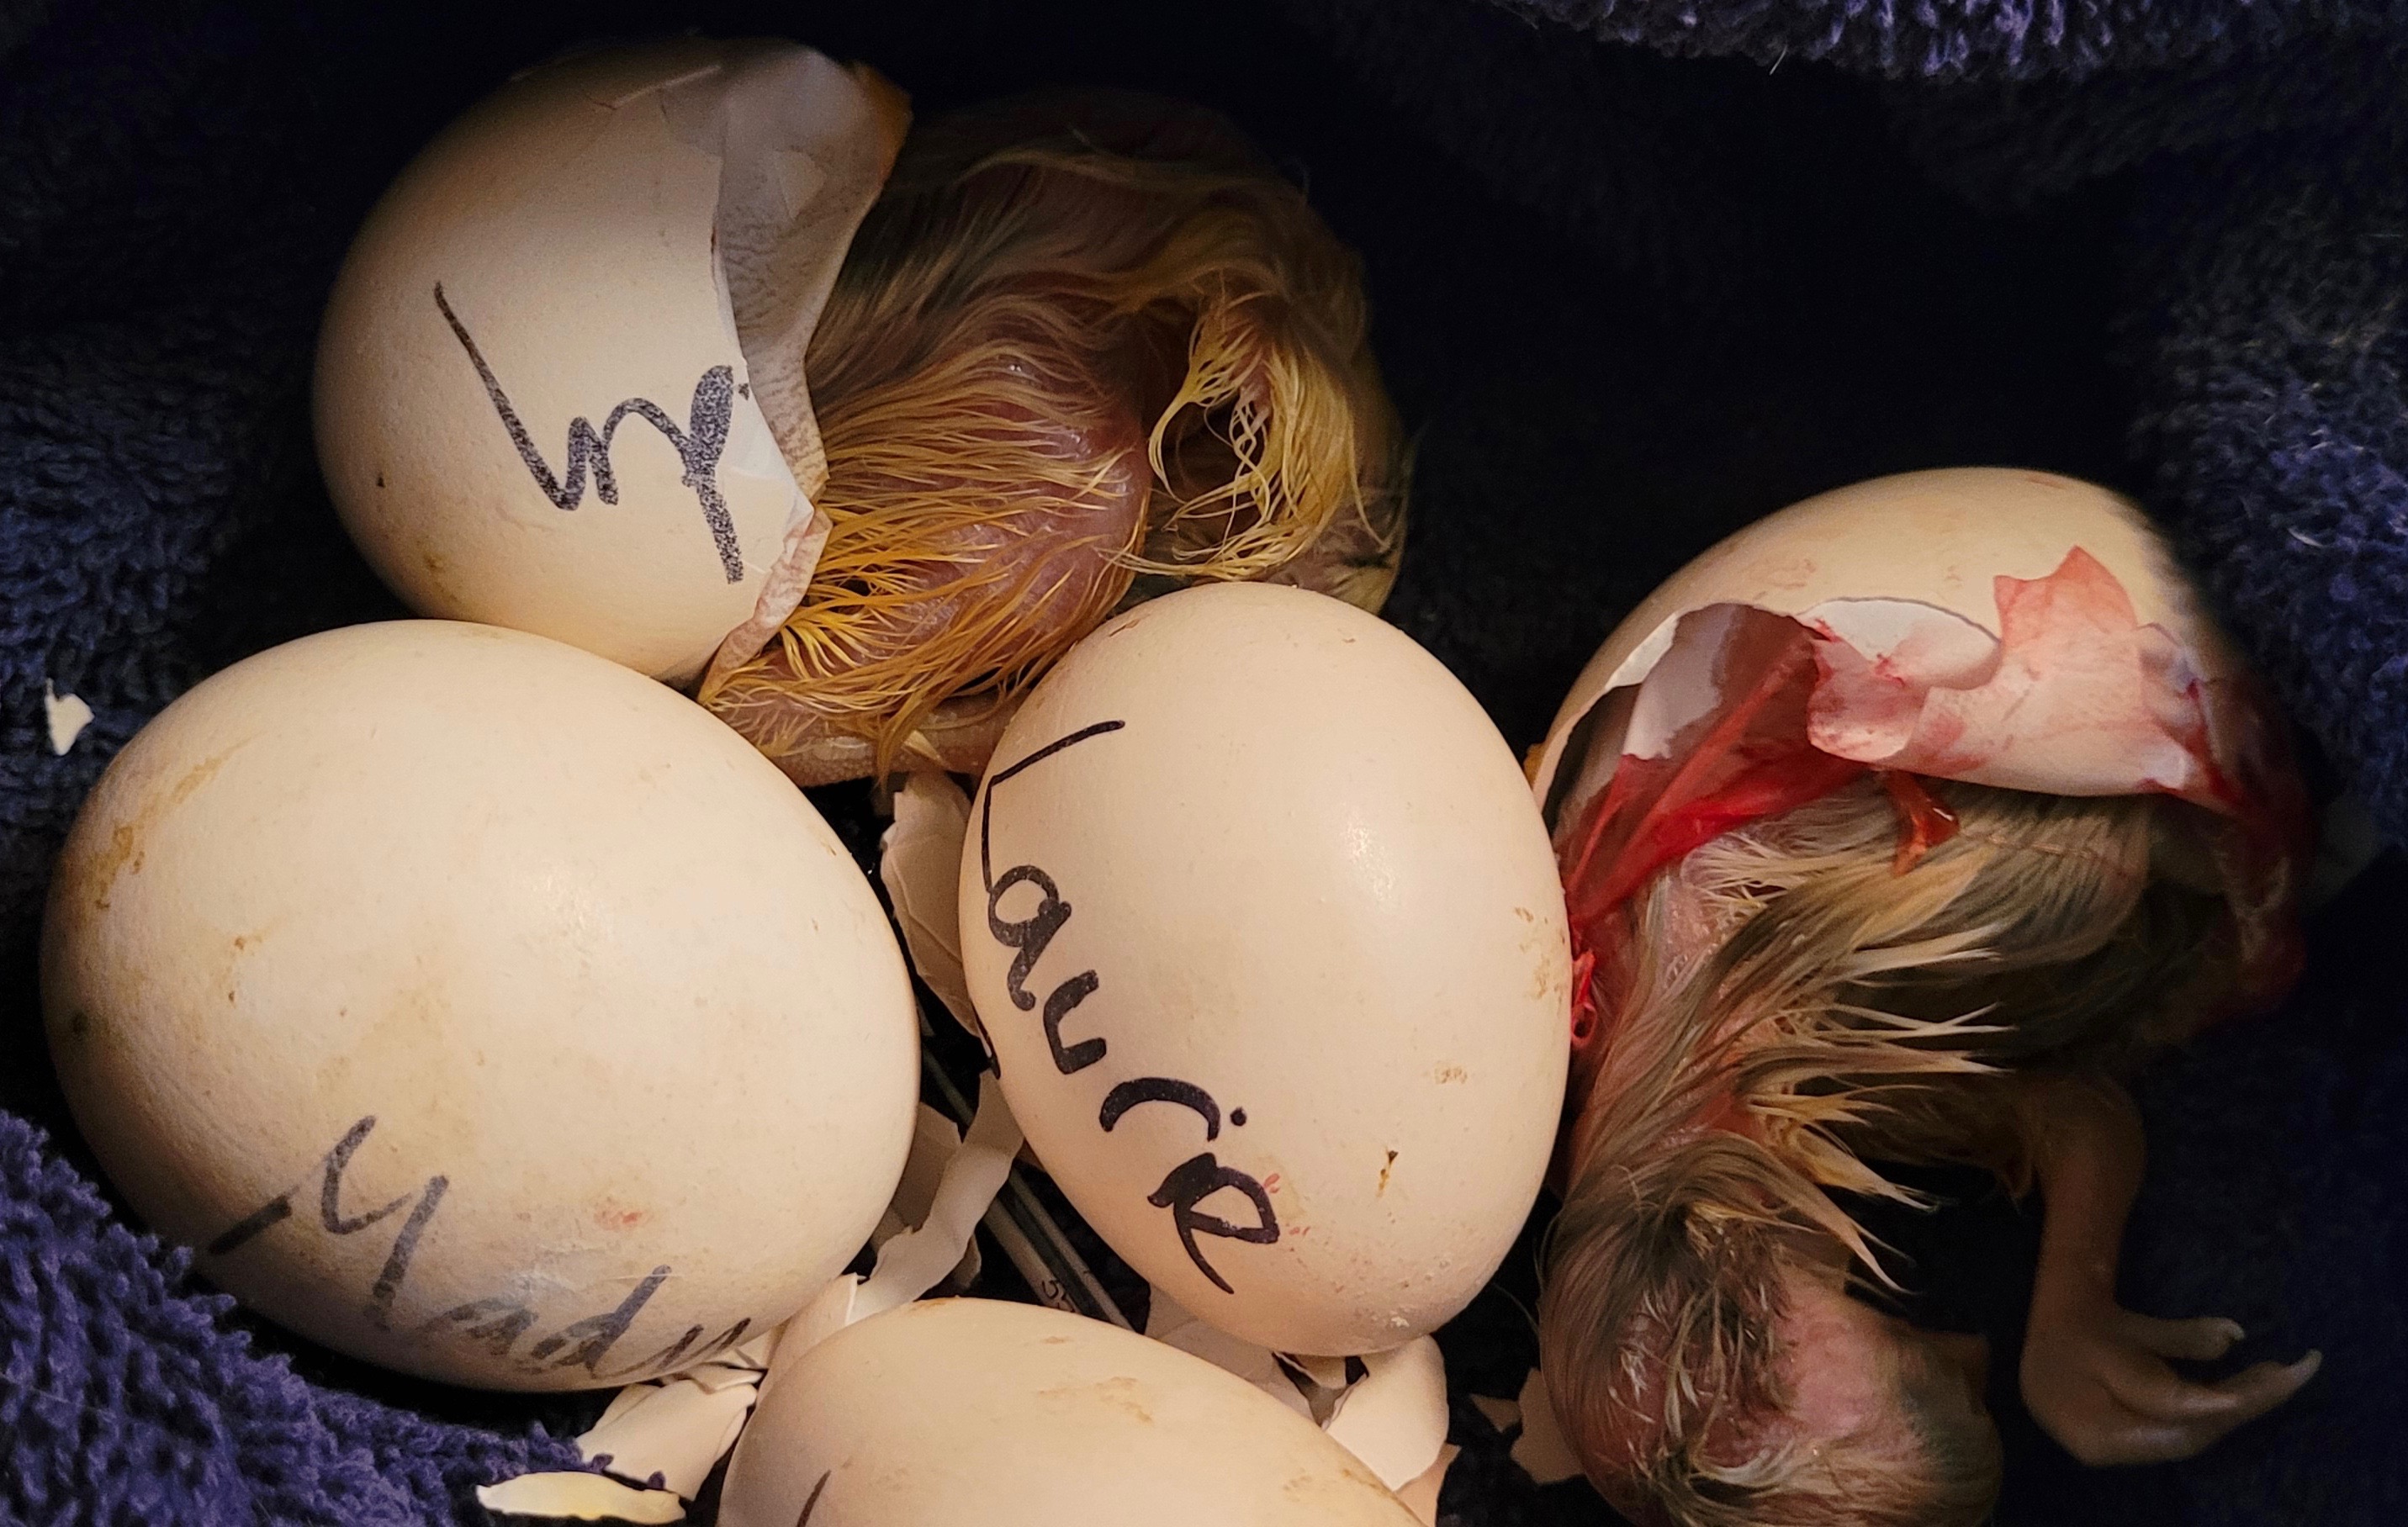
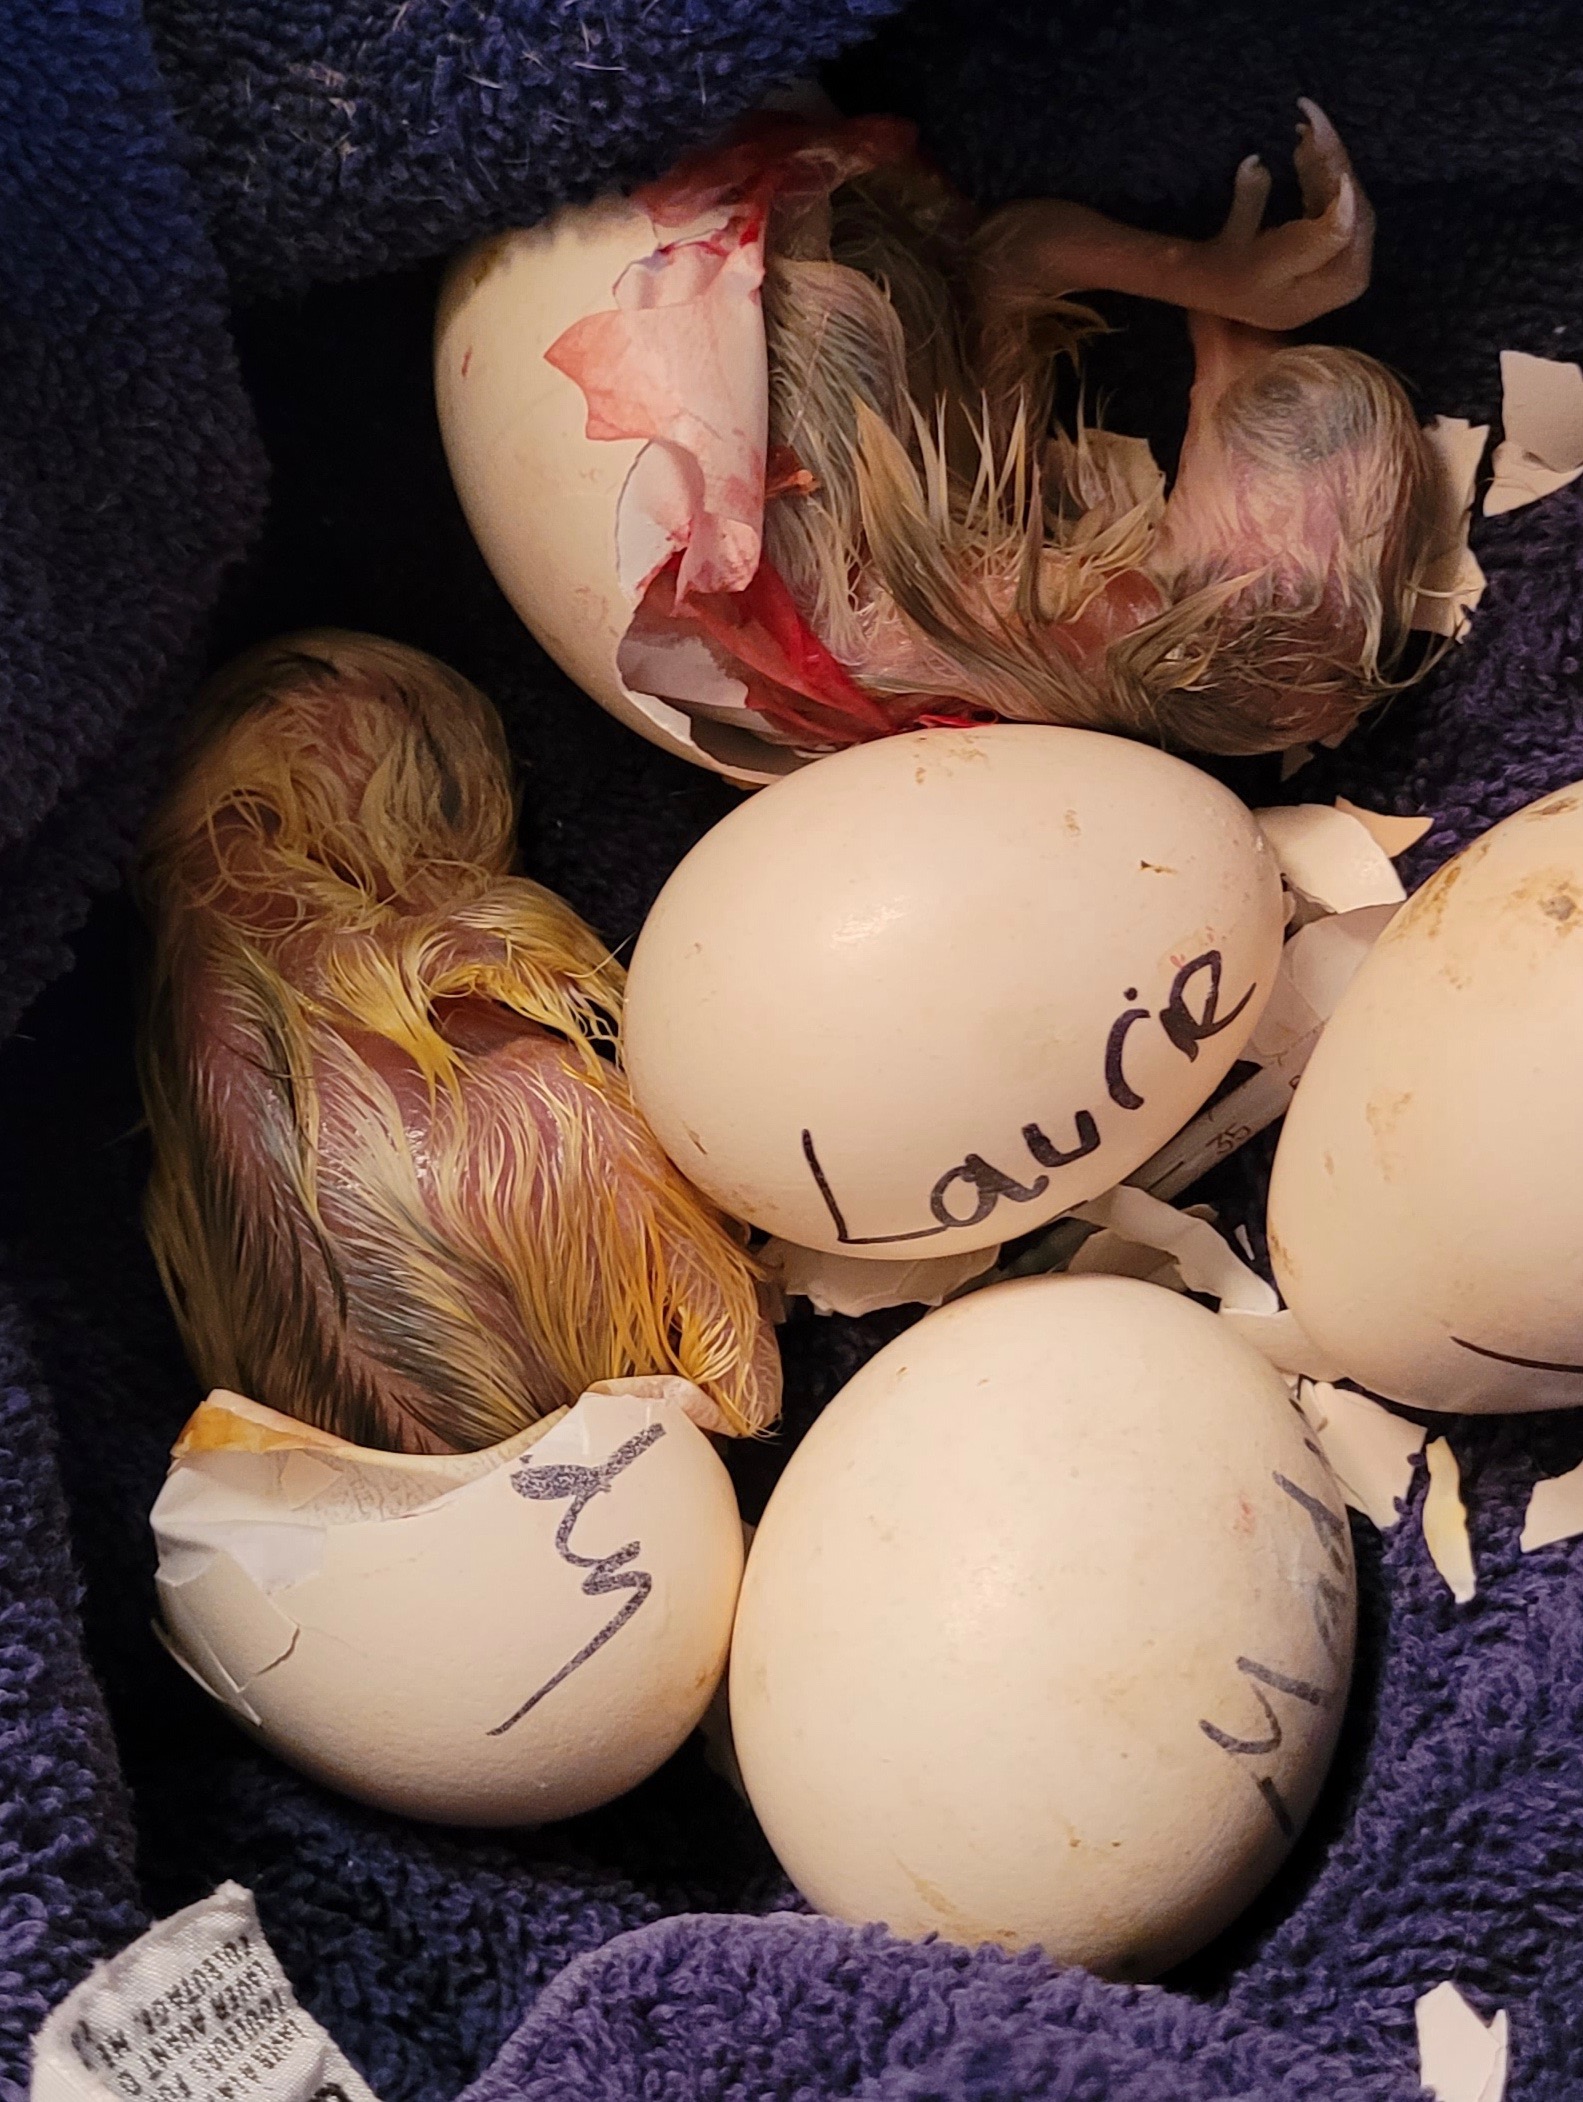
Day 21: Hatch day and only one of T&E’s eggs hatched. I wasn’t too concerned as several of my hatches this year were late and with eggs from three different sources, surely something would be viable. The following day two more of their eggs and one of Laurie’s hatched.
Day 23: Laurie’s blue egg hatched. By 10am One Spot had gotten off the nest with five chicks and left the remaining eggs in the nest box. I candled as well as tapped them with my fingertip, which can stimulate them to peep. I removed two clearly undeveloped duds (one T&E, one L) and slid the six other eggs back under her.
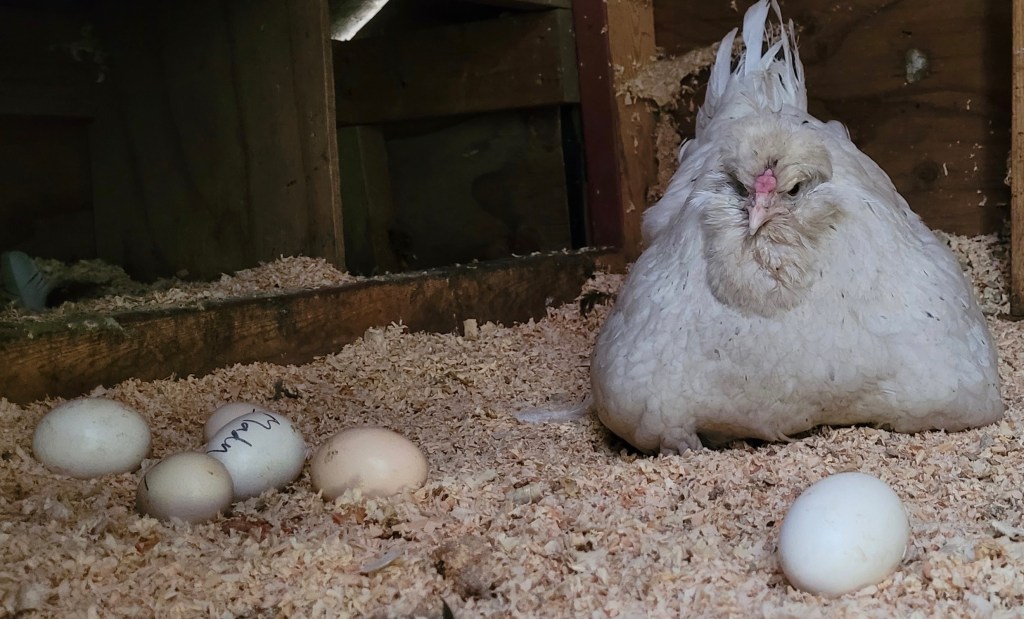
Ninety minutes later, she was off the eggs again. One Mady and one T&E were peeping. Another was pipping (breaking out of the shell). There was no response from the others, but I put them all back under One Spot while I came up with plan B.
12:15pm I set up a makeshift incubator using a heating pad inside a plastic tote. The thermometer indicated the temperature at floor level as @100F. One T&E pipped and the two that were peeping.

Lesson #5: To Assist Or Not?
I discovered that the heating pad had a safety feature so it shut off automatically after an hour or so. Clearly this would be a short-term strategy, as I didn’t have an incubator to put them in overnight. I set up my laptop beside the tote and googled ‘hens talking to their chicks’ videos and played them for a couple of hours. Hens cluck to their chicks in the egg encouraging them to hatch so I figured any kind of cheerleading would be a good thing. It worked as the chicks responded to those calls. (Watch the video here)
I know some folks believe that a hen abandons an egg because she senses something wrong with it. That hasn’t been my experience and, in this case, One Spot left viable chicks because I had staggered putting them under her, resulting in a staggered hatch.


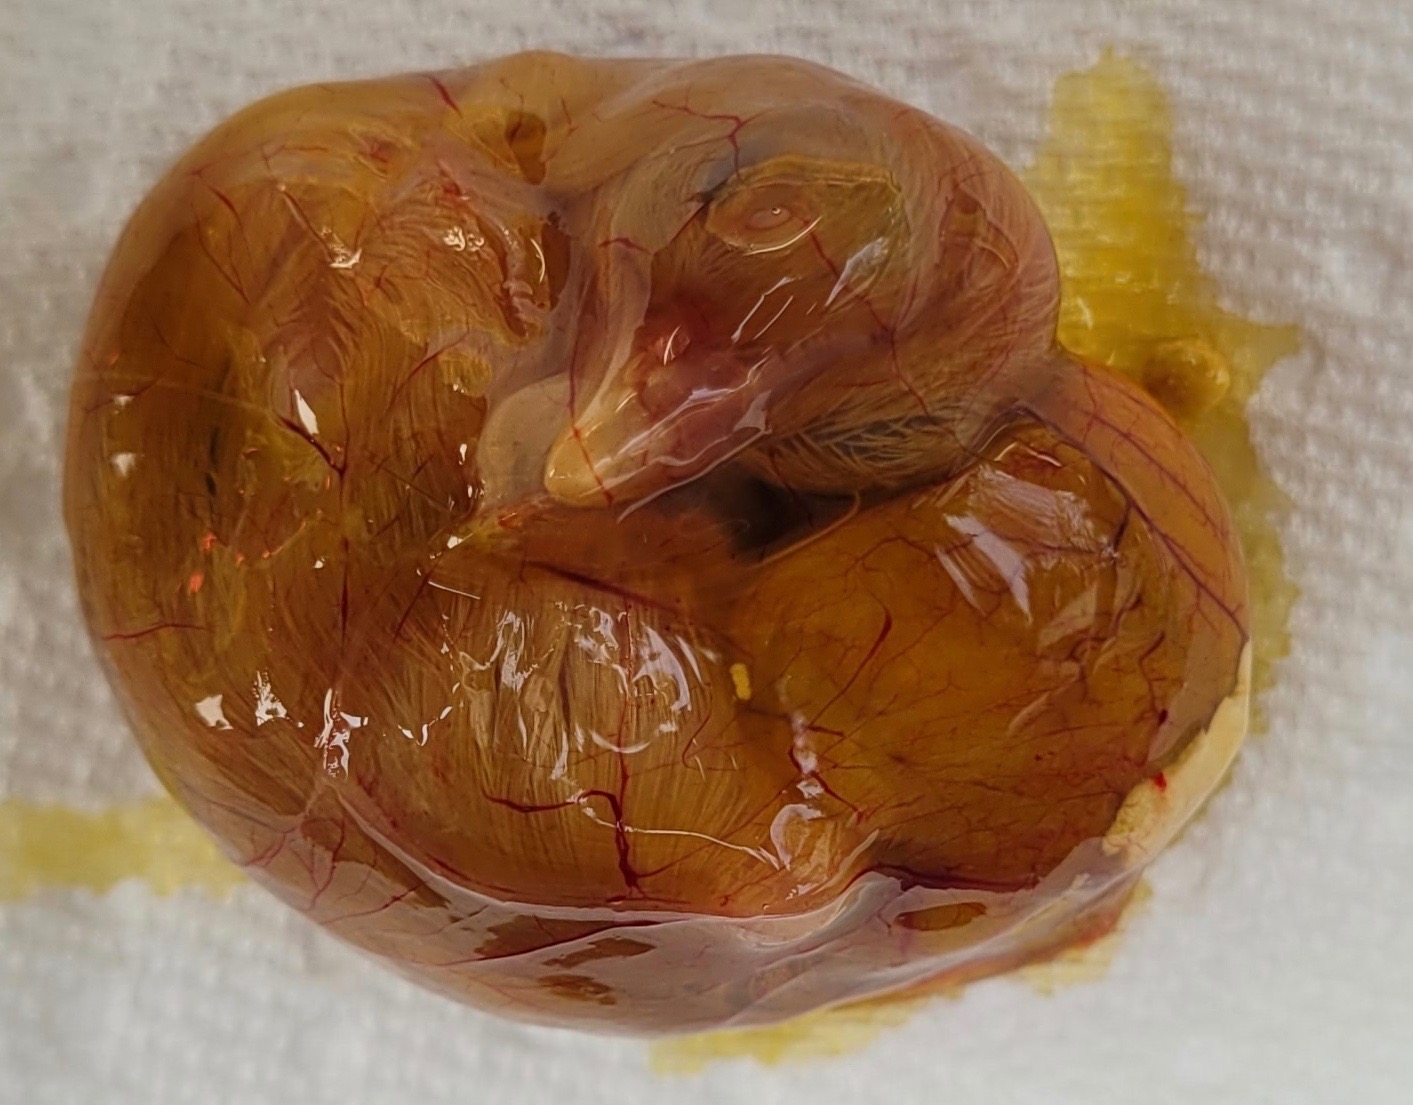
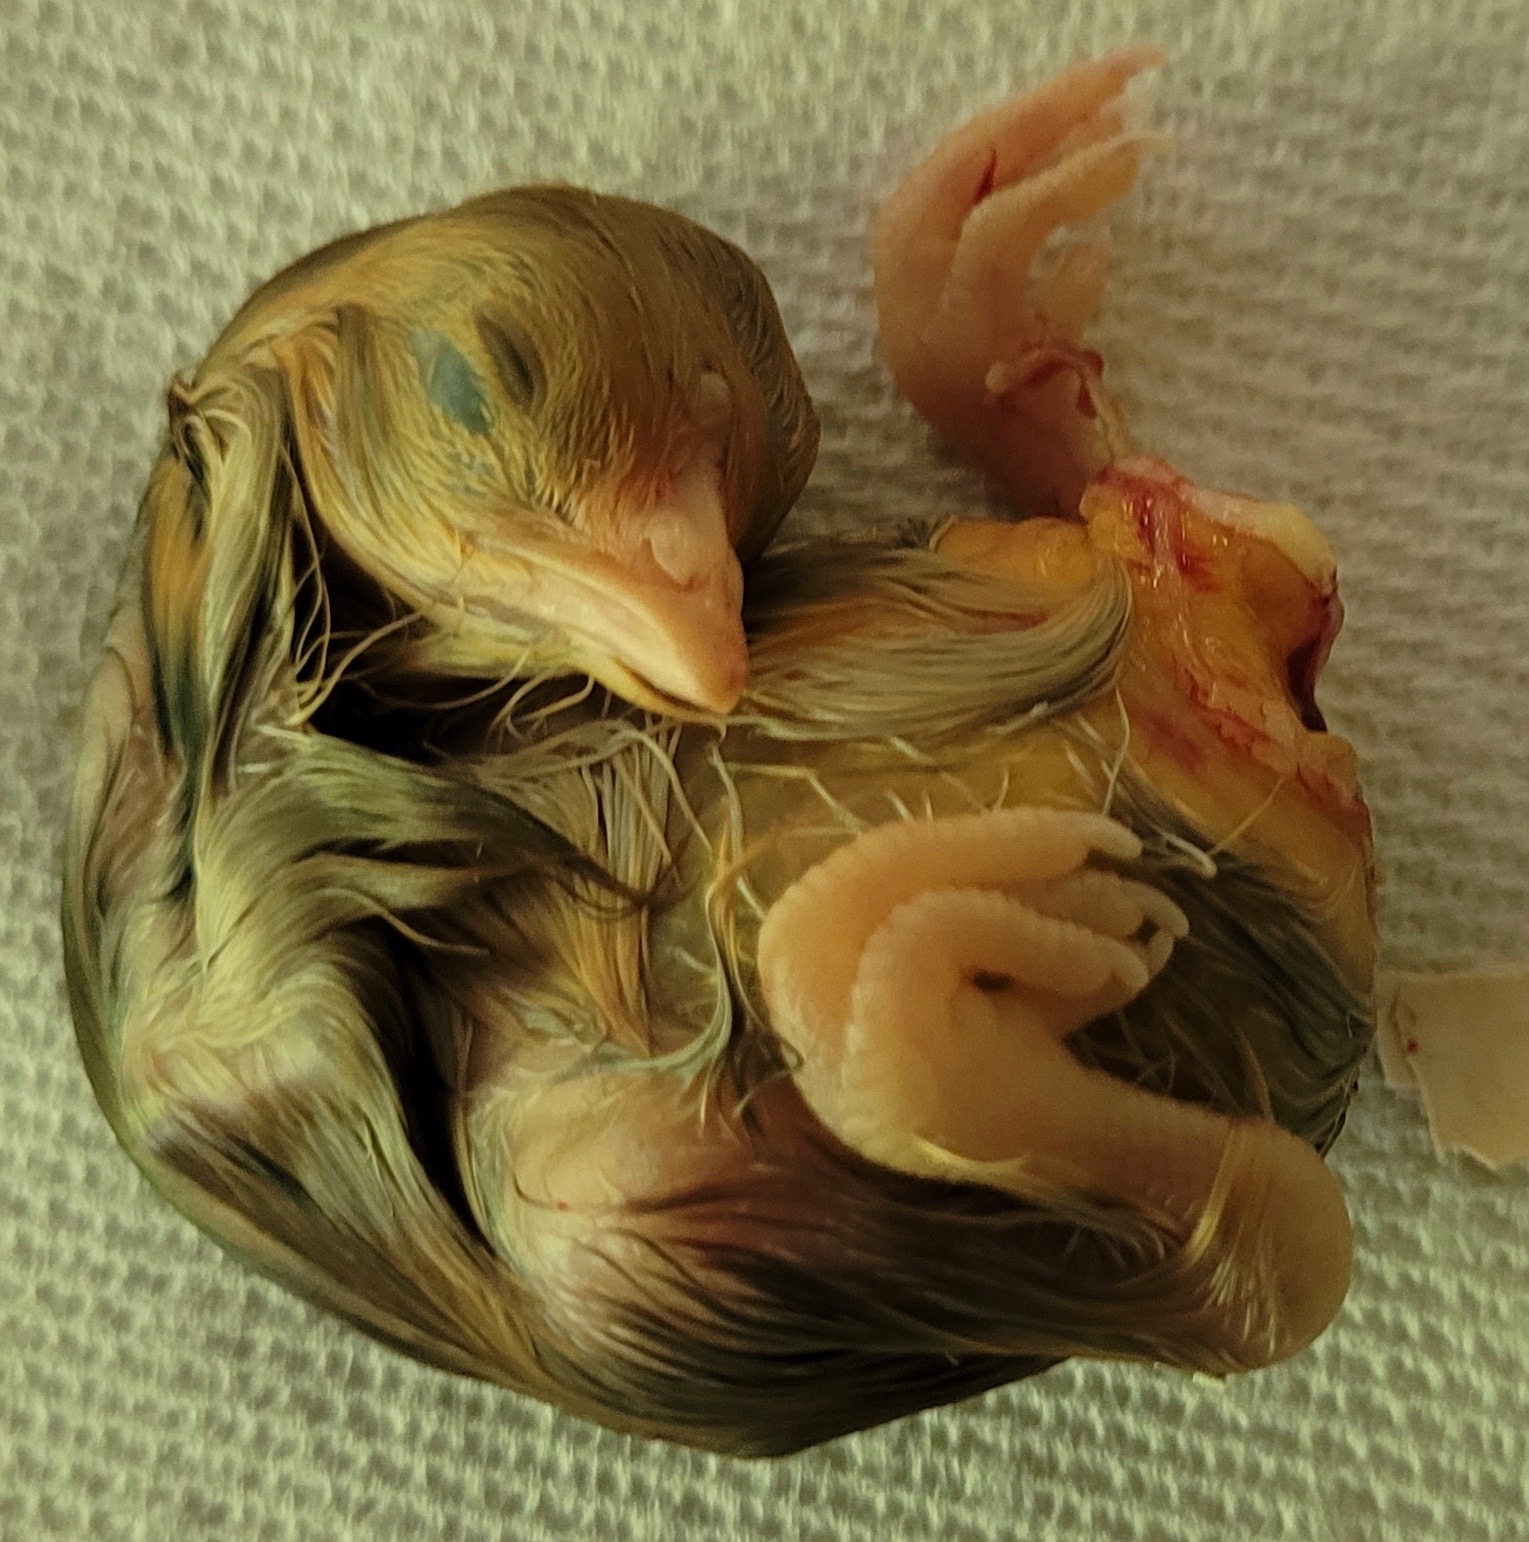
My feeling is it’s better to assist them rather than not. I waited until the chicks had made some progress out of the shell and the white membrane was clear of any veins. Then I slowly picked off the shell giving them a better chance of getting out of the egg. I did that with all three. Two of them had a small unabsorbed yolk sac, which probably meant they could have used a few more hours before they fully hatched. (Watch them hatching here)
Lesson #6: Don’t Push Your Luck
I suspected that the number of eggs I put under her was probably one or two too many which meant that some didn’t get consistently incubated, slowing their development. The ideal number is up to twelve eggs the size the hen lays. So a bantam hen might be able to accommodate six standard eggs while a standard hen could handle well over a dozen bantam eggs. In this case, of the thirteen One Spot was sitting on eight were on the large size, larger than she lays, while only five were her size.
7pm The T&E chick was fluffy and dry so I slipped her back under One Spot.
9pm I put the two other assisted hatch chicks and the three remaining eggs (which appeared to have an embryo, but I couldn’t see any movement) under One Spot for the night so she could keep them warm.
Lesson #6: Don’t Count Your Chicks Before They’ve Hatched
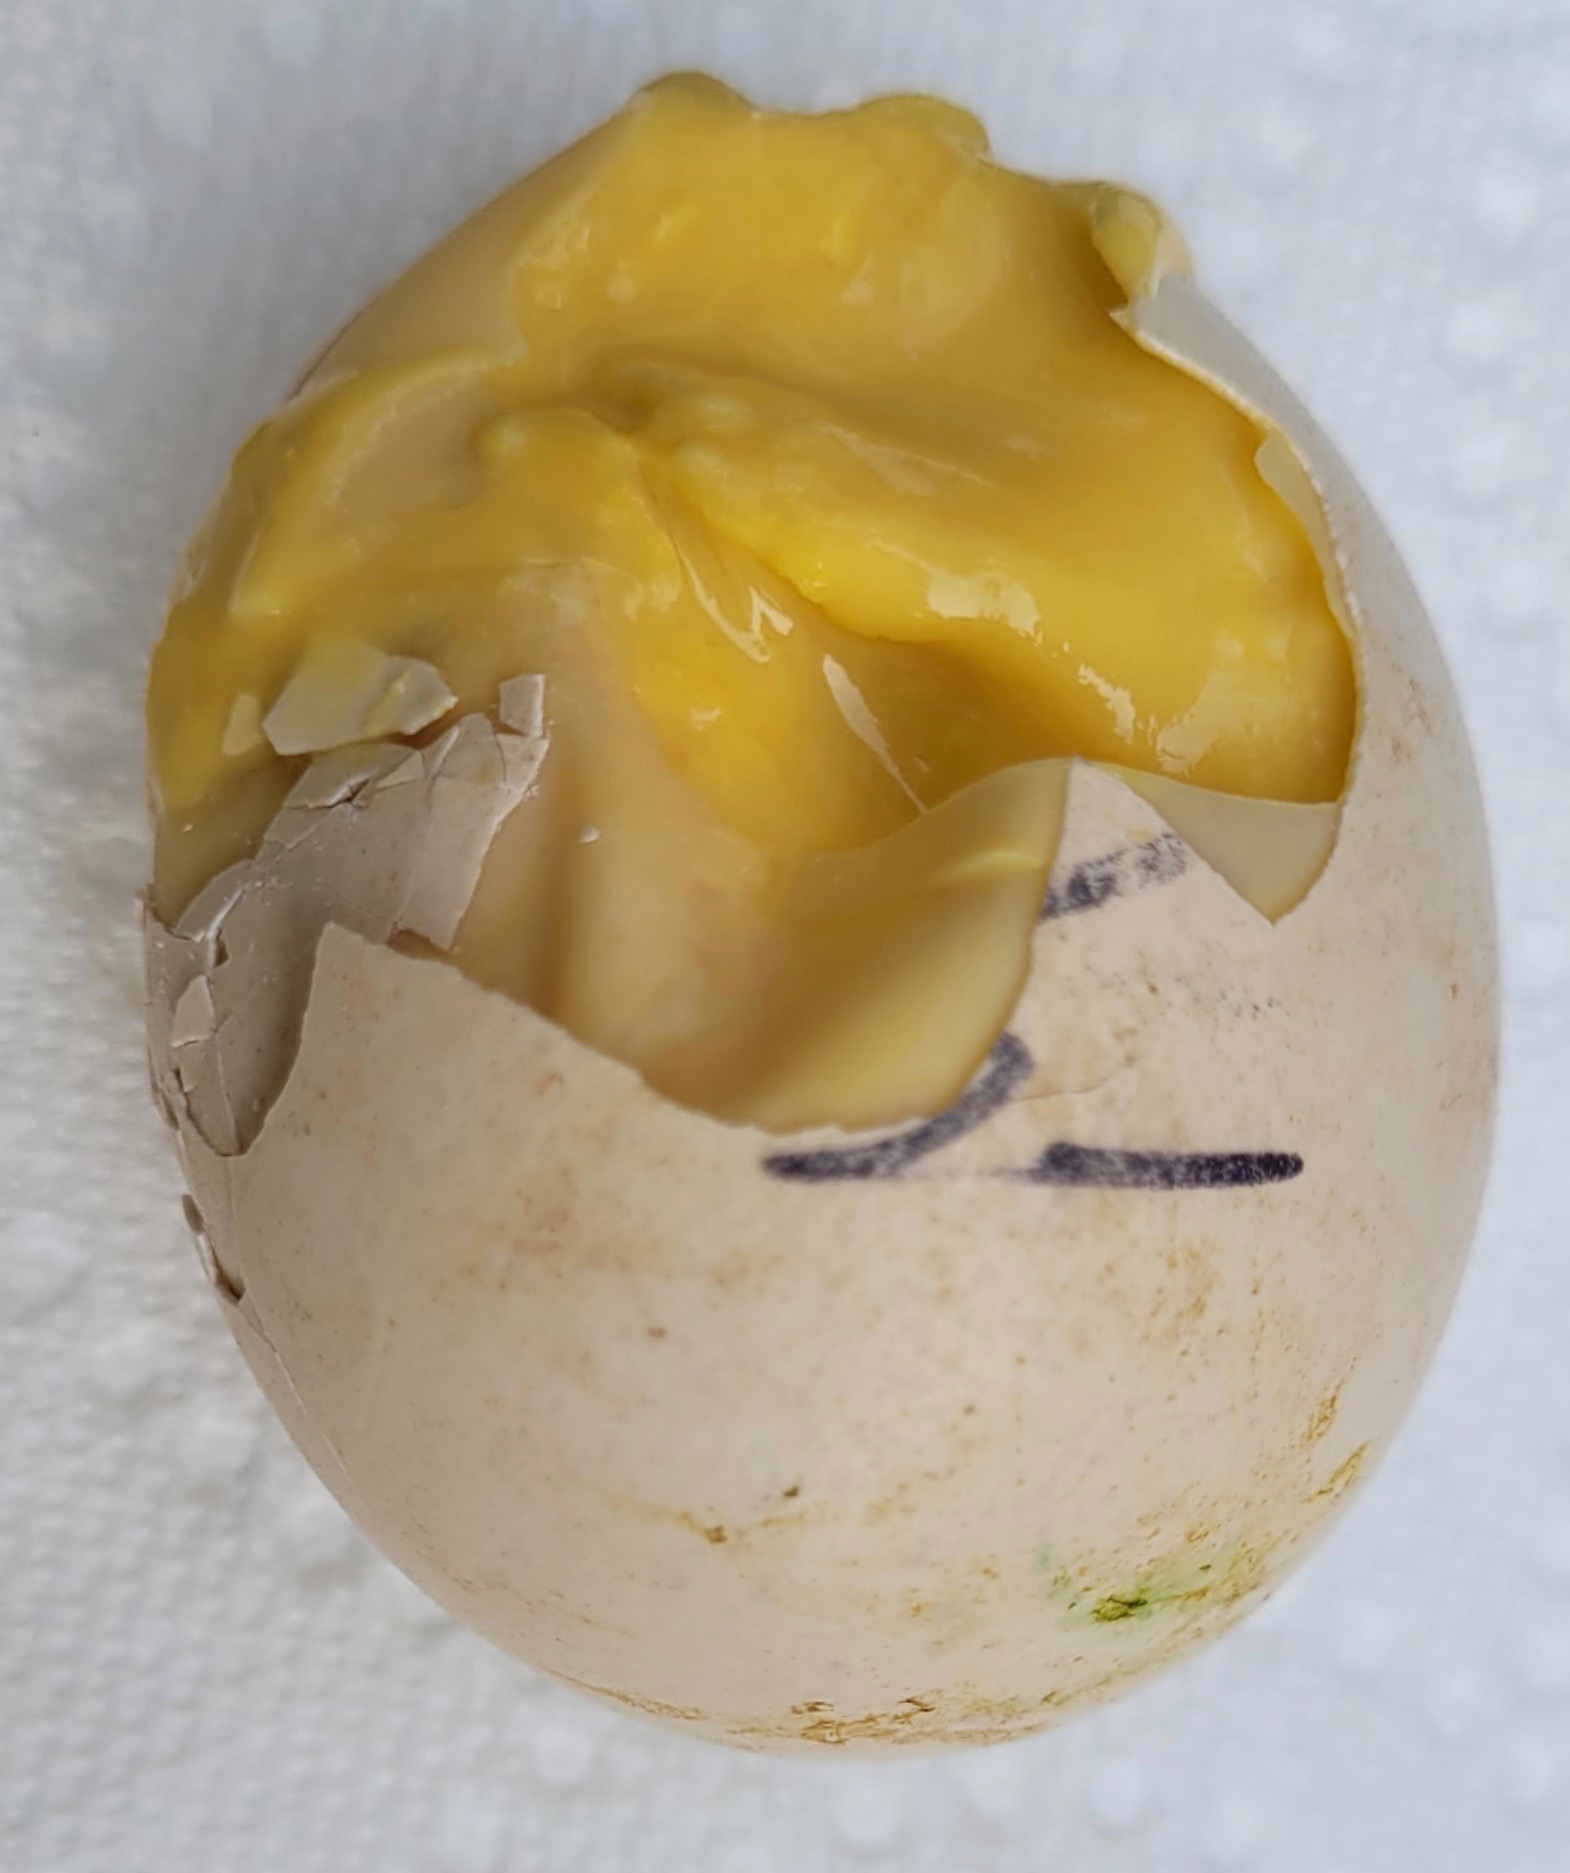
Day 24: One Spot was off the eggs at first light. I put them back in the incubator. I tapped them, but got no response. I candled them and could see veins/dark area but no movement. Usually I leave eggs under a hen – if she’s willing to sit – for at least 24-25 days just in case there is a late hatcher. In this case, One Spot was not interested and I felt sure that there weren’t viable chicks in them. I always do an eggtopsy (cracking them open) just to see what might have gone wrong. In this case, I wish I hadn’t.
Mady’s egg was unfertilized and filled with what appeared to be a disgusting smelling cooked egg. I’ve never seen anything like it and wondered if that was the result of being on the heating pad. One of Laurie’s egg from day 1 was fully formed with an unabsorbed yolk sac and had died a day or so before expected hatch. I was horrified to discover that Laurie’s last embryo was still alive! The chick survived for only a few minutes, it’s lungs not developed enough to sustain it. The unabsorbed yolk sac indicated it probably needed another @24-36 more hours before it would have been ready to hatch.

Lesson #7: If You Intervene Be Prepared For What Comes Your Way
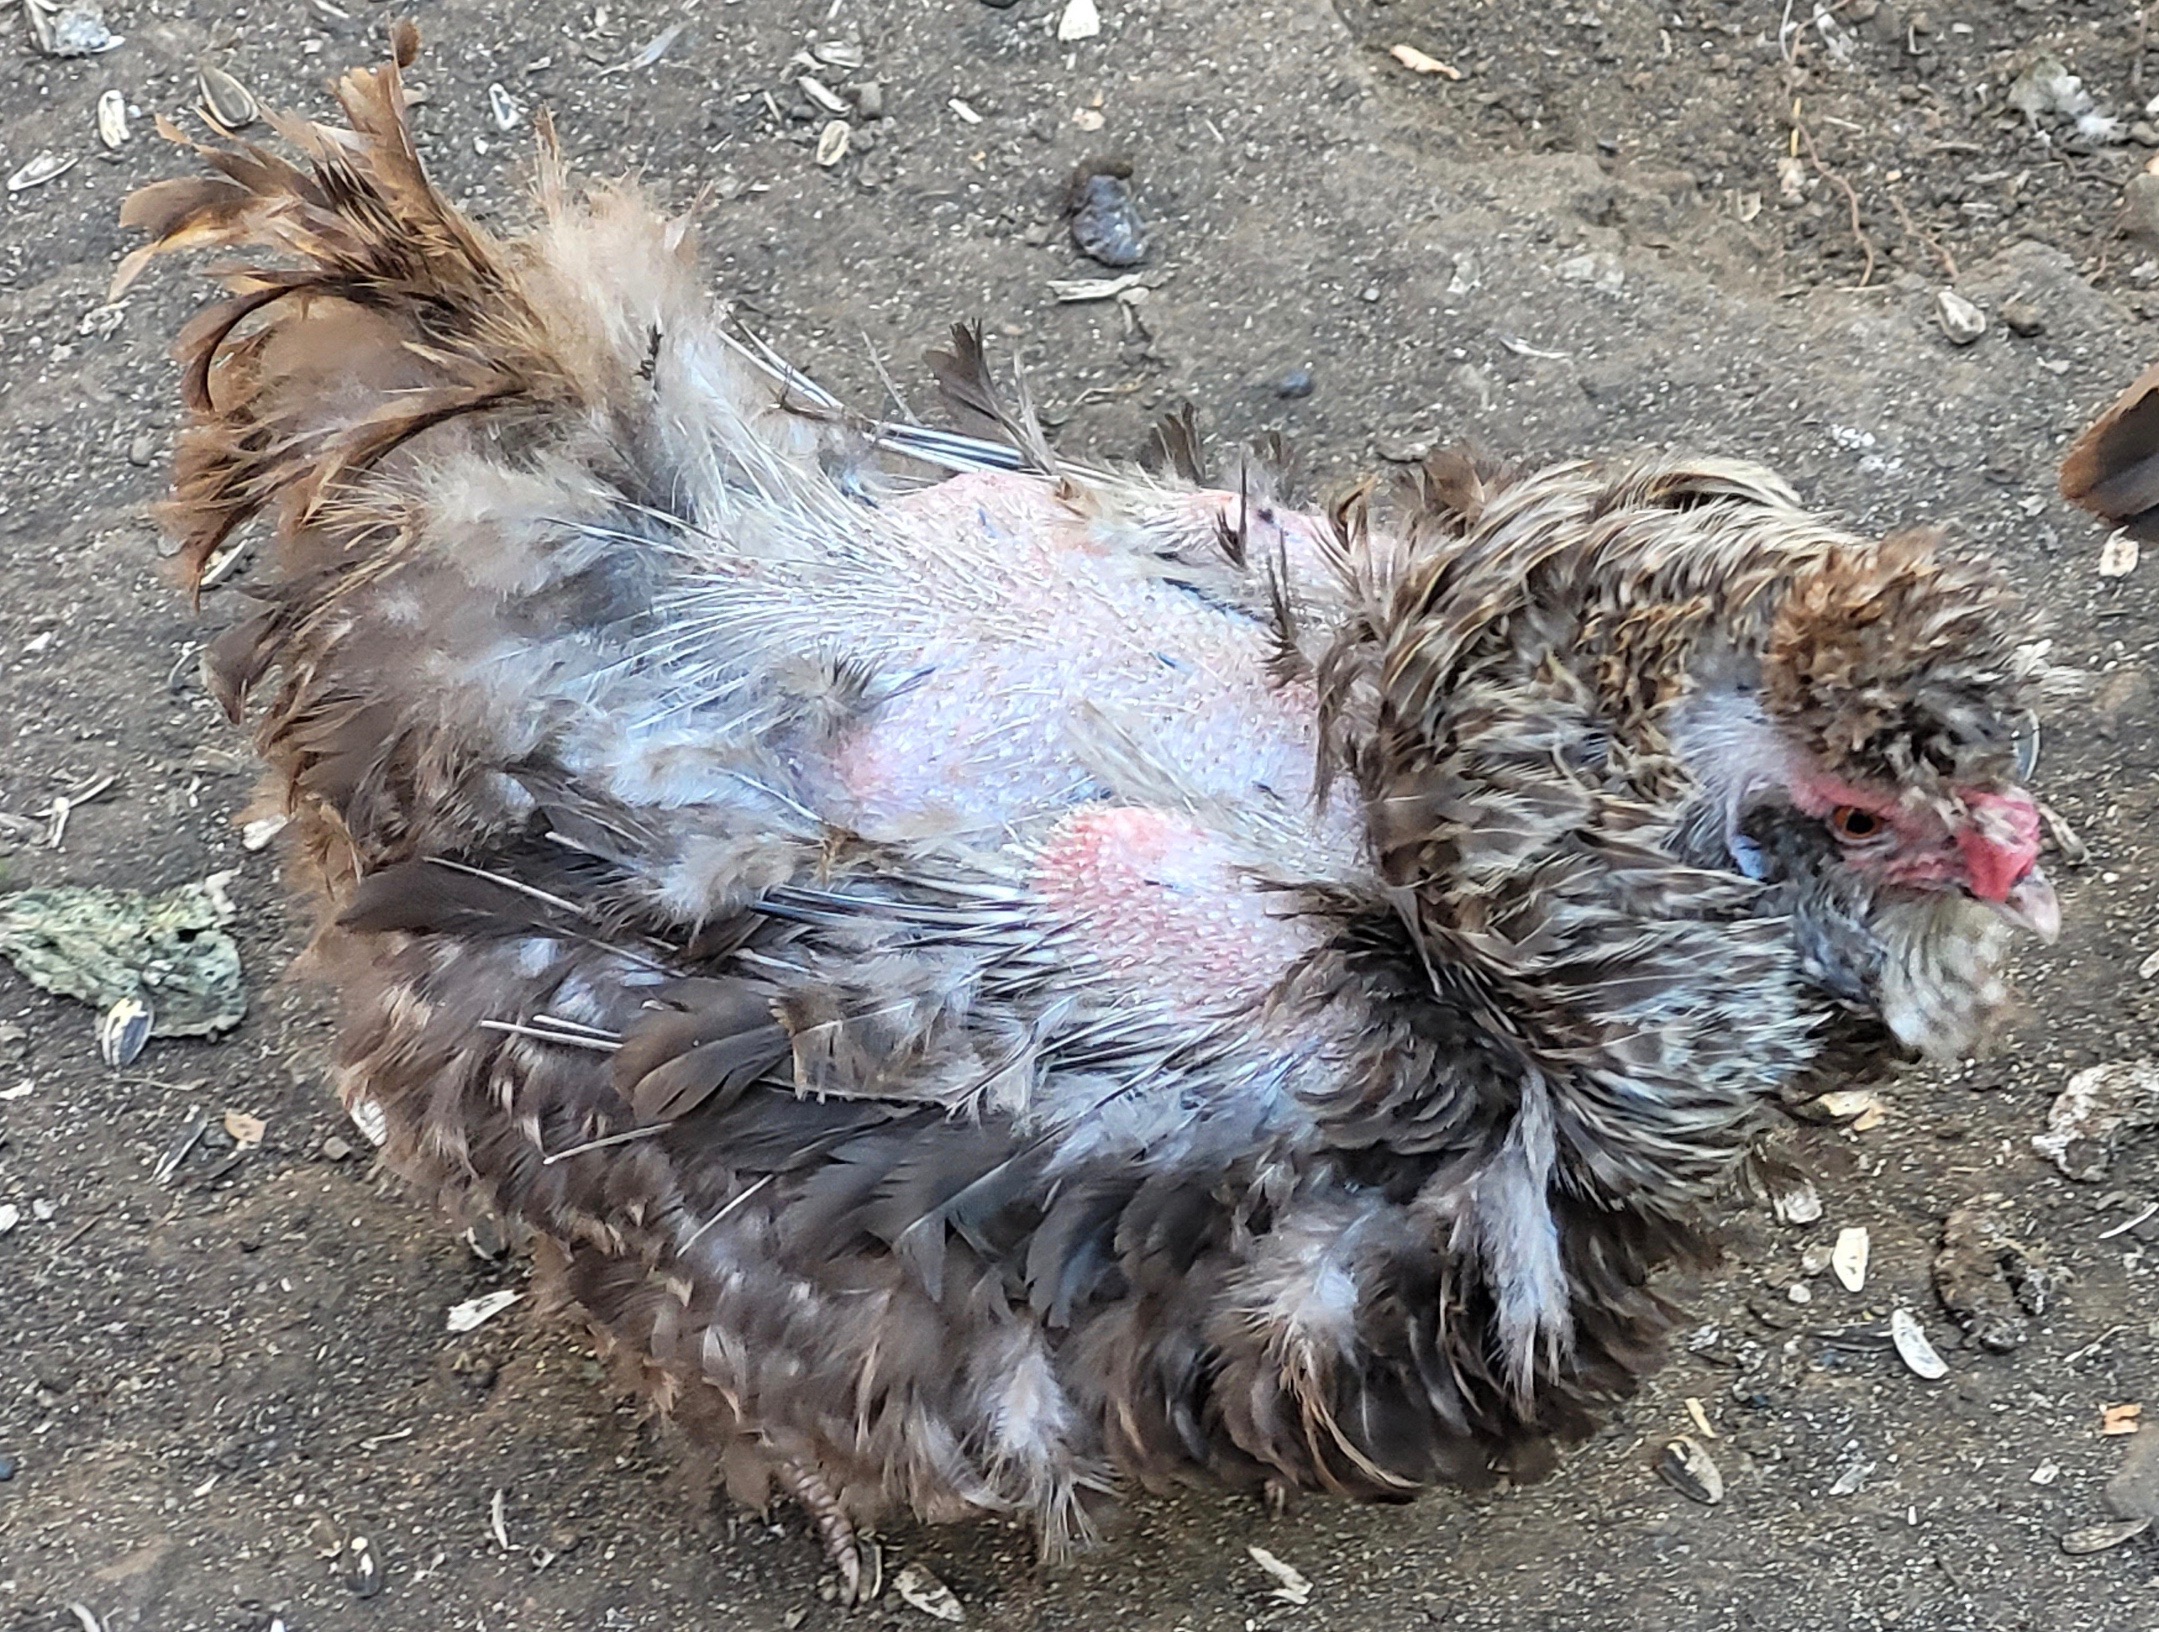
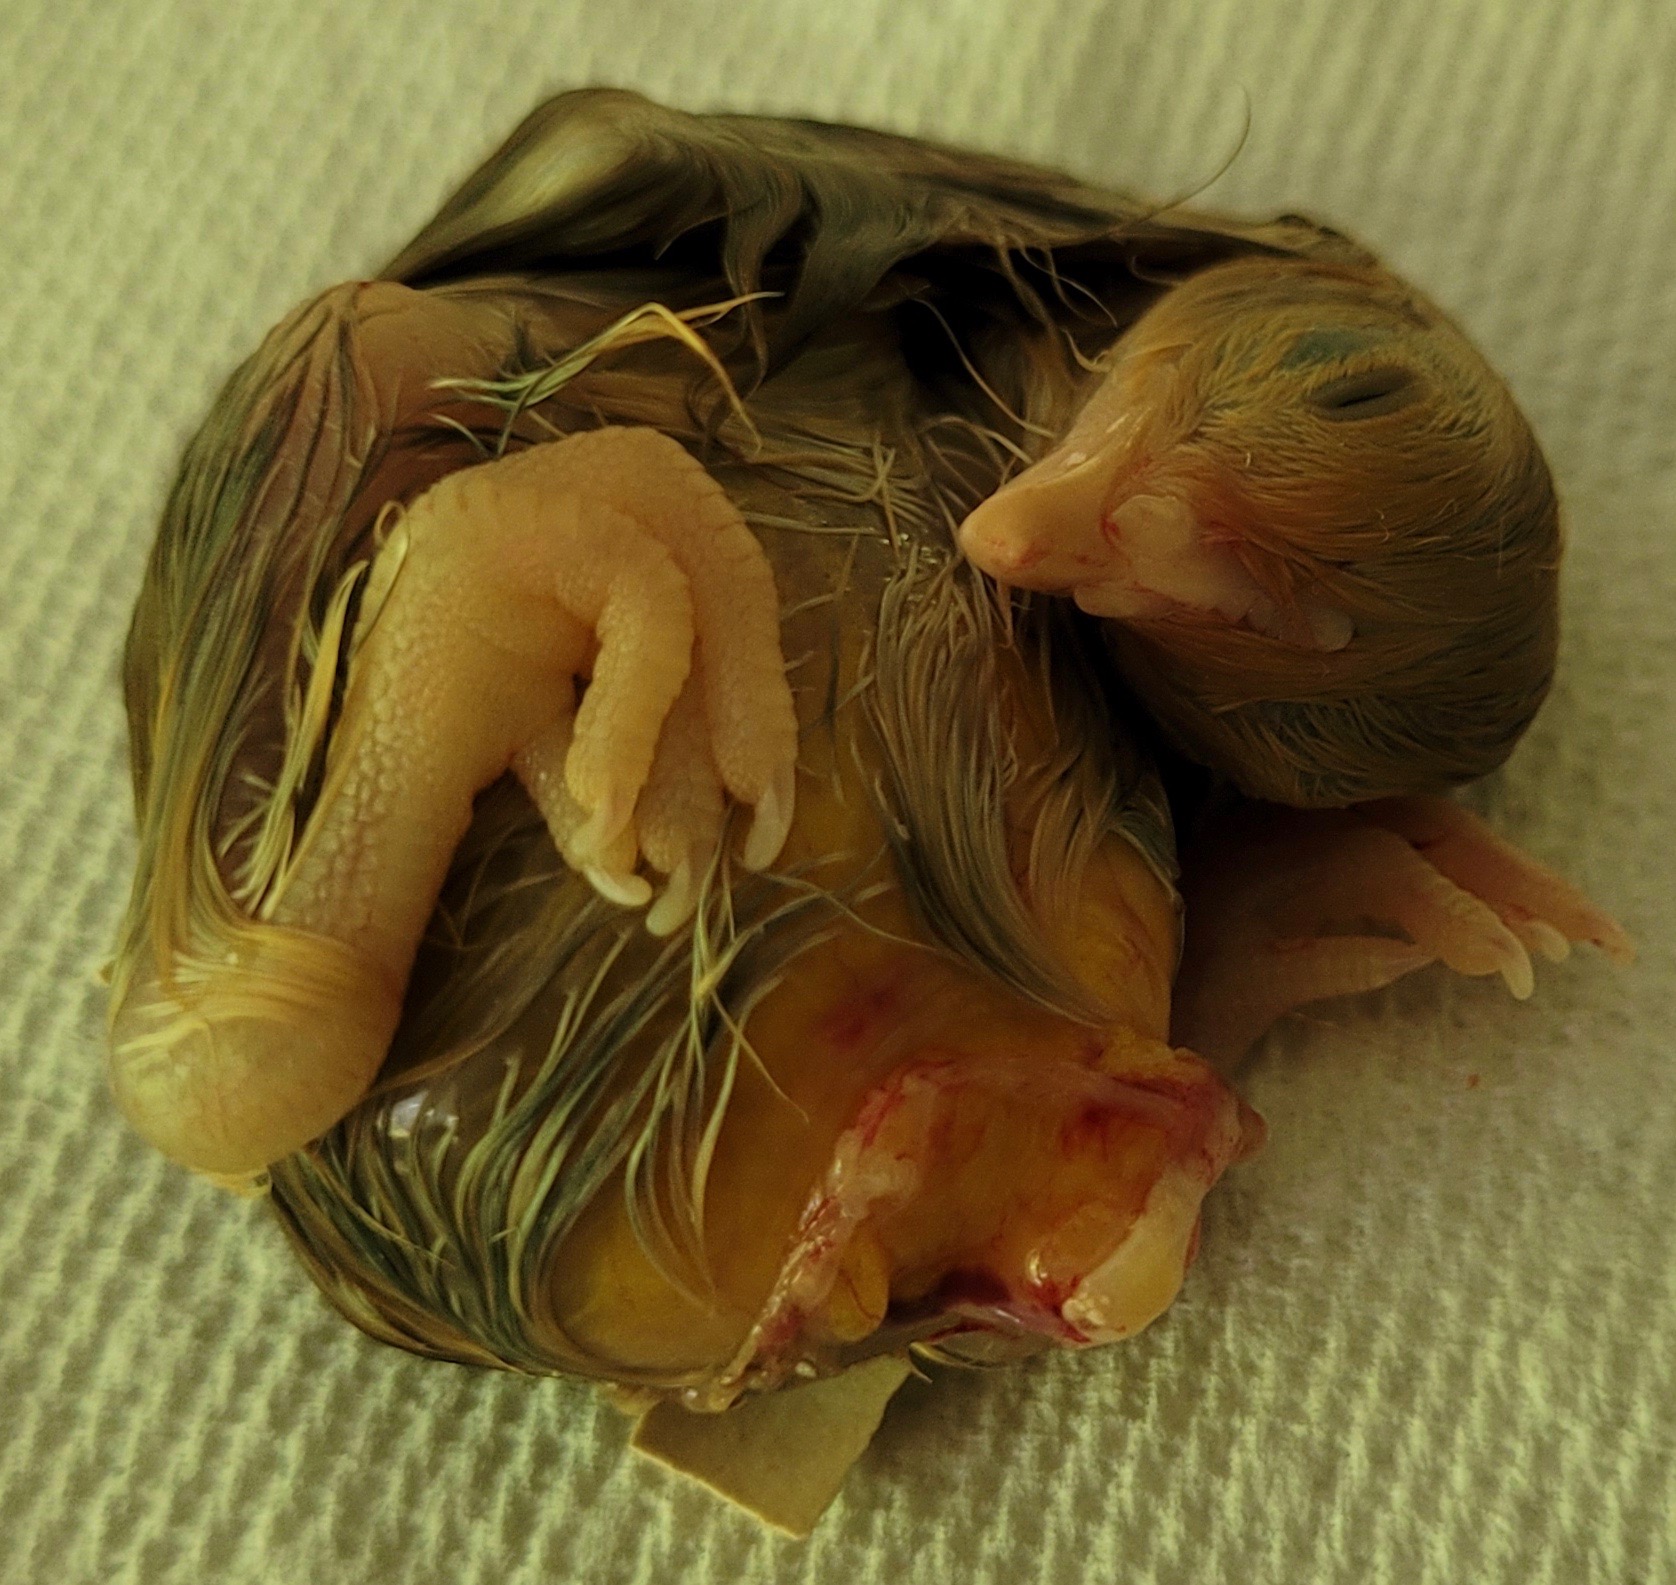
Of the three assisted chicks one was a very large robust chick. One appeared to be doing well but died overnight when it was 2½ days old. It still had a very small yolk sac at its navel and I wonder if this was an entry point for a bacterial infection. The third had curled toes, which is usually attributed to inconsistent incubation issues. I had dealt with it for the first time earlier in the summer, also affecting an assisted chick. That one was fitted with the makeshift ‘shoes’ I made to straighten her toes and looked perfect after just 48 hours.


This chick was problematic. My partner and I affixed the shoes with painter’s tape, just like we did with the first one. By morning she managed to get out of them and her toes were still curled. Back on with the shoes and they were off within two hours. We changed the type of binding we used (this time with vetrap) and she had them off by the following morning. I was concerned that she’d end up with deformed feet but my intermittent remedy worked. Having the shoes on for two nights and for part of two days was enough to support her body so she could motor around and allow her feet to grow into a normal position. She was the smallest of the bunch so I could pick her out, but only by her size not because of her feet.

The Tally
In case you have forgotten, here’s what One Spot incubated and the results:
- Thomas & Elizabeth: 5 eggs (3 hatched two days apart; 1 assisted hatch; 1 unfertilized)
- Laurie: 5 eggs (2 hatched and yay, one is a frizzle; 1 unfertilized; 1 late quitter; 1 died at hatch)
- Mady: 3 eggs (2 assisted hatch; 1 unfertilized)


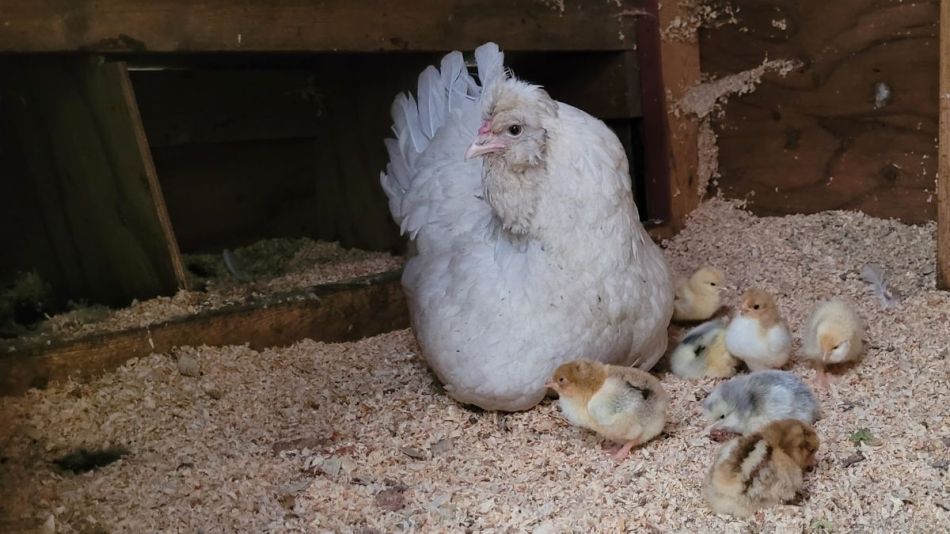
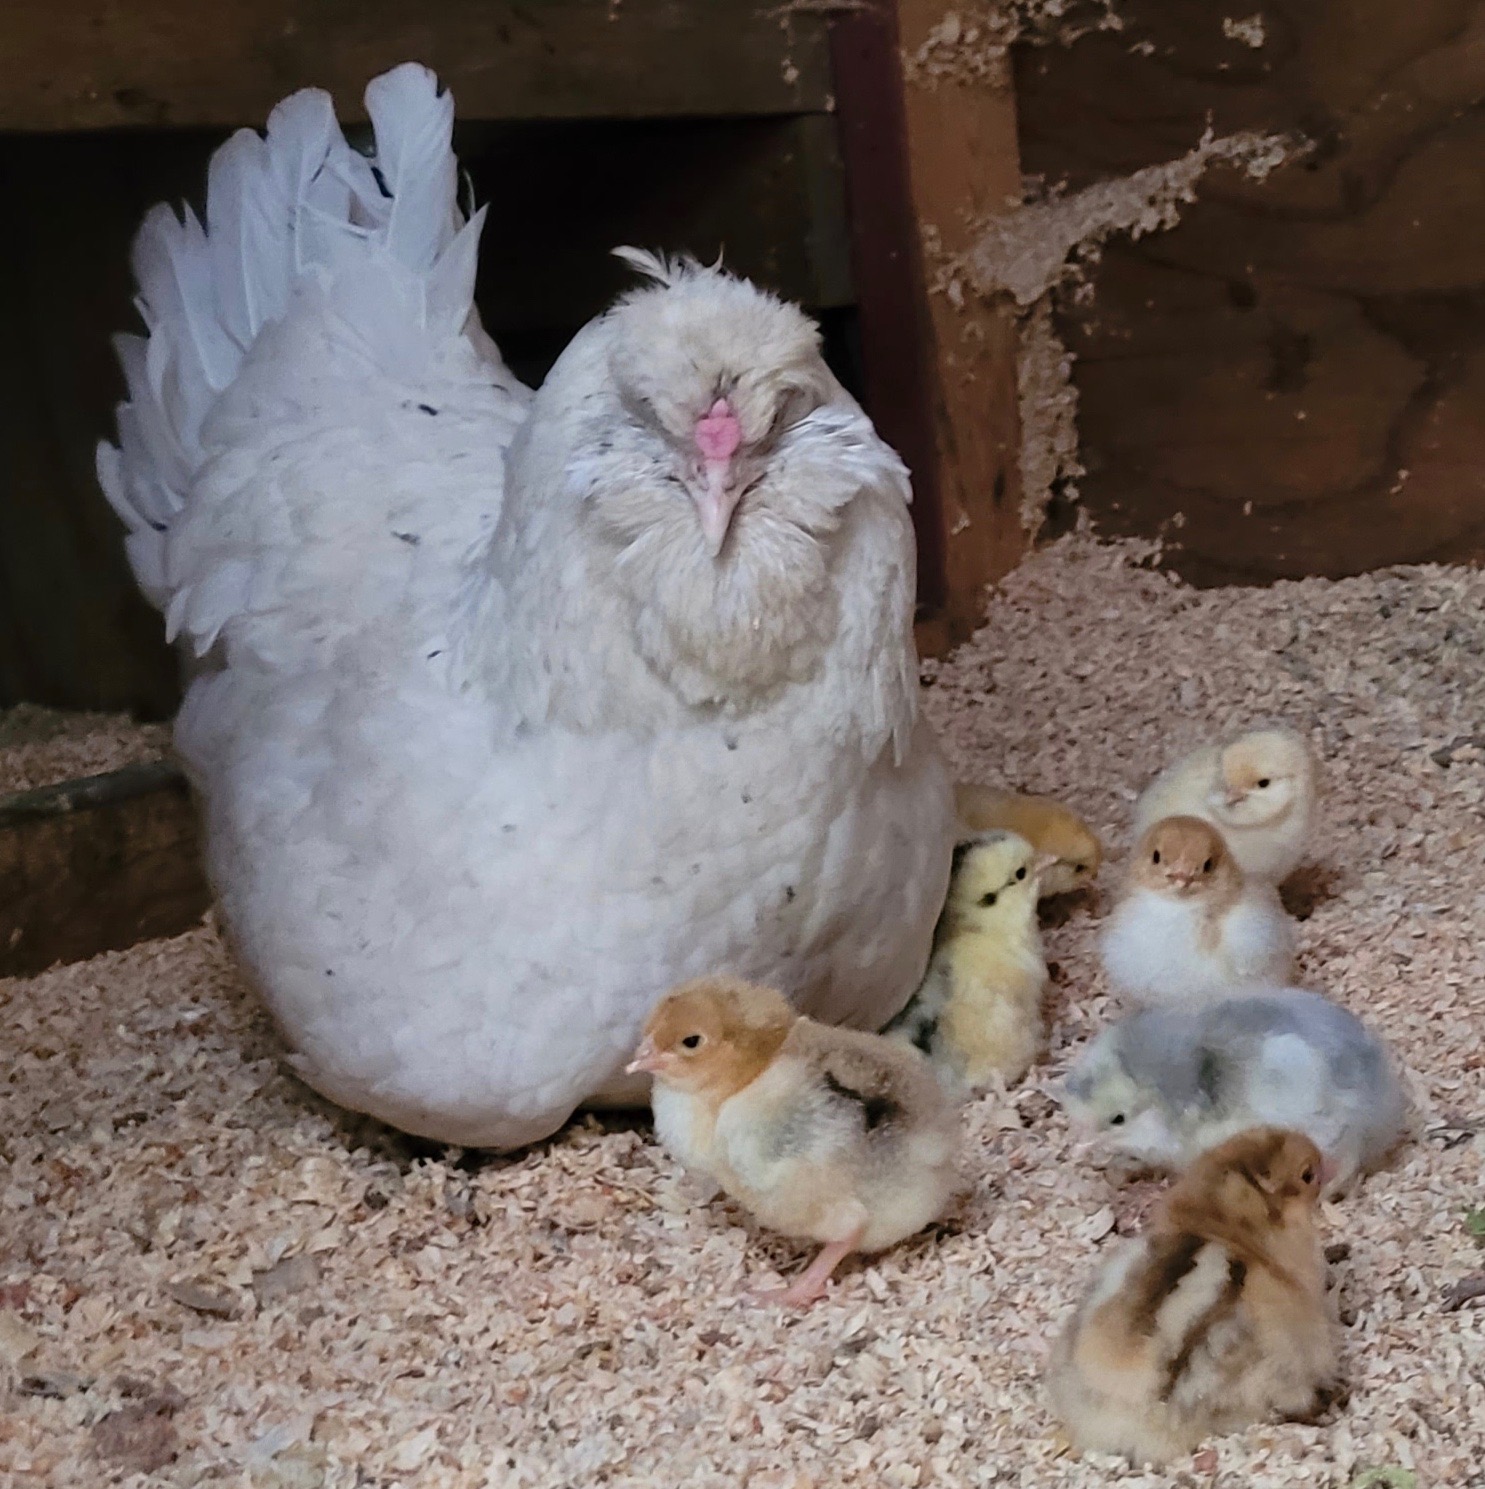
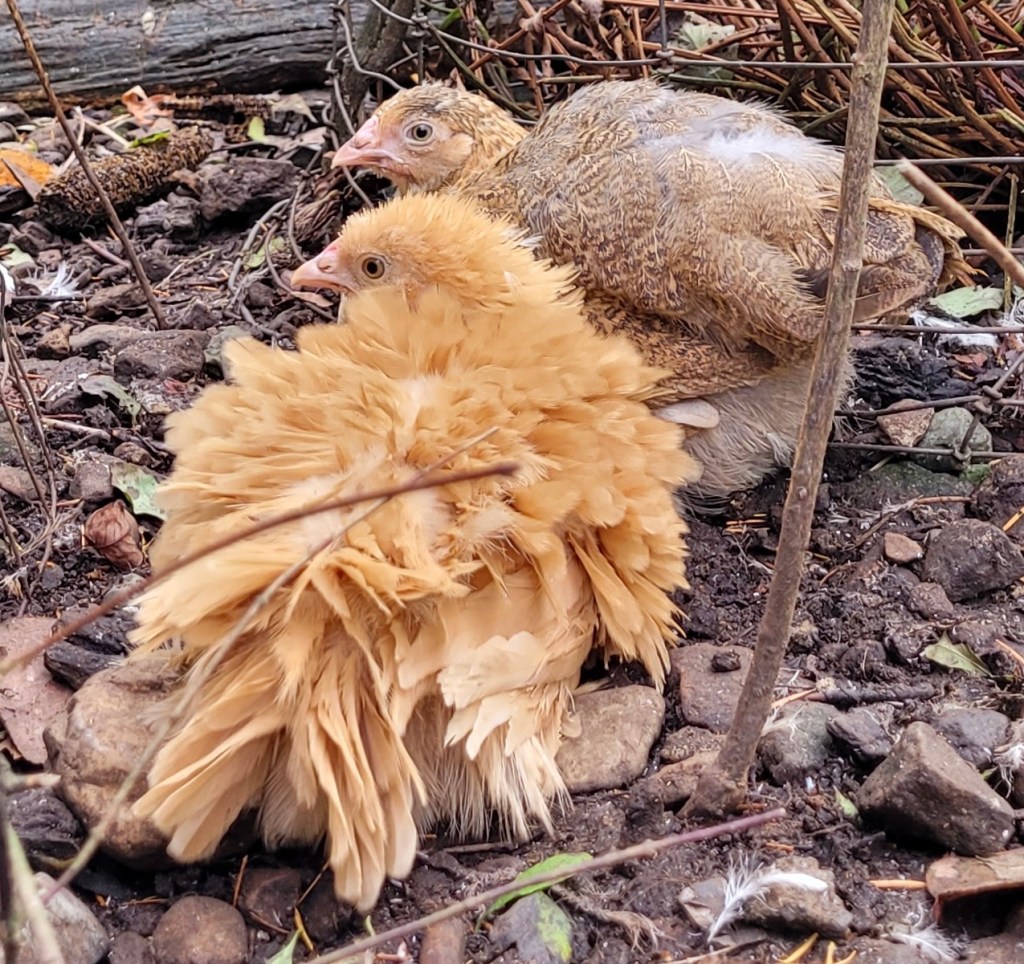
The seven chicks are now nine weeks old and still with One Spot. All are healthy and best of all, the frizzled chick is a pullet! The chick in the back, also a pullet, was the assisted hatch with curled toes.
Thanks to the folks who donated eggs and to My Favourite Chicken and Brinsea for offering me products to test. All photos Bitchin’ Chickens

So glad you got a frizzled Pullet!
LikeLiked by 1 person
I actually got two this year, one from an earlier hatch (egg from my birds).
LikeLike
I’m so happy to see your new babies! Congratulations!
My internet got all messed up. I’mfFinally I’m situated with a new provider. Catching up on all the blog posts now.
Hope y’all are doing well – Alicia
LikeLiked by 1 person
And I’m happy to see you’re back and doing the deep dive reading through my latest posts.
LikeLike